Visual Editor
Overview
The Visual Editor allows you to create, build, edit and execute workflows on the platform.
It is the default workflow layout view that follows and simplifies the structure of the Sequence Editor.

The Visual Editor
Before you begin
Navigate to the Workflows tab and make sure you have permission to interact with integrations.
Procedure to invoke
You can invoke the Visual Editor in one of two ways:
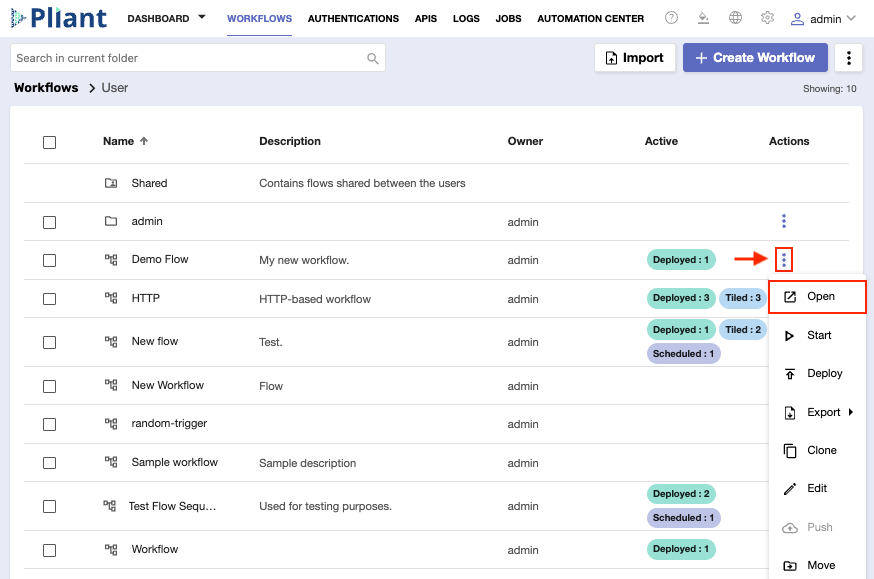
By clicking on an existing workflow’s row.
By opening an existing workflow through the Аctions menu.
In both cases, the workflow must already be of “flow” layout type.
The Workflows tab
Procedure to create
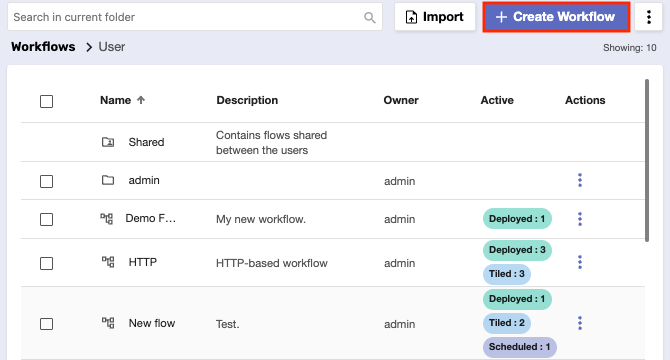
To add a new visual workflow, click the Create Workflow button.
In the window that opens, you need to go through some required fields:

Name the flow, choose the flow layout type, and provide an optional description.
When done, click Create.
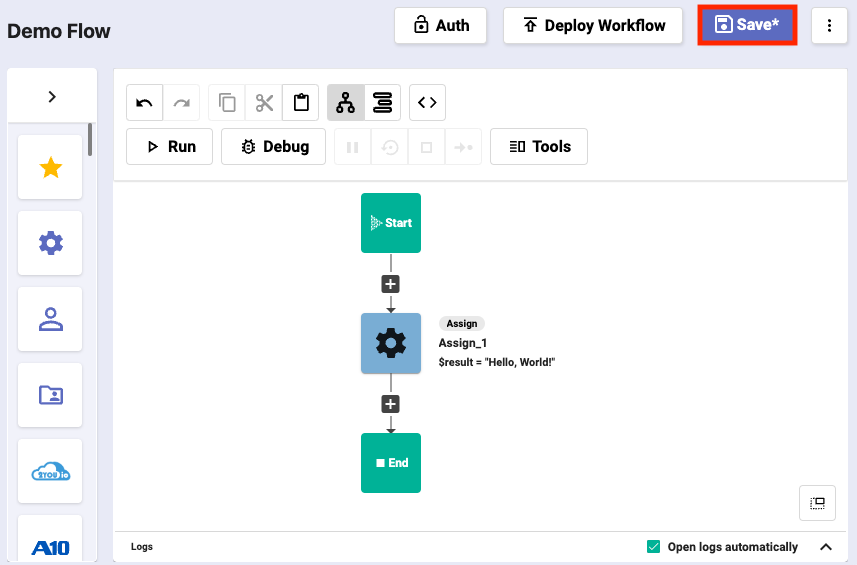
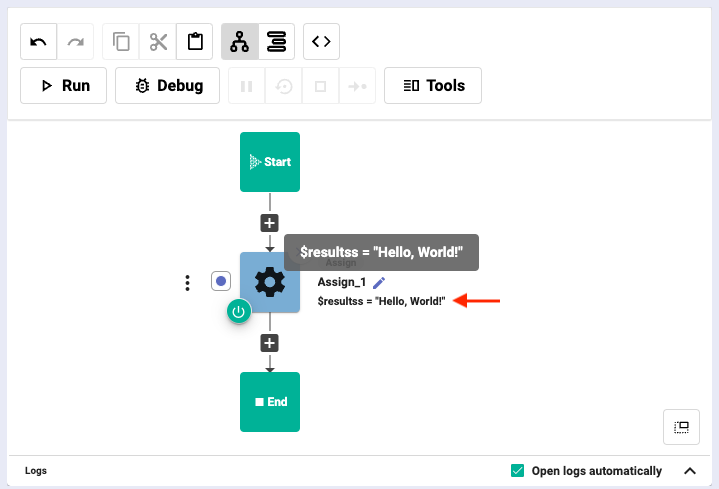
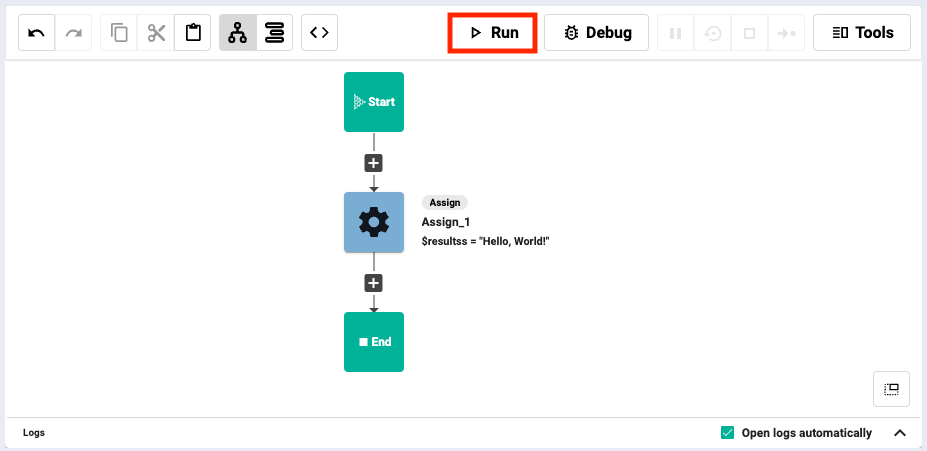
After you successfully create the flow, the Visual Editor will be loaded and a ready “Hello, World!” script will serve as a starting point.
Basic features and actions
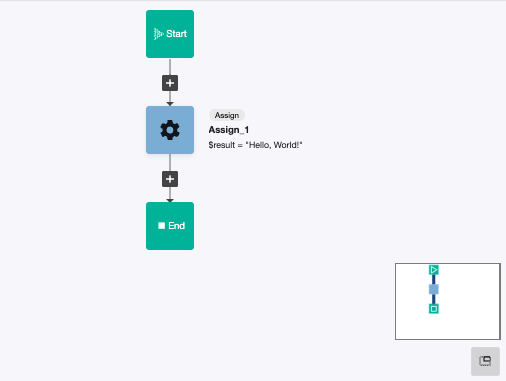
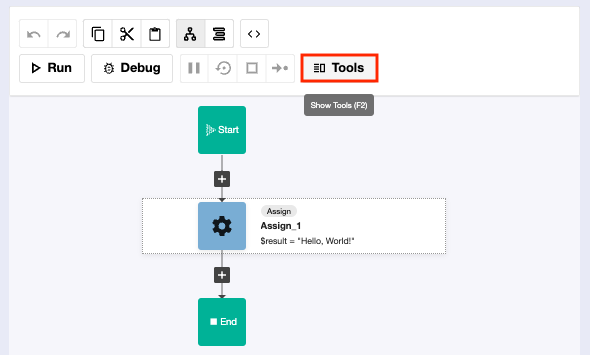
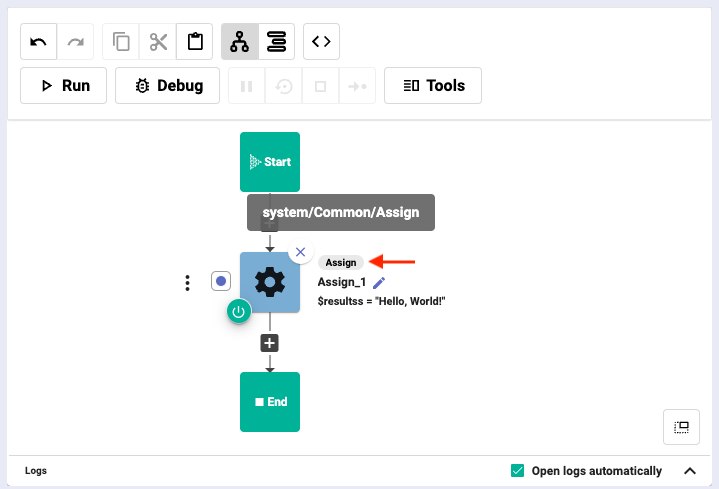
By default, every new workflow contains a Start, Assign, and End blocks that designate the start, middle and end of the flow.
Each of them is represented by a small colored square. The design of a block will vary depending on its function.
Flow layout type workflow view
You can’t do much on the blocks themselves. The Visual Editor has fully integrated the Object Editor to build the inner contents of its workflows.
Just click once on a block and the module will appear on the right, displaying all variables and properties of that block.

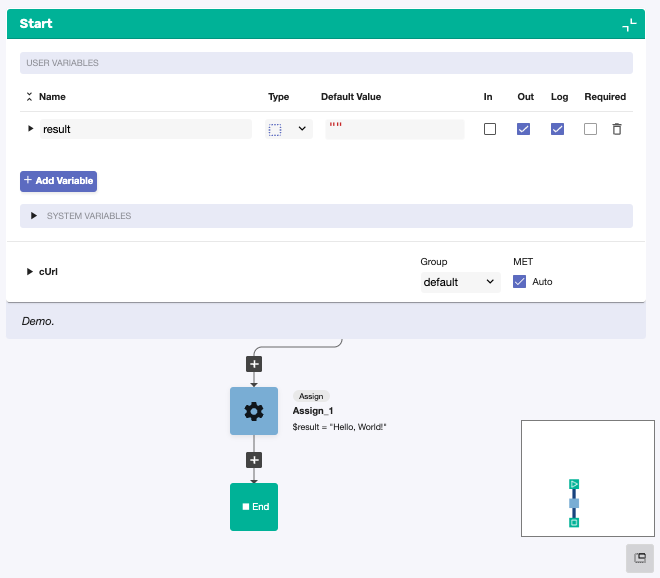
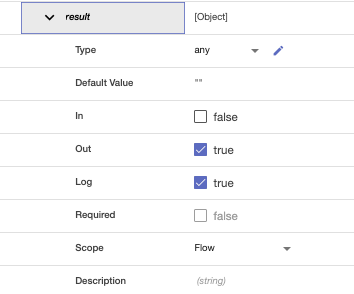
Assign block variables inside the Object Editor
The Object Editor is part of the Tools panel. To expand or collapse this module manually, click the respective button.
To work, the block structure of every workflow relies on inputted variables. They’re added and managed within the visual Start block.
You need to click on it once to be able to see and edit its properties.

Start block variables inside the Object Editor
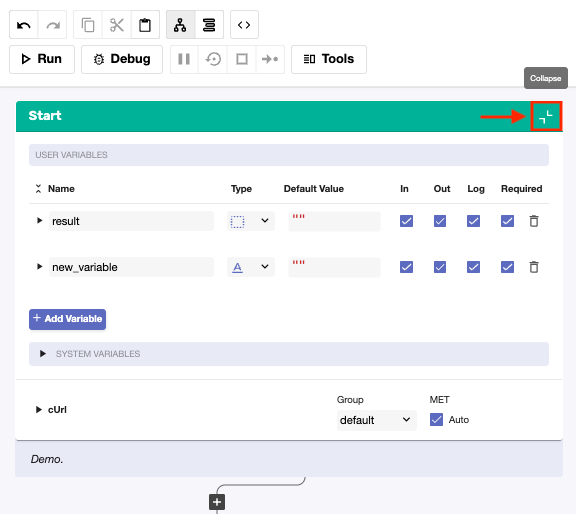
It’s possible to transform the visual Start block into its sequential version.
Hover over the square and click the downward arrow.

This will expand the block and offer you the sequence way of managing it.
Additional features such as cUrl, worker group and MET will become available for configuration.
To restore the Start block back to its visual state, click the double-arrow button at the top-right corner.
The Object Editor’s version of the Start block has simplified, but similar structure. Here, system variables are displayed above standard variables.
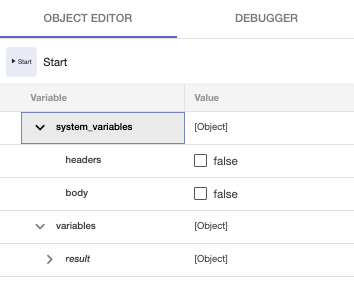
The “result” variable is always the first standard variable of a newly created workflow.
Click on it once to expand its properties.
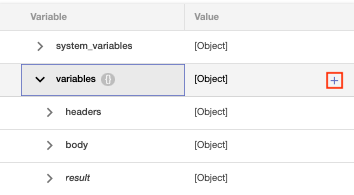
The “headers” and “body” variables are the default system variables of a newly created workflow.
You can check their boxes if you want to add them to the workflow. They’ll be moved to the standard variables group.

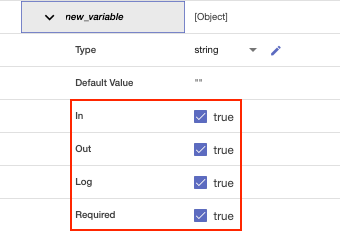
More standard variables can be created with the help of the + button on the right of the “variables” object.
Once you give it a name, it will be filled with common variables such as “Default Value” and “Type”.

When you check the Required box, it means that if your variable is In(put), it must have a value for the workflow to execute.
If you check the Log box, it meanas that if your variable is Out(put), it will not be sent outside of a worker, but to a parent flow inside the worker.
Integrations and blocks
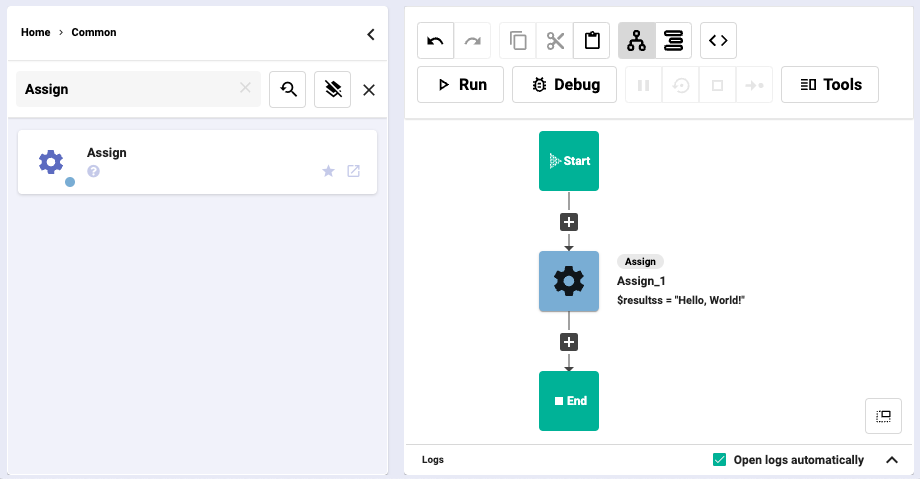
On the left of the Visual Editor, you’ll see groups of integrations which can be used to build your workflow.
Their behavior and characteristics are essentially identical to what you can do in the Sequence Editor, with minor differences.

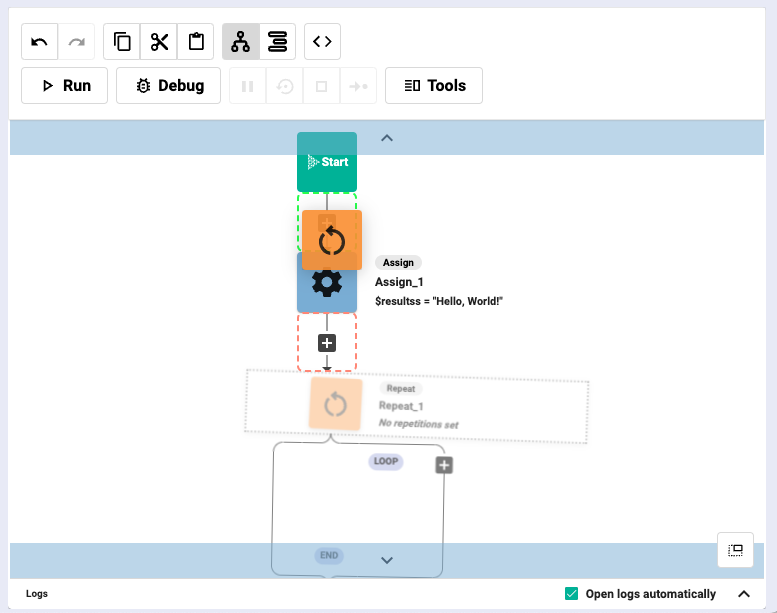
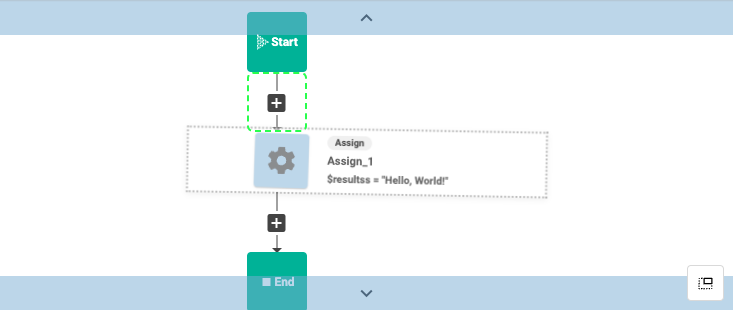
Blocks are introduced into the workflow with a click-and-drag or through the Take block icon.
Hovering over a red dashed region paints it green - you can place the new block there immediately.

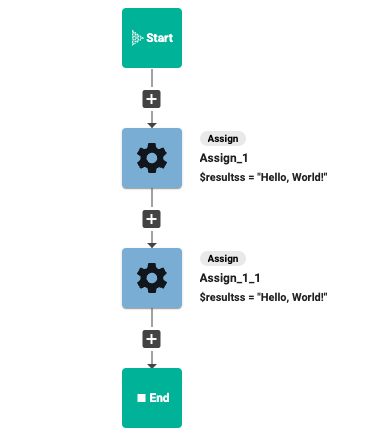
When inserted into a workflow, each block acquires a name in addition to its title.
By default, the name of a block is “Title_consecutiveNumberOfAppearanceInTheFlow”

To change the name, click on the blue pen button. Keep the change by clicking once outside the edit field.

Messages for the values (empty or present) of the blocks display below their names, and relevant to their current status and logic.
If you hover the mouse over the title of a block, you can see its path in the list of integrations (e.g. “system folder/Common folder/Assign block”).
You can reposition a block to a different position in the workflow. Select it, drag it up or down, and place it within a green region.
To move multiple blocks at once, click and hold Shift while you select the blocks, drag them, and reposition them accordingly.

Most integrations and blocks on the left side are visualized by different icons depending on what they do…
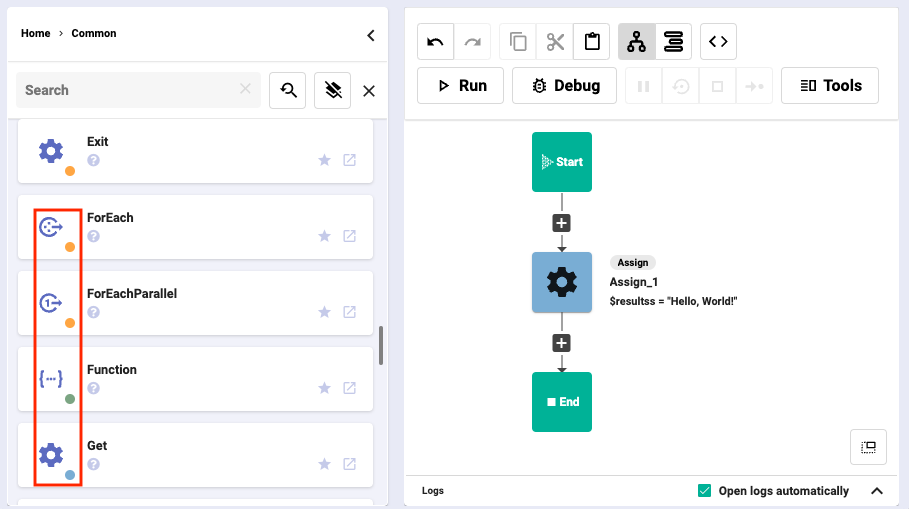
…and different visual structures depending on their function.

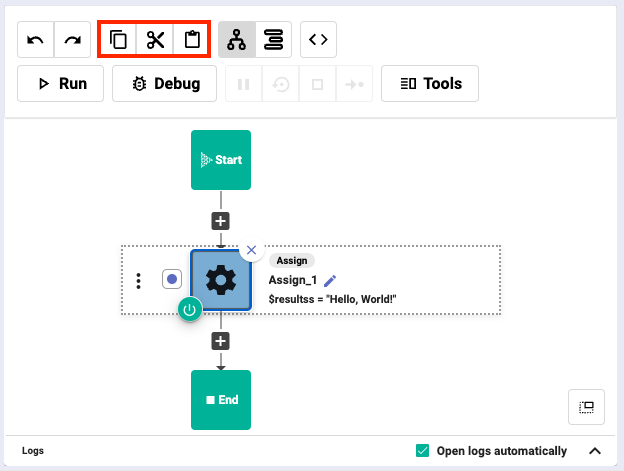
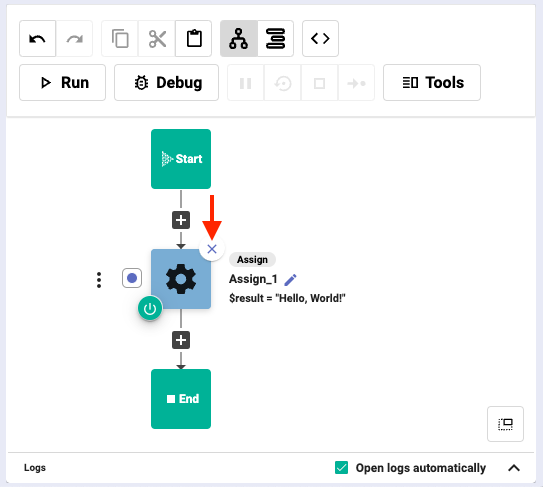
If you click anywhere on a visual block, three buttons will become available for use.
Button | Function |
|---|---|
Copy (CTRL+C) | From left to right, the first button creates a copy of your block which you can paste later. |
Cut (CTRL+X) | From left to right, the second button removes the block and creates a copy of it. |
Paste (CTRL+V) | From left to right, the third button places a copied or cut block to a specified location, typically shown in a green rectangle.
|

Some of these actions become available when you hover over a block and click its three-dot button.
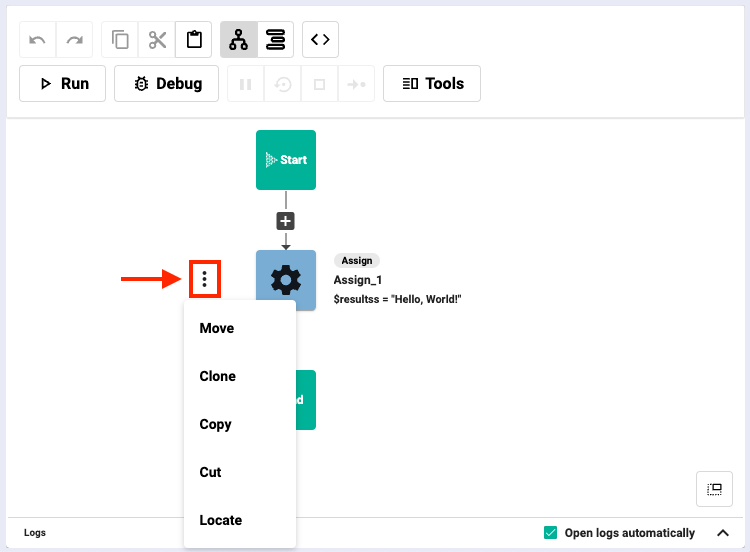
Action | Function |
|---|---|
Move | Allows you to reposition the block to a different place without the need to drag it.
|
Clone | Creates an instant duplicate of the block.
|
Copy | Creates a copy of the block that can be pasted in a different location. |
Cut | Removes the block and creates a copy of it which you can paste somewhere else. |
Locate | Takes you to the exact location of the block within the tree of integrations.
|
To disable a block, click the shutdown button. If the block isn’t needed for now, disabling provides an easy way to isolate it without changing the workflow.
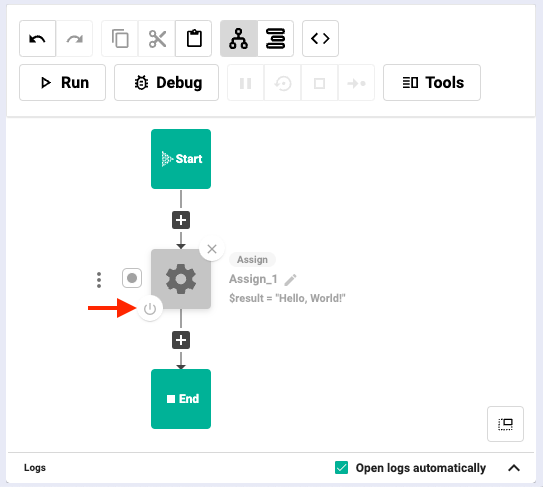
To remove a block from the workflow, click the X button.
Additional features
There’s a minimap at the bottom-right corner that allows you to easily navigate to any block by clicking and moving the mouse up and down inside the map.
This can help you when working with complex workflows, where you could waste a lot of time searching for blocks.

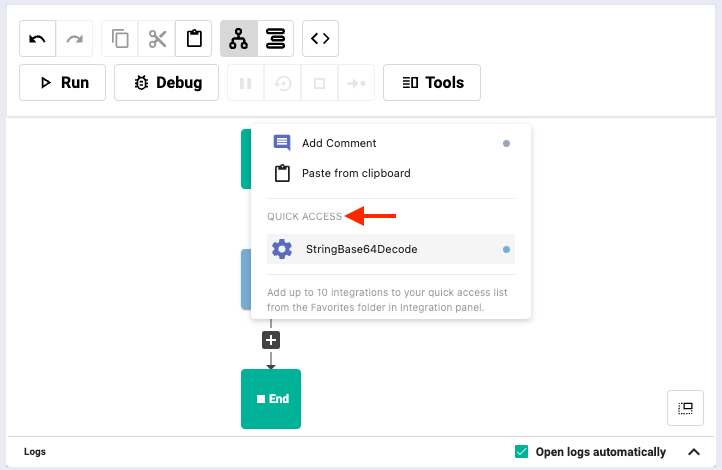
Custom comments can be added to blocks or any point of the workflow. Click any of the + buttons and select Add Comment from the pop-up menu.
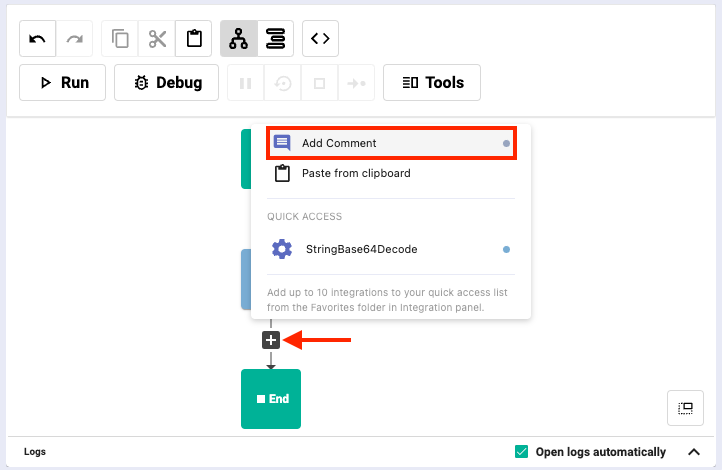
Write your comment in the new field.
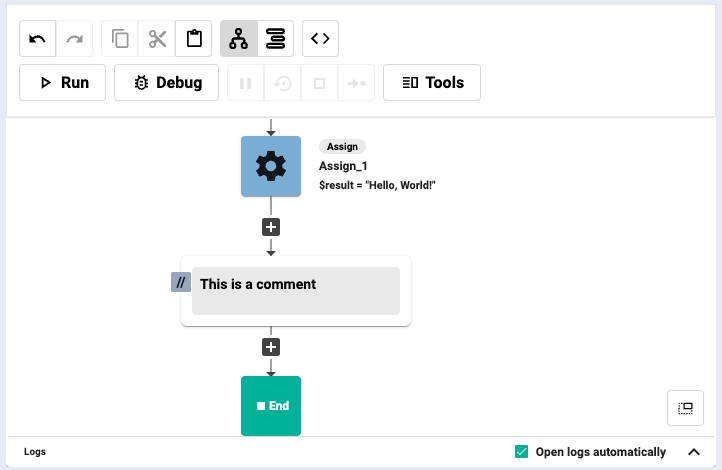
Click once outside the field to save the comment. It can be dragged, moved, relocated, edited and removed just like a typical block.

The same dropdown allows you to instantly add one of your quick-access blocks from your Favorites folder.
To see the full range of available features as well as how to add authentication services for your workflow, refer to Create a Workflow (Sequence Editor).
Running a workflow
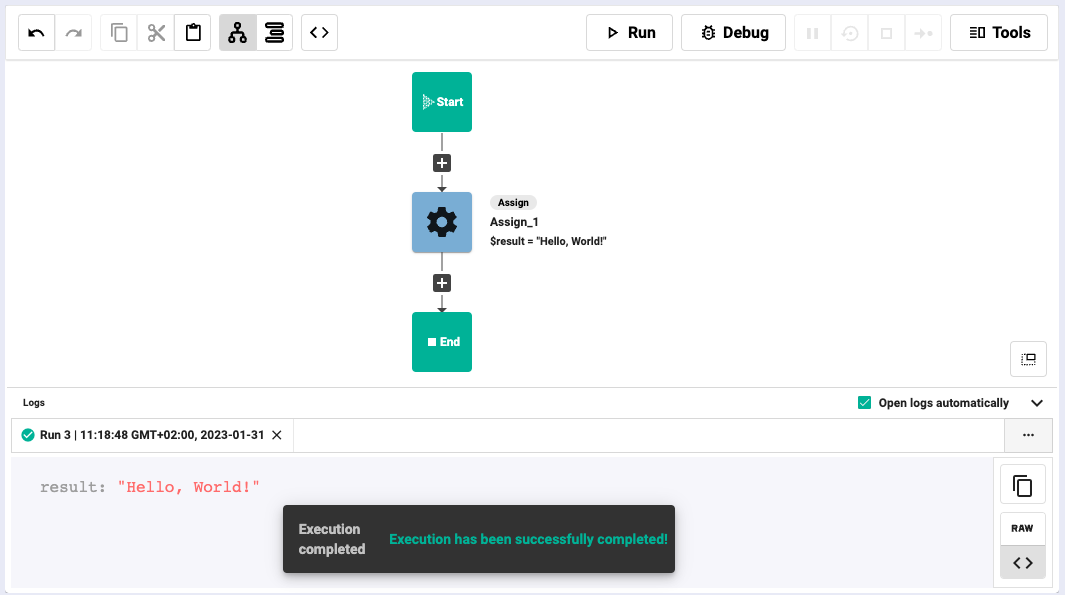
To execute your workflow, click the Run button. The workflow will be auto-saved.
If everything’s alright, you’ll get a success log at the bottom of the screen.
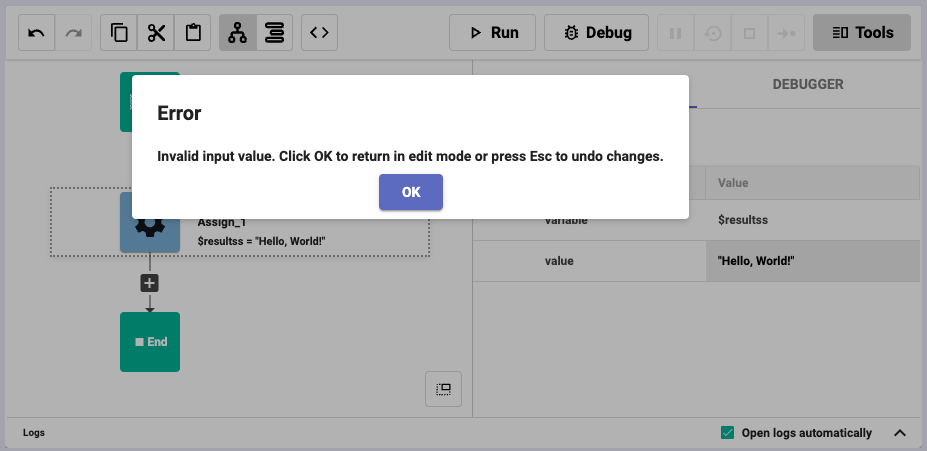
If there's a problem, you’ll get an error log which will be in red, meaning the workflow has failed to execute.
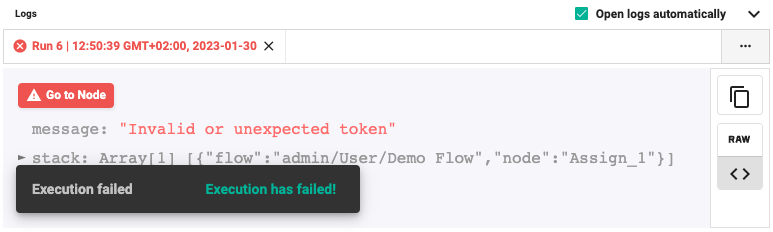
Most errors are registered by the Object Editor while you’re building your workflow so that potential mistakes can be avoided before execution.
Every execution is reflected in the Dashboard and Logs in real-time.
Debugger
If you need to perform a check and/or edit a workflow as it is executing, you can debug it.
This features proves extremely benefitial for identifying errors and offering quick solutions, all the while preserving your progress.
How to debug
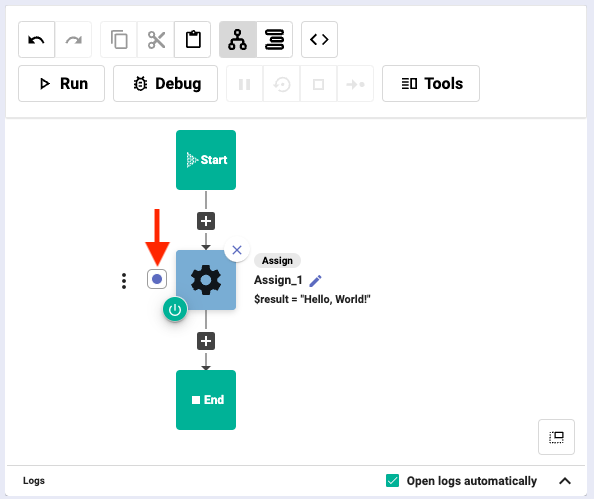
On the left of each block, there’s a square with a blue circle that turns red when clicked.
Make sure to push it for the block(s) (breakpoint) you want the execution to stop at.
2. Then, click the Debug button.
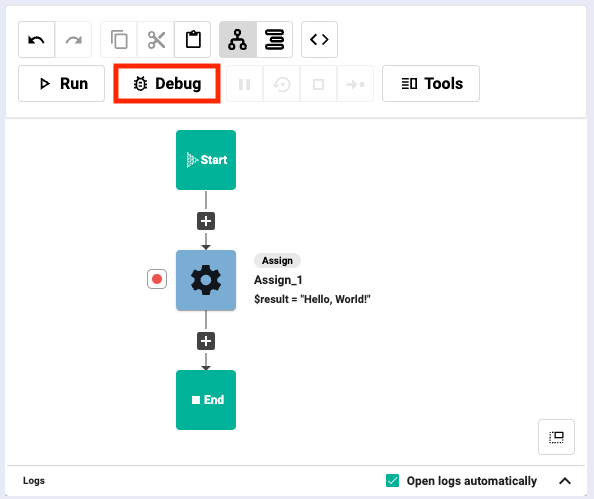
A normal execution will begin but it will be paused so that you can see the threads, state, and breakpoints of the workflow.

Changes can be made to the variables and values if necessary, just like in the Object Editor.
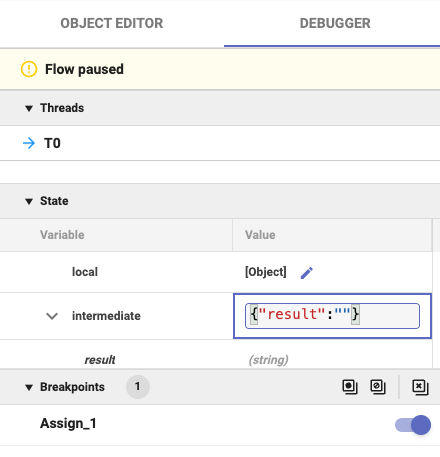
You can also manage your breakpoints in bulk (enable, disable or clear) with the help of three buttons.
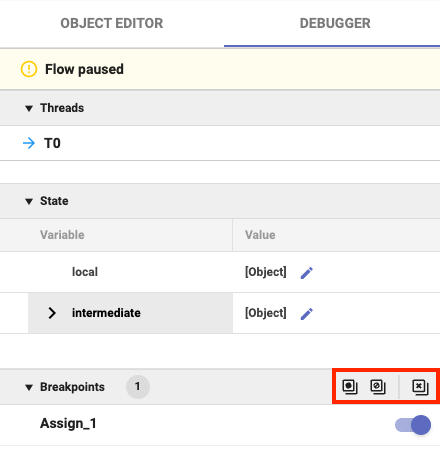
Enable all - turns on all breakpoints.
Disable all - turns off all breakpoints.
Clear all - deletes all breakpoints for the current workflow.
To “unpause” the workflow, you can perform one of four debugger commands: Resume (F9), Start Over (Shift+F10), Stop (F10), and Step (F8).

Saving a workflow
To save your workflow, click Save.
This preserves your progress up until this point and allows you to return to the workflow later.