Create a Workflow (Sequence Editor)
Overview
Workflows are user-created algorithms and scripts that are created using the powerful visual editor. It allows you to create complex programs taking advantage of the platform's powerful capabilities.
The Sequence Editor allows you to create, build, edit, and execute them on the platform.
The Sequence Editor
Before you Begin
Navigate to the Workflows tab and make sure you have permission to interact with the module.
How To Open the Editor
You can invoke the Sequence Editor in one of two ways:
By clicking on an existing workflow’s row.
By opening an existing workflow through the Аctions menu.
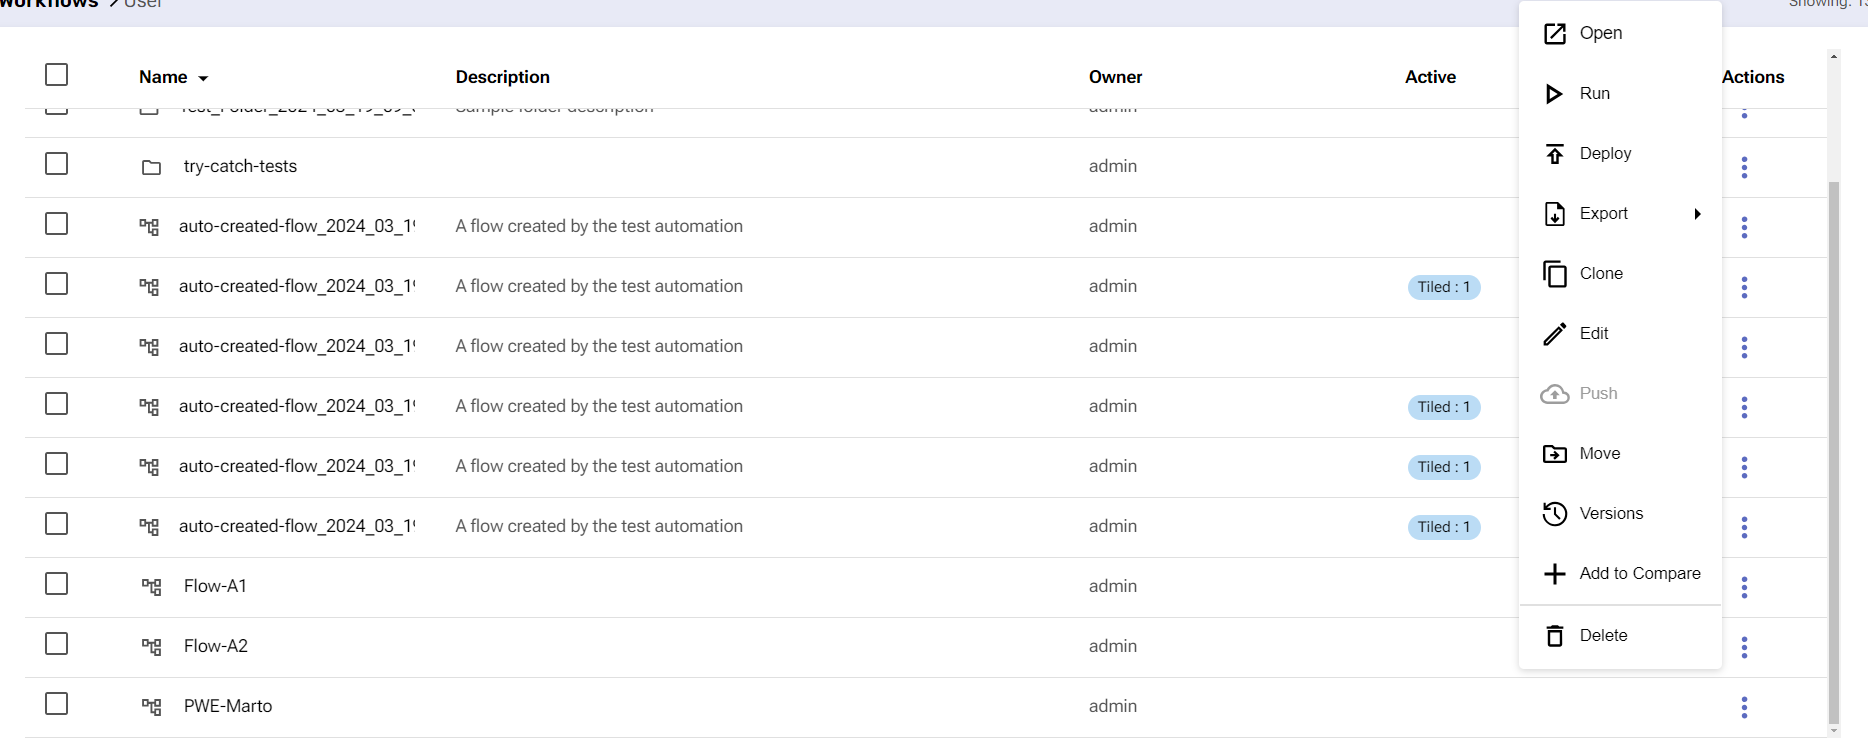
The Workflows tab
Create a Workflow
To add a new sequence workflow, click the Create Workflow button.

In the window that opens, you need to go through some required fields:

Choose a Name of the desired flow, select the sequence layout type, and provide an optional description.
When done, click Create.
After you successfully create the flow, the sequence view of the Workflow Editor will be loaded, and a ready “Hello, World!” script will serve as a starting point.
Basic Features and Actions
By default, workflows contain a Start block, an Assign block, and an End block that designate the start, middle, and end of the flow.
It’s in the middle portion where you build the body and executable actions.
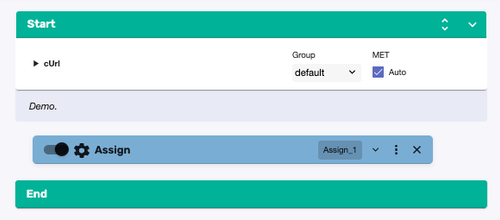
Sequence layout type workflow view
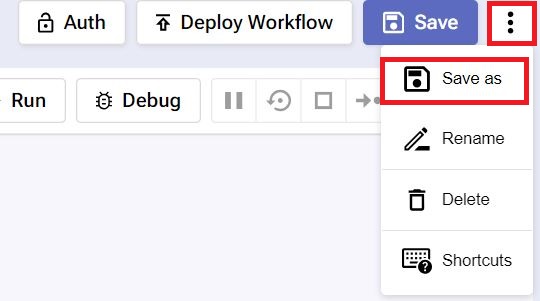
You can save the workflow under the same or a new name in the same or a different location.
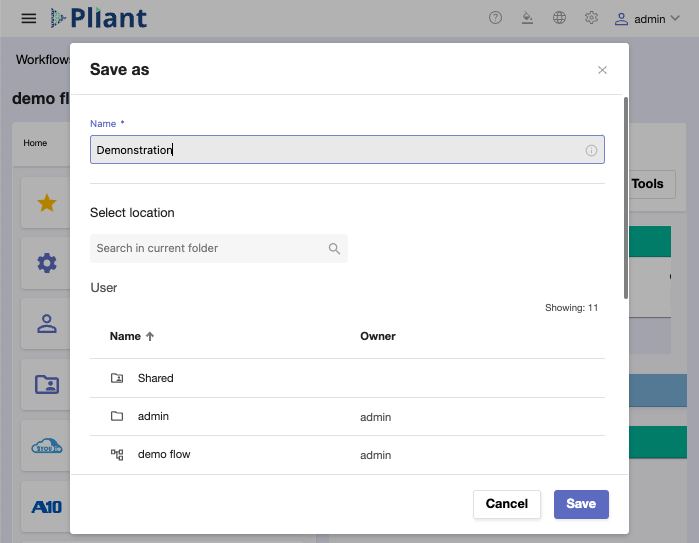
Just click the three-dot button at the top-right corner and select Save as.
This opens a separate window for defining a name and choosing a folder for the workflow.
To save the flow in the default User folder, don’t select anything and simply click Save.
If you only need to rename the title of the workflow, use the Rename button from the same three-dot button dropdown menu.
A quicker way to do this is by clicking on the flow’s title at the top-left.
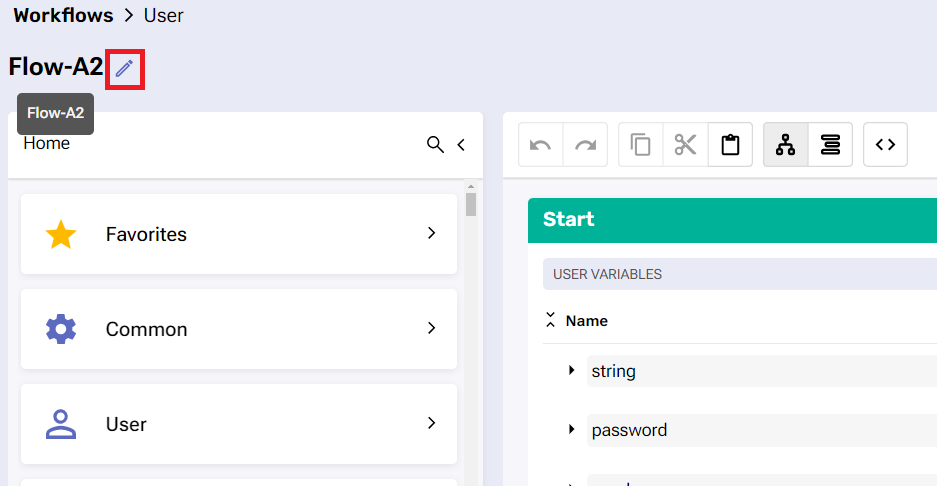
Renaming is fast and easy. Don’t forget to apply your changes with the check mark button.
The flow will be saved to preserve your progress and reflect the change.
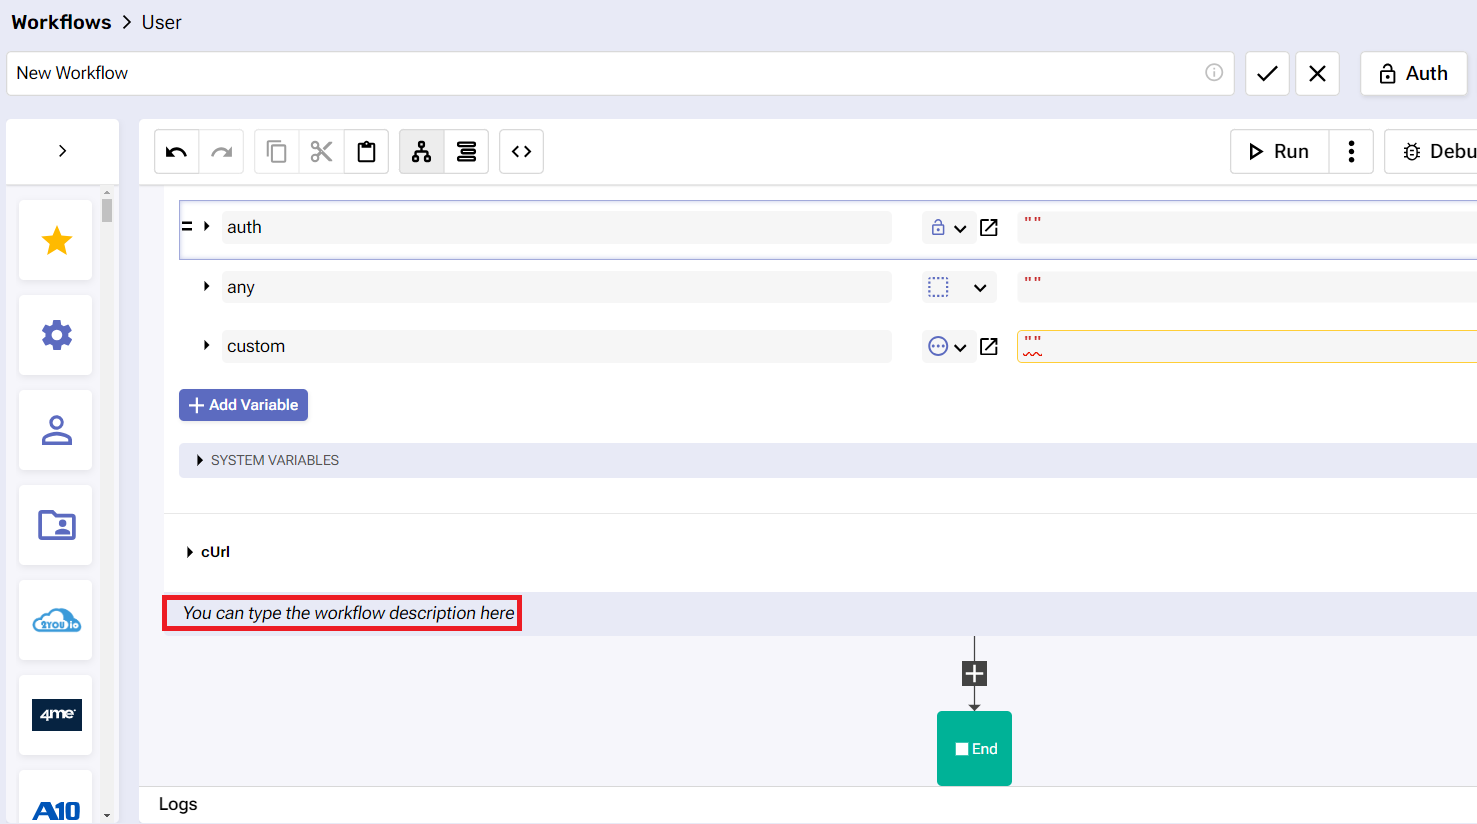
Like flow titles, flow descriptions can also be edited. In the sequence layout view, you’ll need to go inside the Description field of the Start block.
Clicking on it once allows you to add a new description or change the existing one.
To keep your changes, click once outside the field. This sets the new description for the workflow.
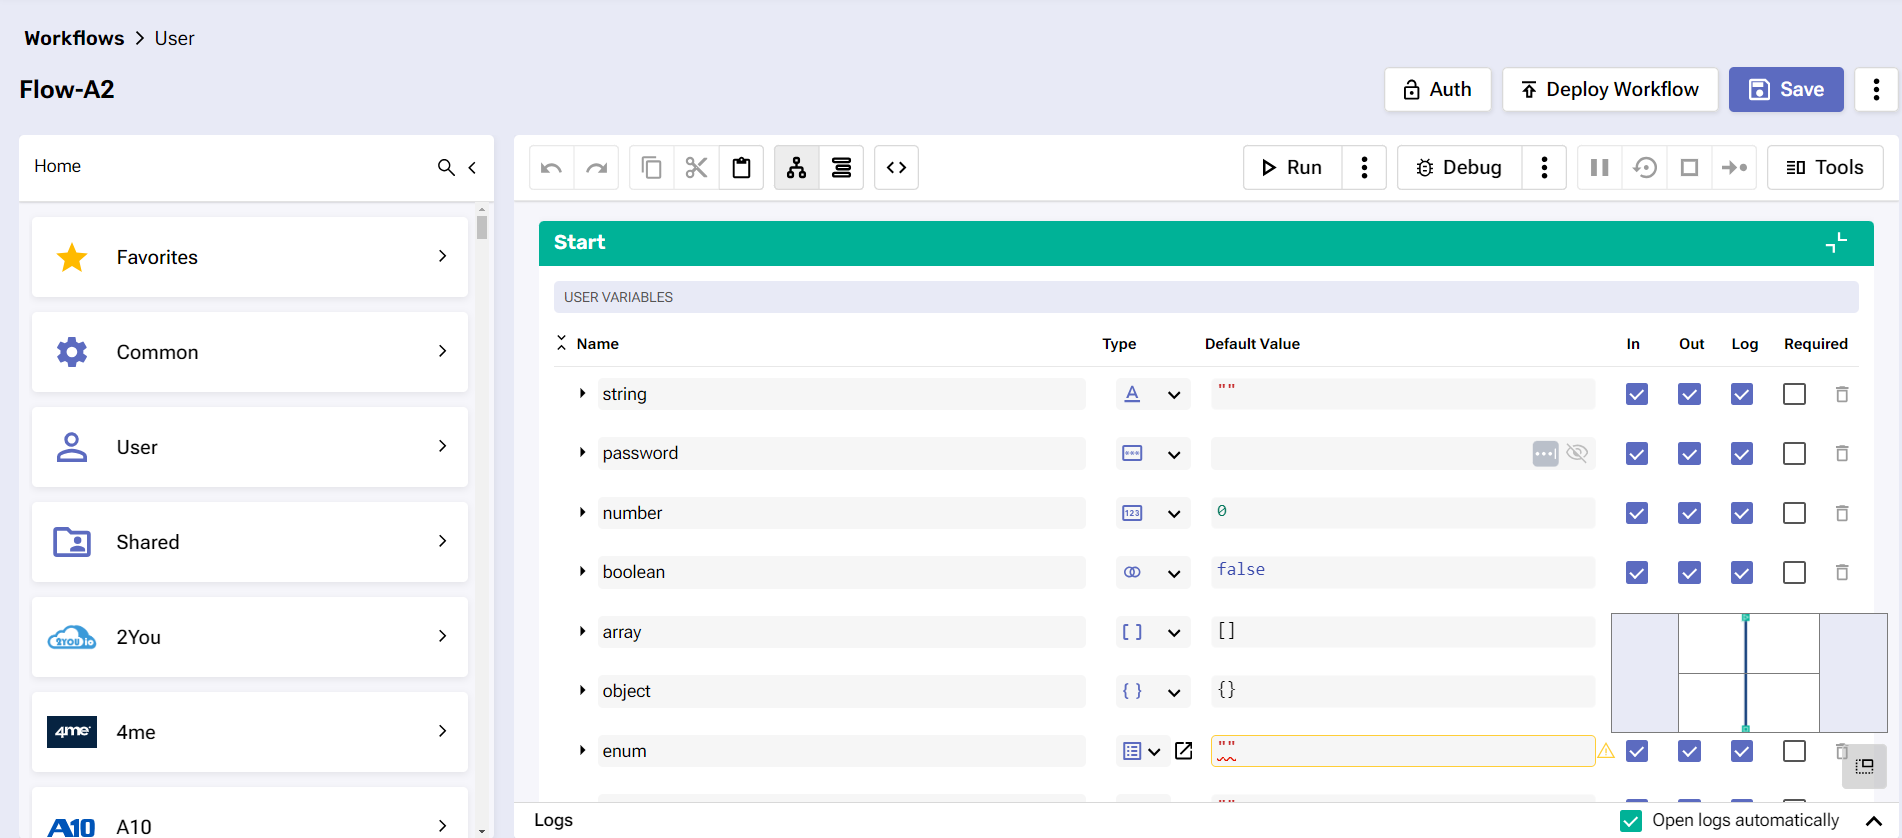
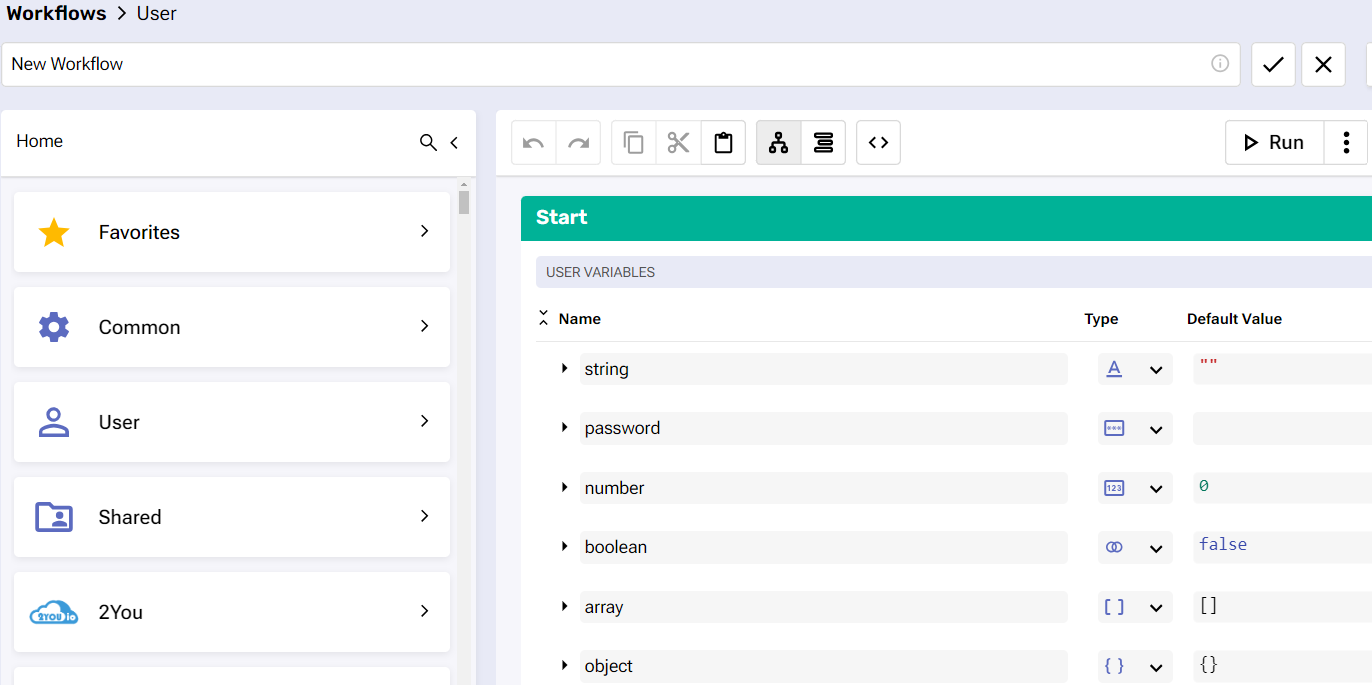
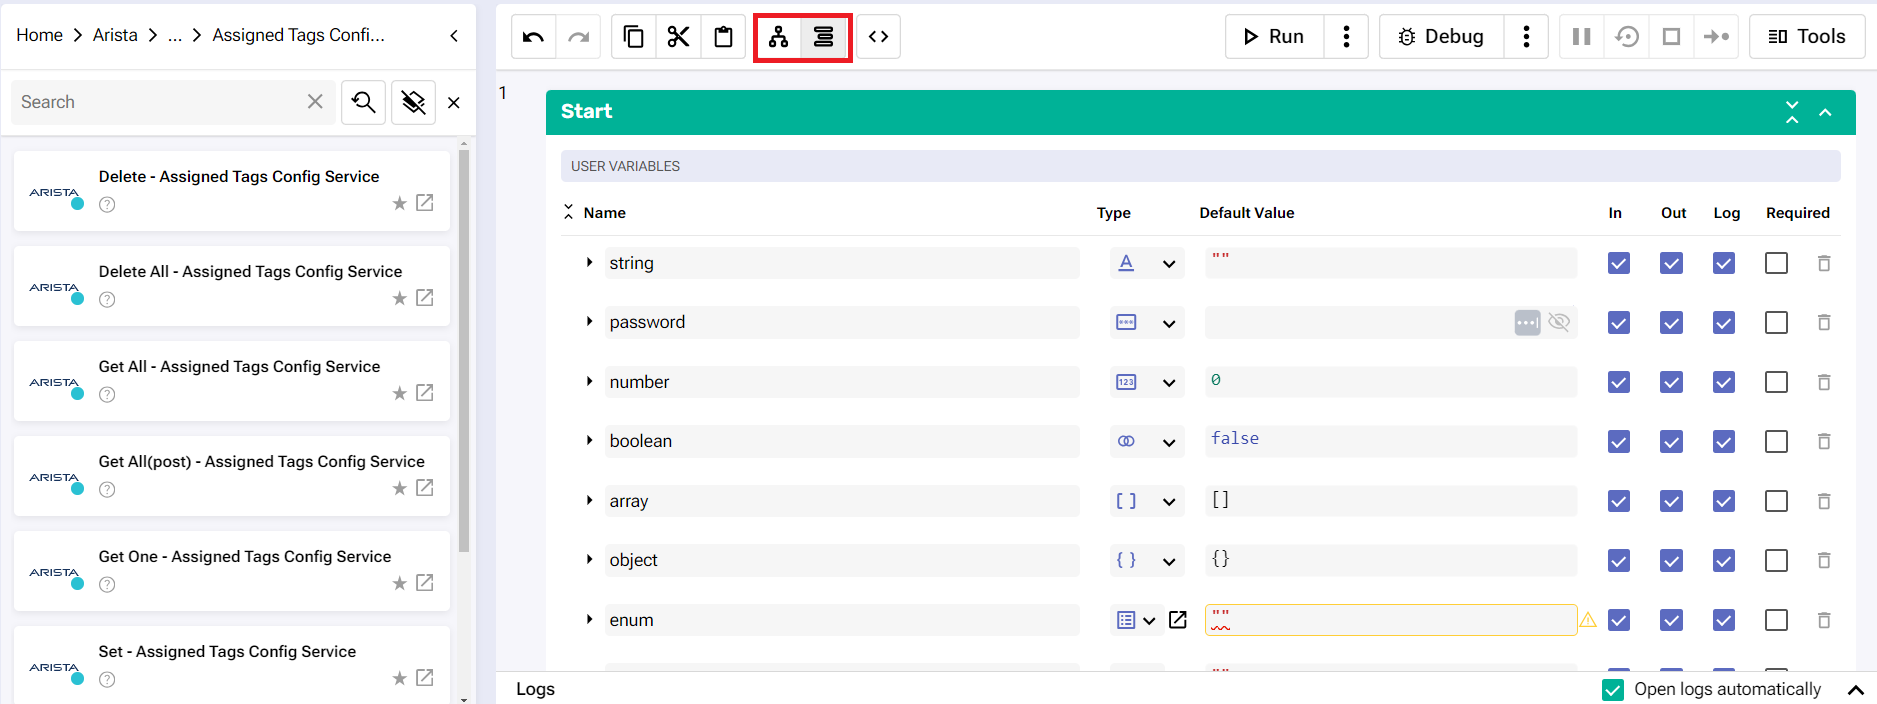
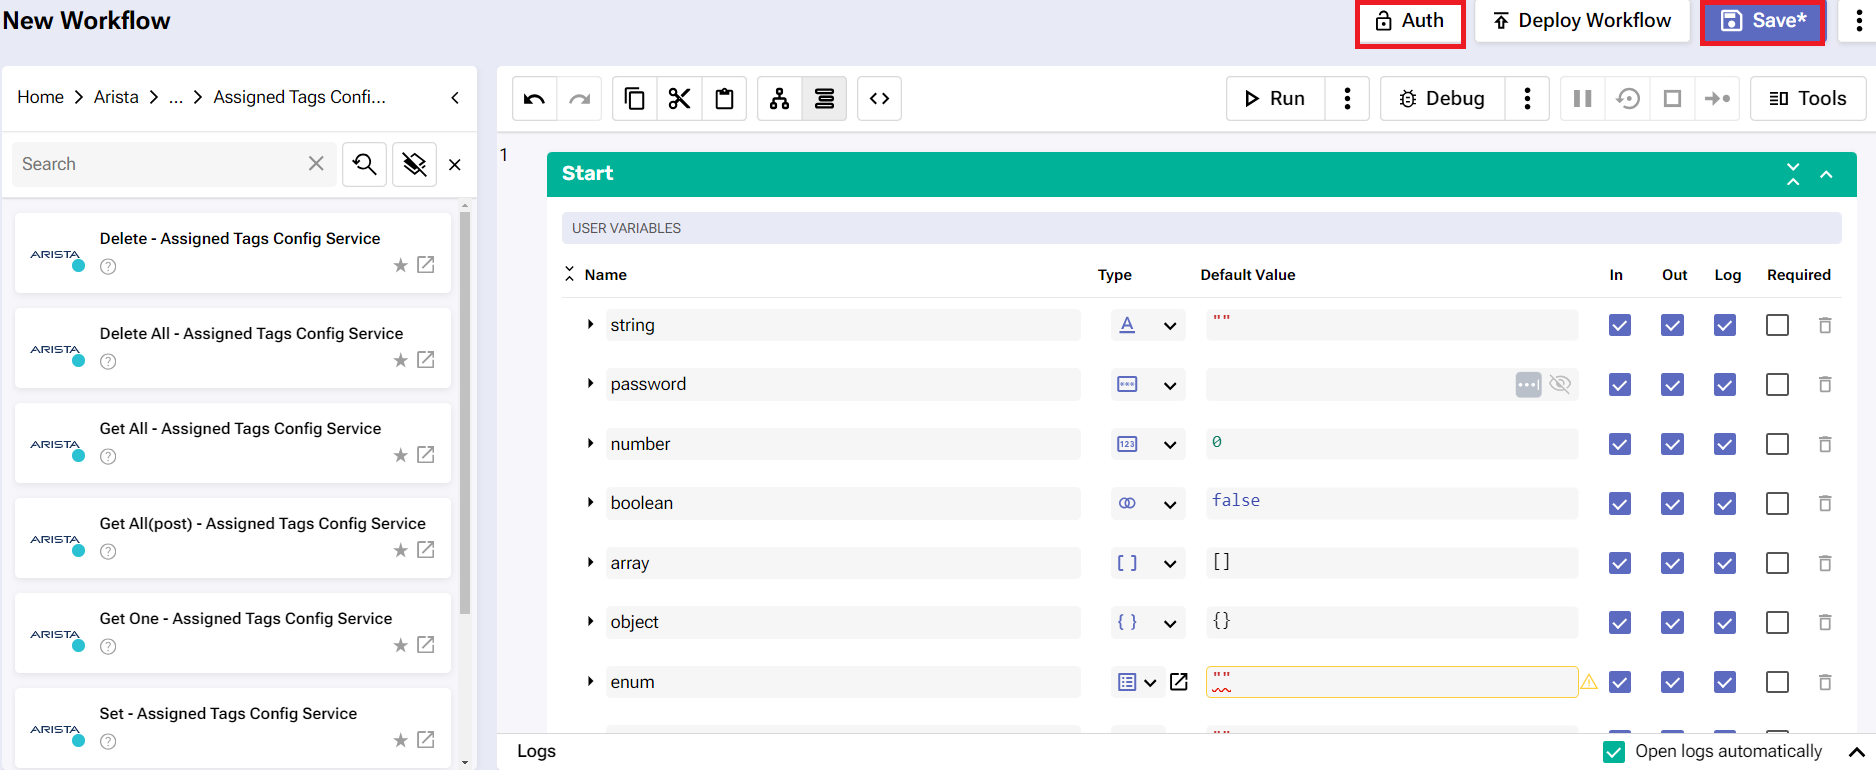
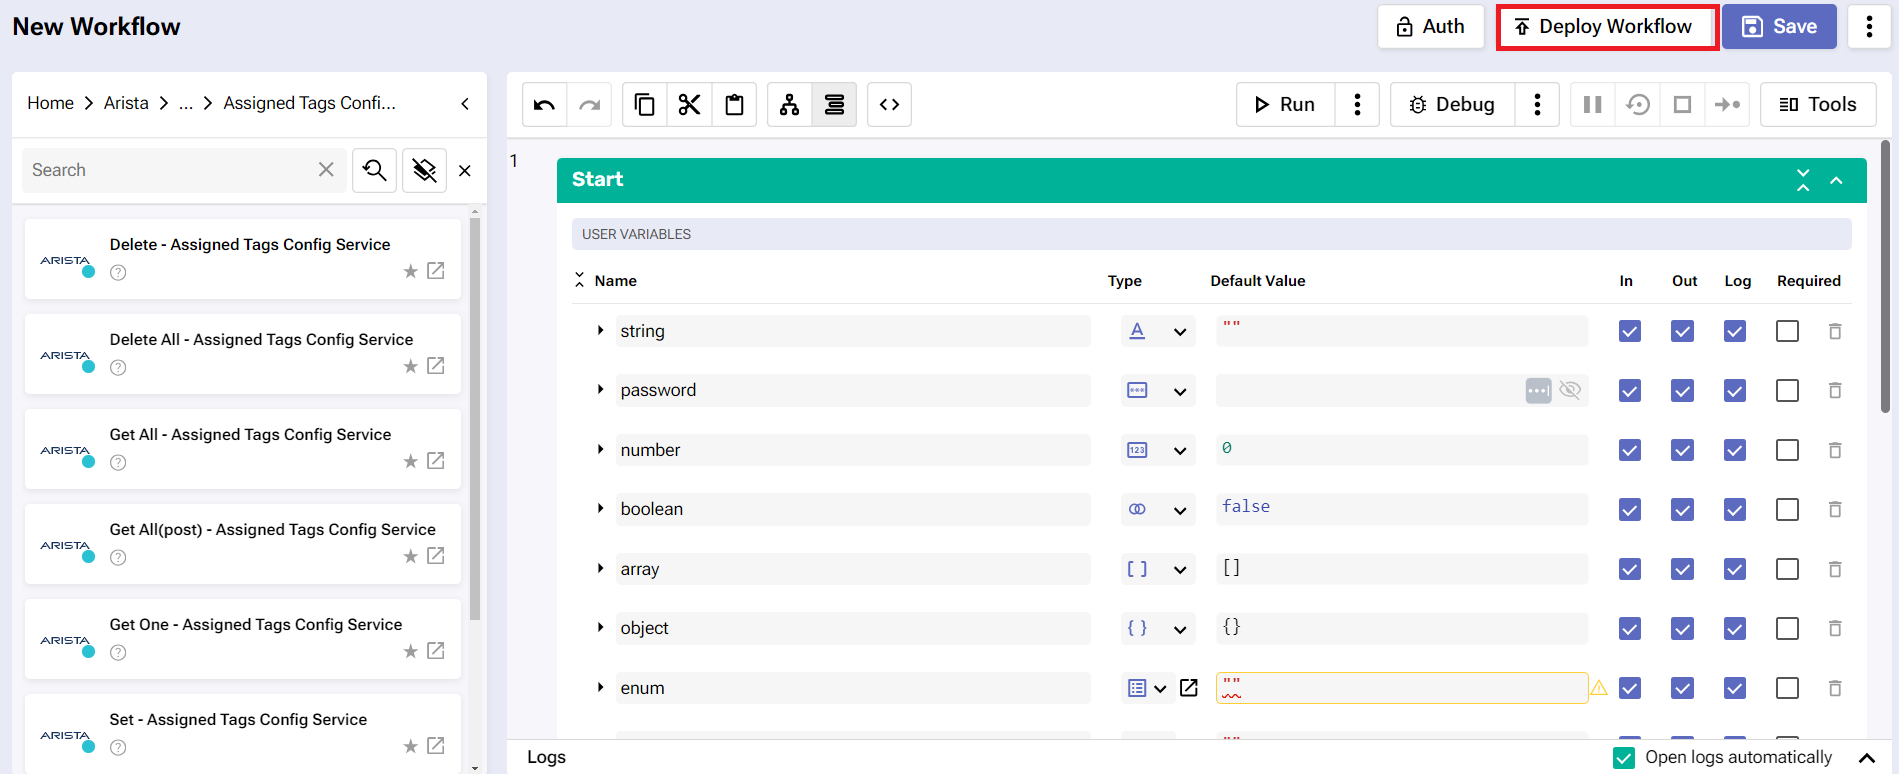
As a general rule, the structure of every workflow relies on inputted user and system variables. They’re added and managed within the Start block.

Sequence layout view of the Start block
You can expand and collapse this block with or without every block below it using one of the two corner buttons.
You can open a list of available keyboard Shortcuts by clicking on the last option in the three-dot menu. This will open a dialog window showing all available combinations.

If needed you can toggle the option to Disable Keyboard Shortcuts.
Keyboard Shortcuts Behaviour
When you disable the keyboard shortcuts, this behavior will be applied only to your current device. If you restart your browser, the shortcuts will continue to be disabled.
Integrations
On the left of the Editor screen, you’ll see groups of default and installed blocks that can be used in the process of building your workflow.
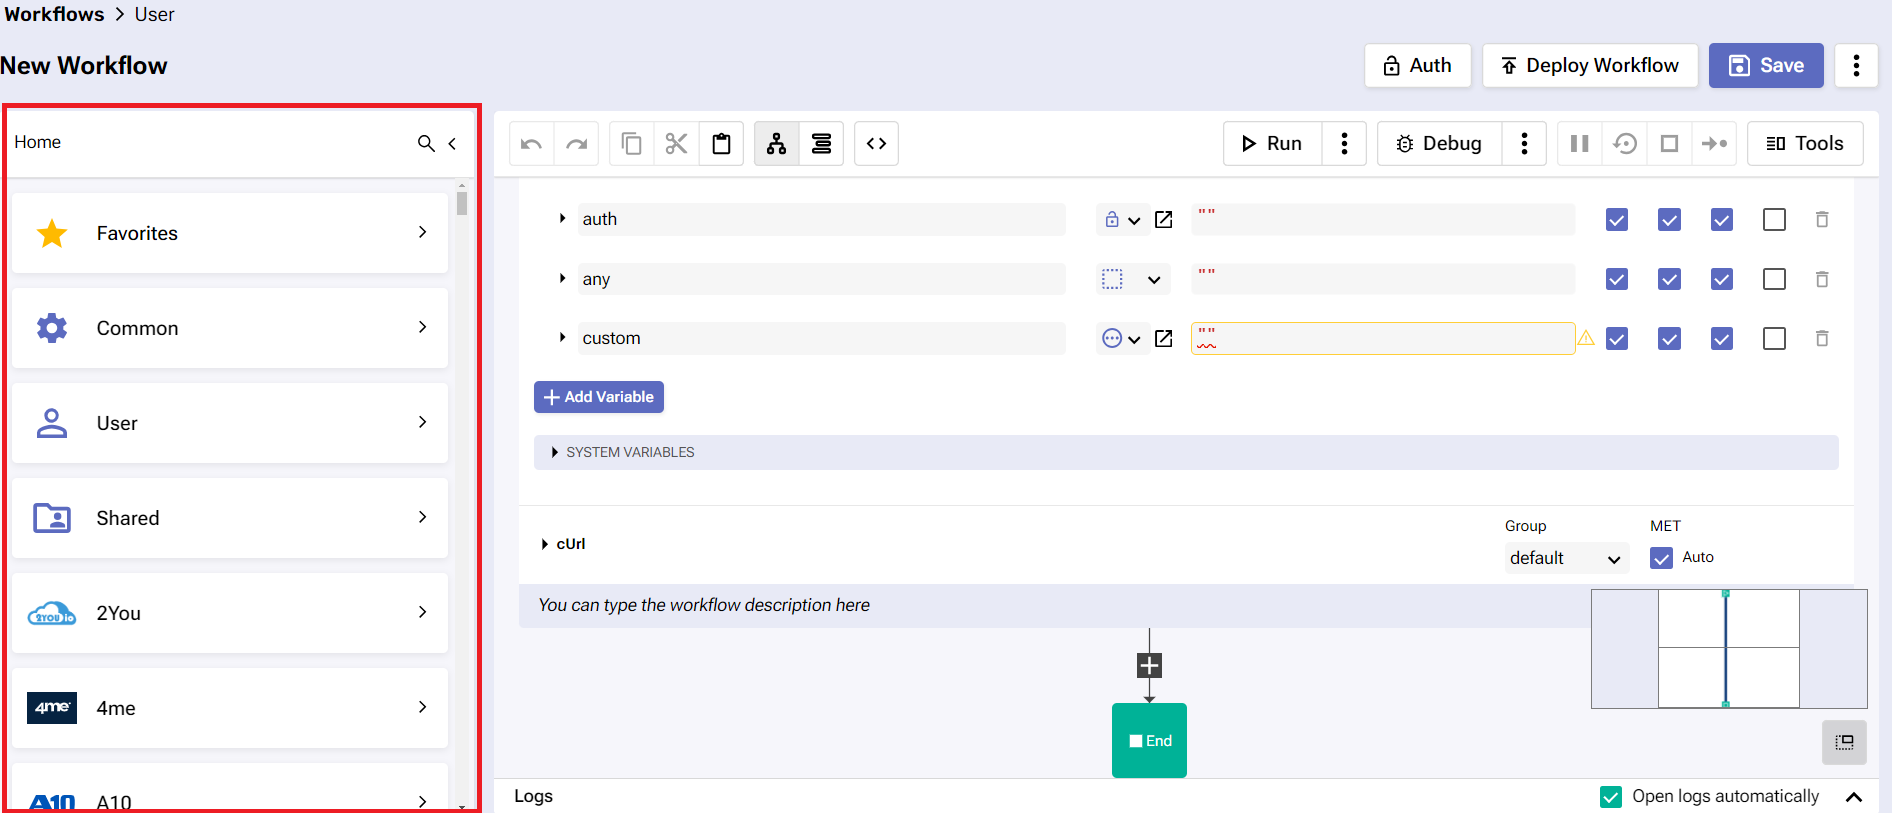
You can store blocks and entire workflows in custom folders like Favorites, User, and Shared, as well as use Common Pliant blocks and various other manually installed integrations.
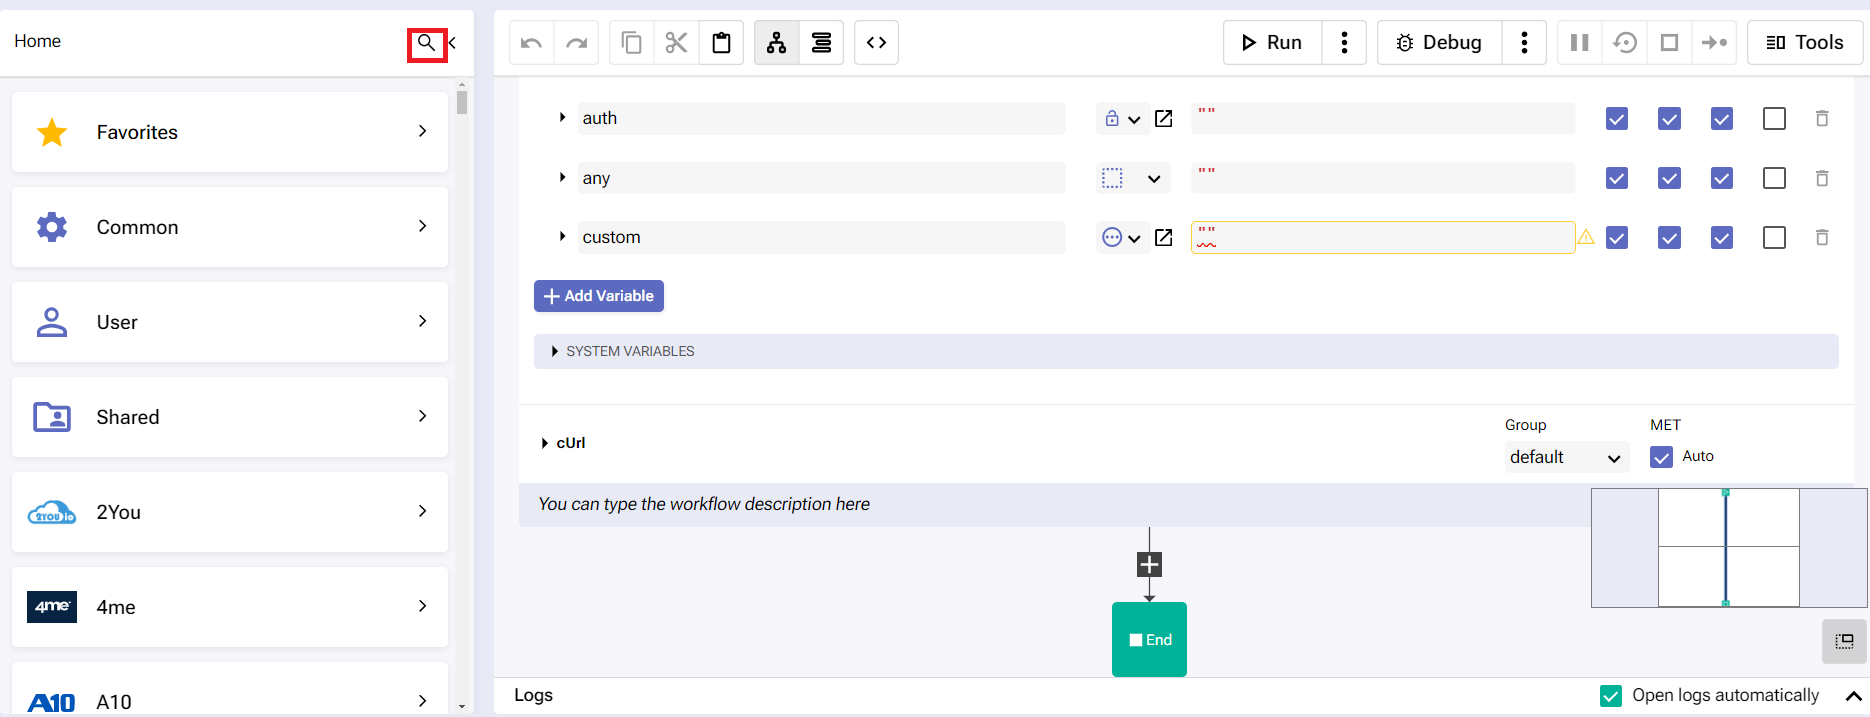
To locate a particular block or group folder, use the search button at the top-right corner of the section.
This opens a search field with two additional options:
The deep search feature allows you to find matches for all the blocks and folders containing the keywords you’ve provided.
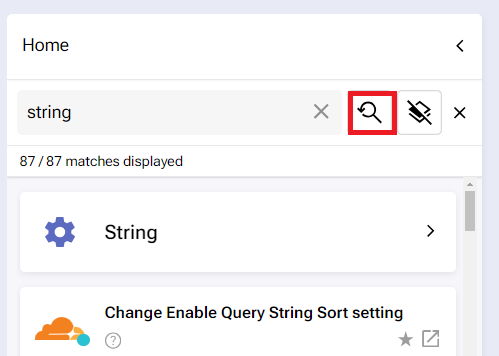
The group deep search features are useful when it comes to organizing the displayed results into their origin folders.
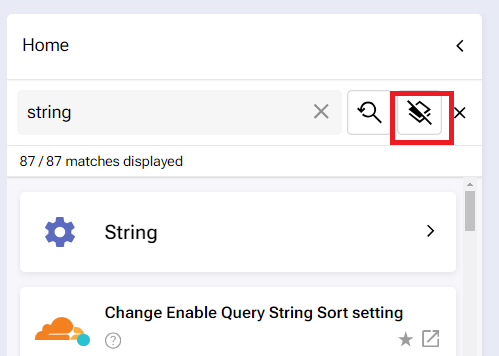
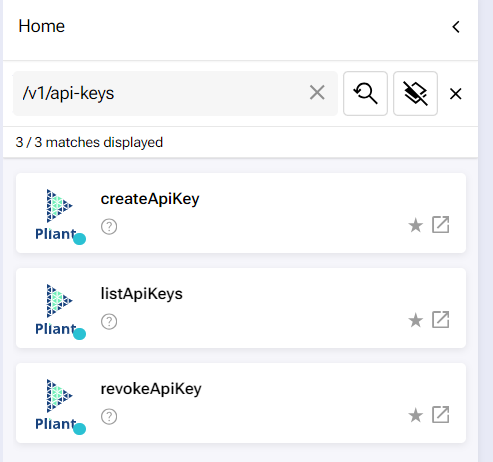
In addition to blocks, you can search for endpoint paths as well (e.g. /v1/api-keys/).
Once a block is found, you can place it into a workflow with a simple click, hold and drag.
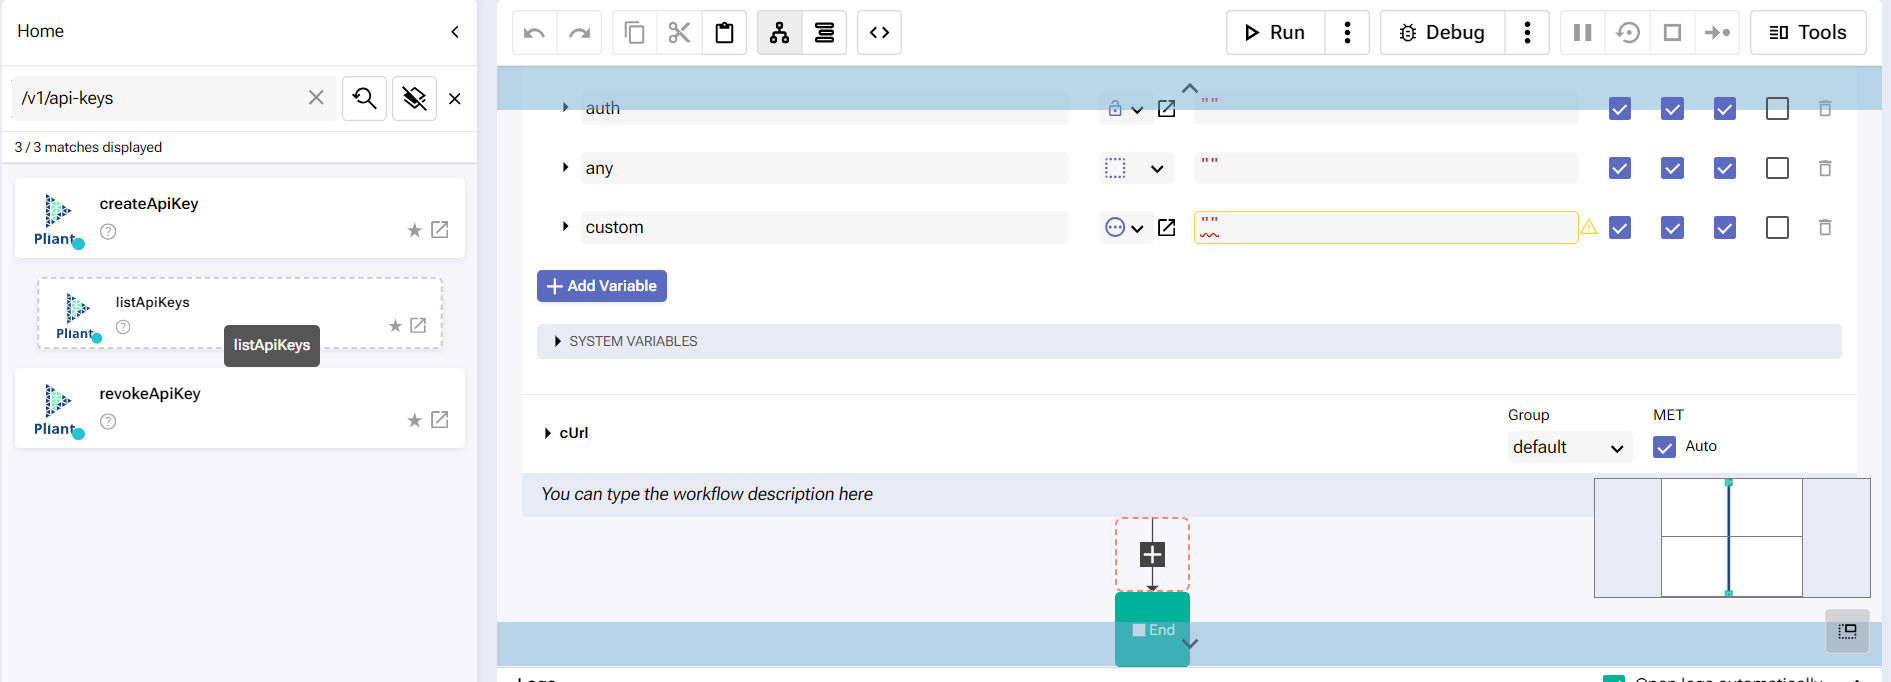
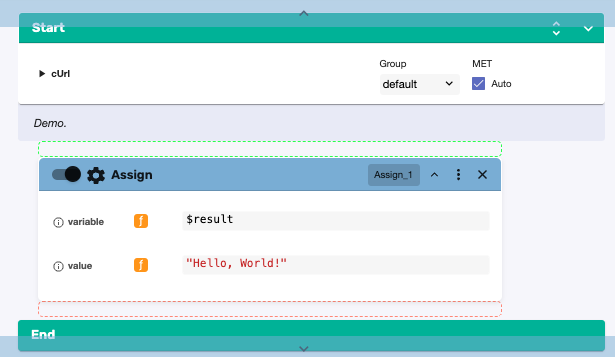
Another way of doing this is with the Take block button, which triggers dashed lines to appear between the Start and End blocks.
Hovering over a red region makes it green - you can place the new block there with a single click.
Block Features
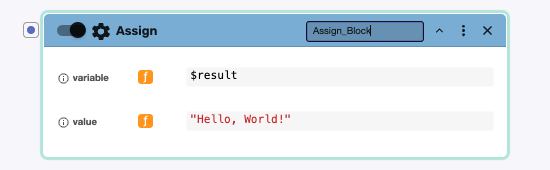
When placed inside a workflow, each block acquires a customizable name in addition to its standard one.
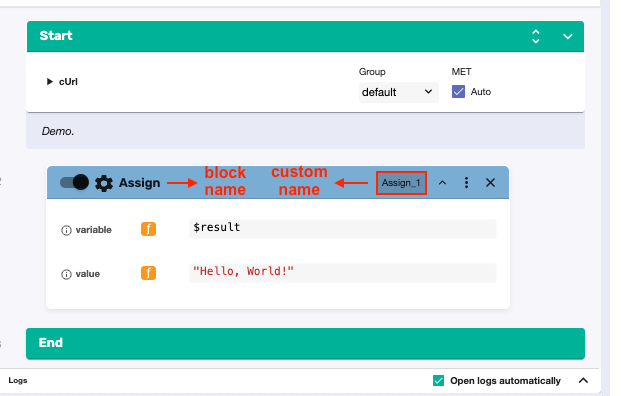
To change the custom name, click on its rectangle. Save the change by clicking once outside the rectangle.
You can reposition a block to a different position in the workflow. Select it, drag it up or down, and place it within a green region.
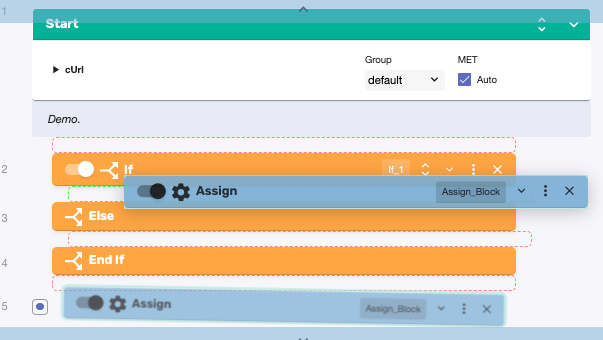
To move multiple blocks at once, click and hold Shift while you select the blocks, drag them, and reposition them accordingly.

Depending on the block, you’ll typically have the required fields. Most of them work with the values you’ve defined in the Start block.
Others will need manual configuration.

When working with fields, you’re using the integrated JSON editor. Language-specific shortcuts and features can be taken advantage of.
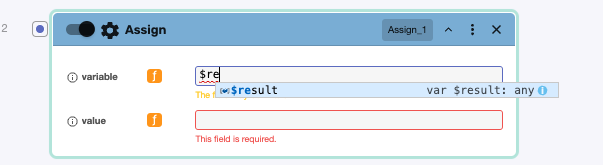
Auto-suggestion capability
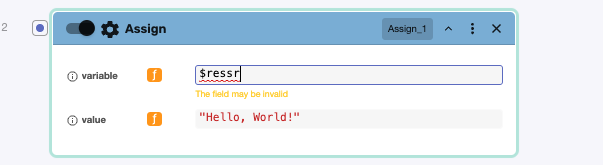
Error tracking capability
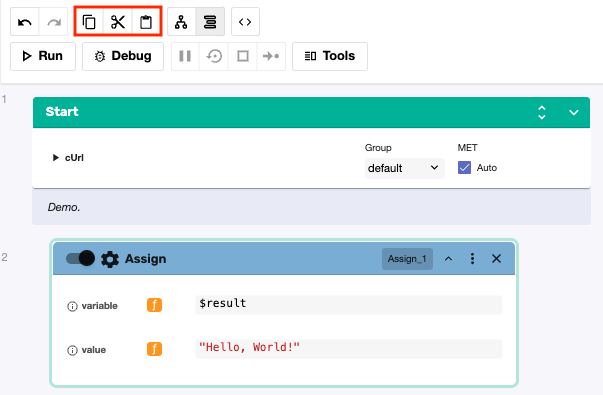
If you click anywhere on a block, three buttons will become available for use.
Button | Function |
|---|---|
Copy (CTRL+C) | From left to right, the first button creates a copy of your block which you can paste later. |
Cut (CTRL+X) | The second button removes the block and creates a copy of it. |
Paste (CTRL+V) | The third button pastes a copied or cut block to a specified location.
For manual pasting without shortcuts, click the + button and select Paste from clipboard. 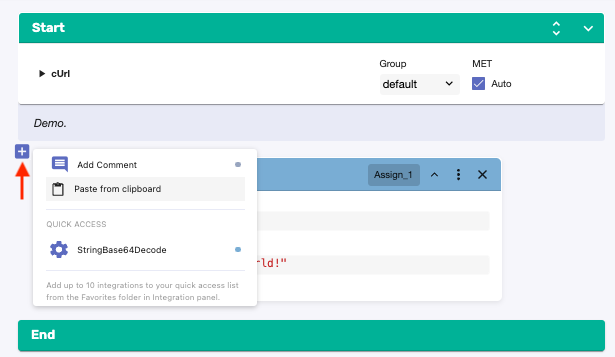 |
Some of these actions are also available when you click the three-dot button on the block.
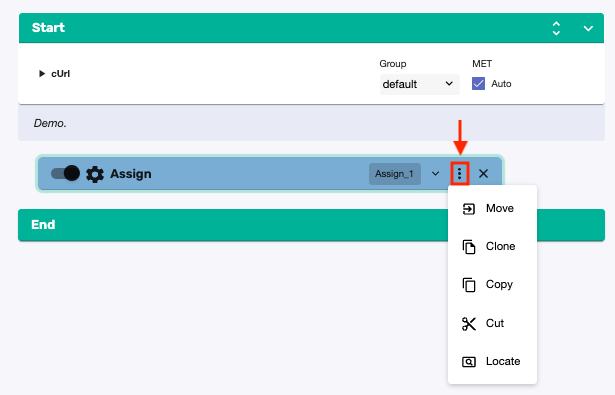
Action | Function |
|---|---|
Move | Allows you to reposition the block to a different place without the need to drag it.
|
Clone | Creates an instant duplicate of the block.  |
Copy | Creates a copy of the block that can be pasted in a different location. |
Cut | Removes the block and creates a copy of it which you can paste somewhere else. |
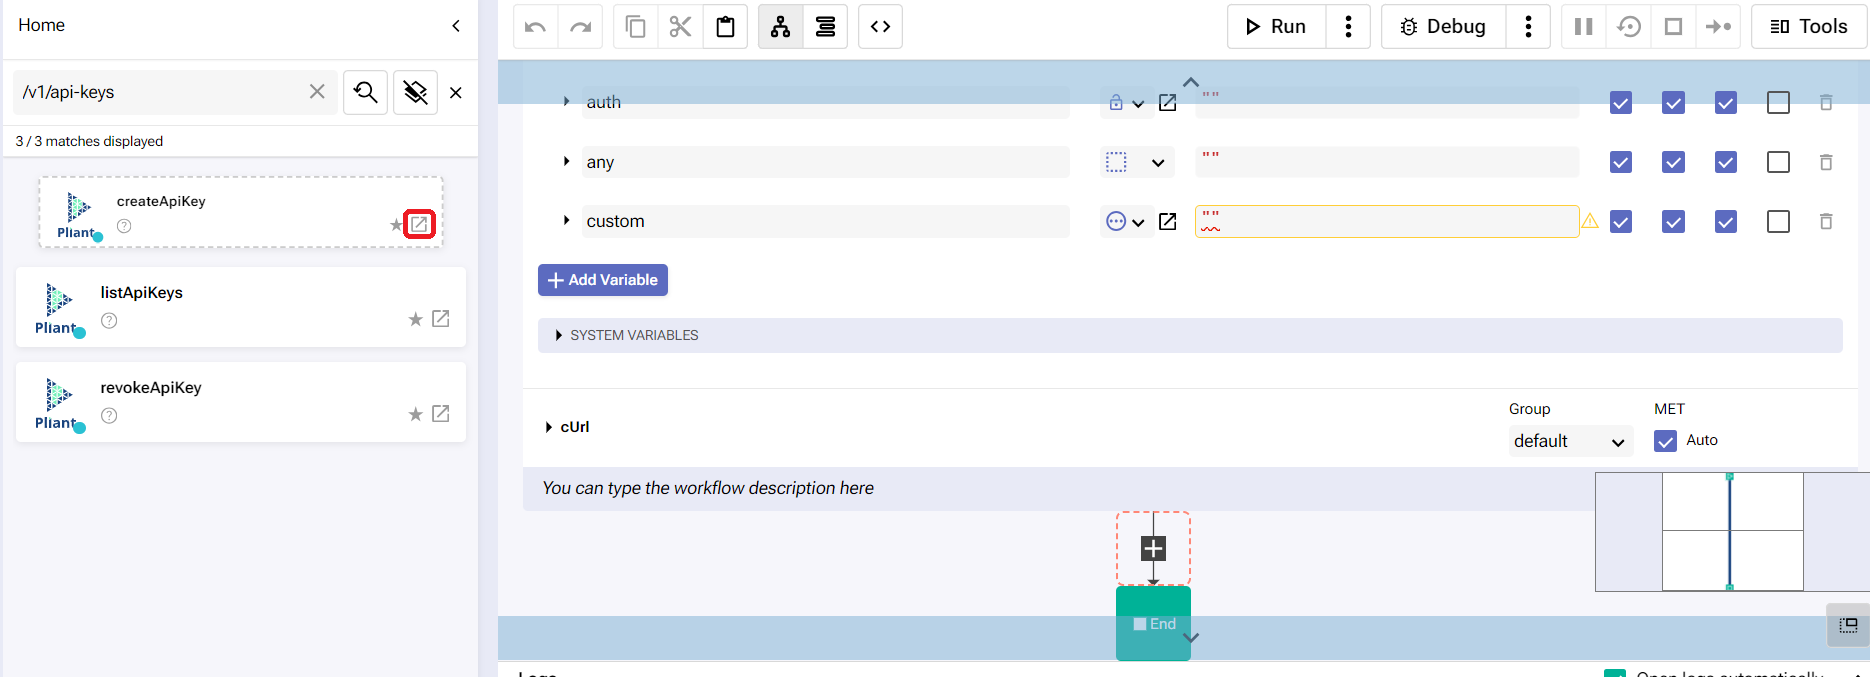
Locate | Takes you to the exact location of the block within the list of integrations. 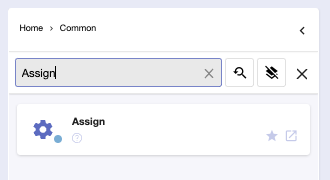 |

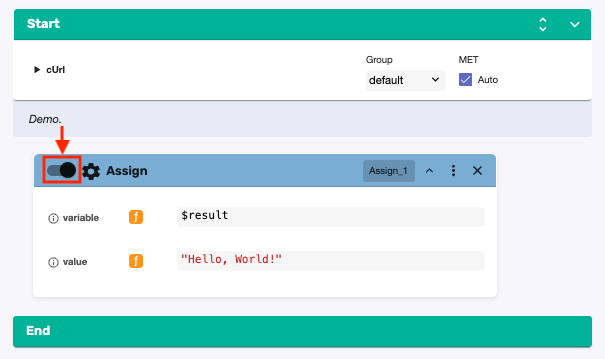
You can disable a block. If the block isn’t needed for now, disabling provides an easy way to isolate it without changing the workflow.
Lastly, you can collapse or expand a block using the downward arrow button.
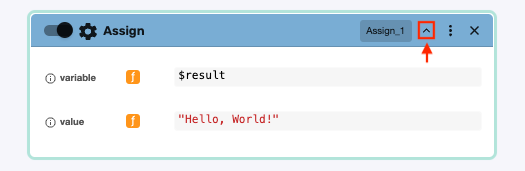
…and remove it using the X button.

Additional Features
Two switch buttons allow you to go back and forth between the flat and flow layout modes.
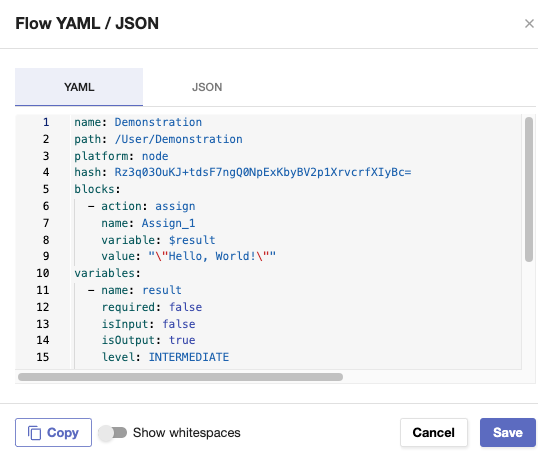
The entire workflow can be managed inside built-in YAML and JSON editors.
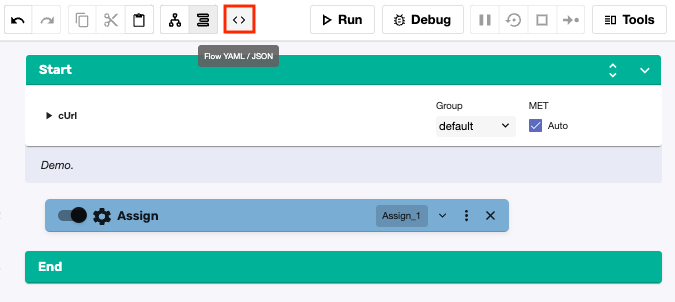
Clicking this button opens a window that contains two alternative representations of the workflow.
You can find editable YAML and JSON code that’s easy to read and edit. You can copy it instantly using the button at the bottom-left corner.
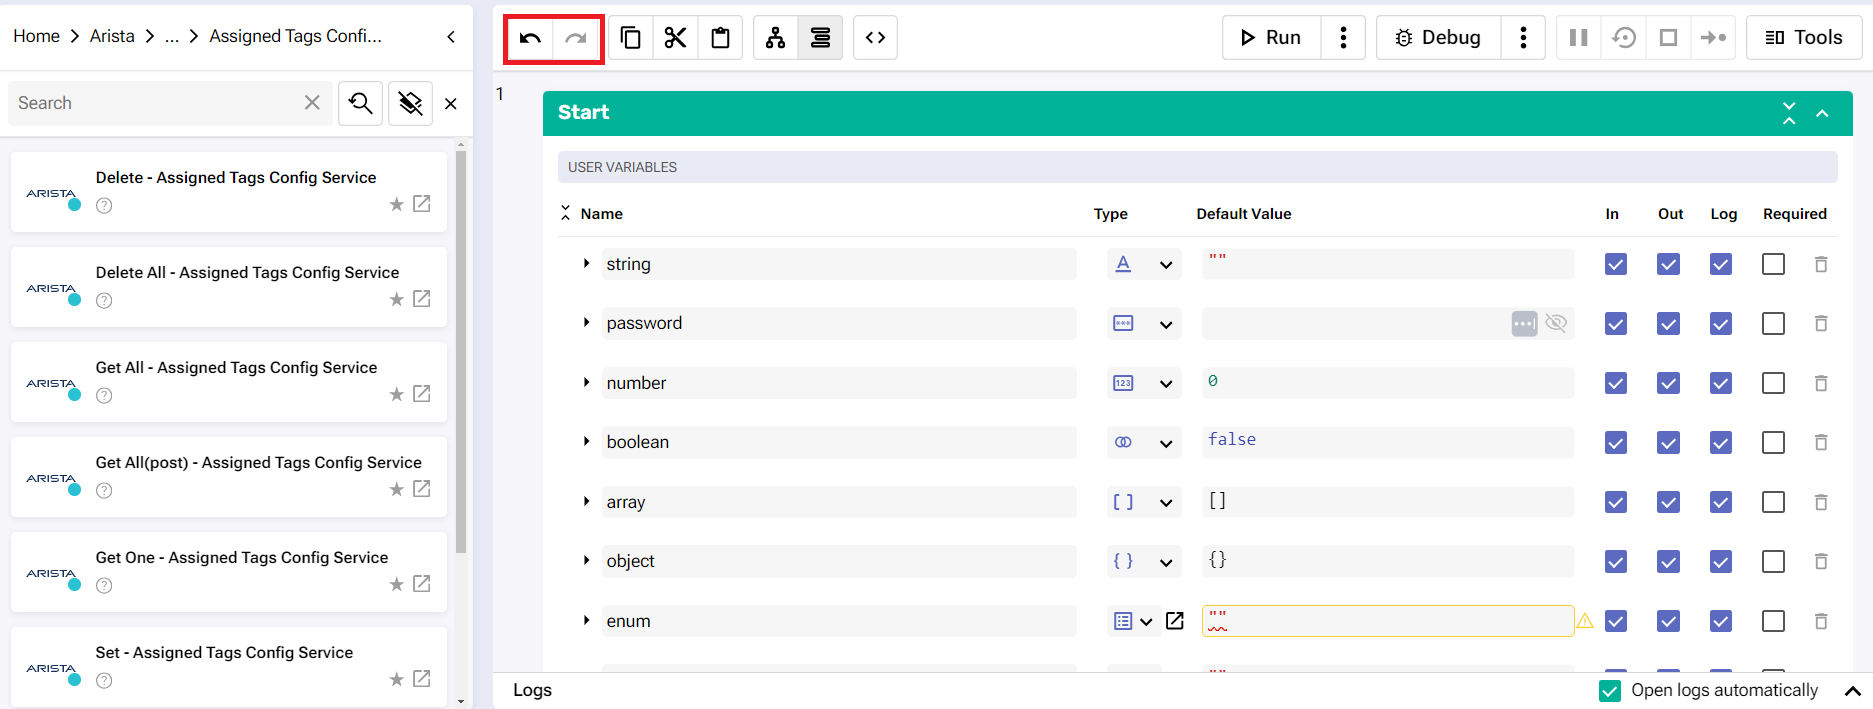
You can manually undo or redo any actions you perform in your workflows using the left and right arrow buttons.
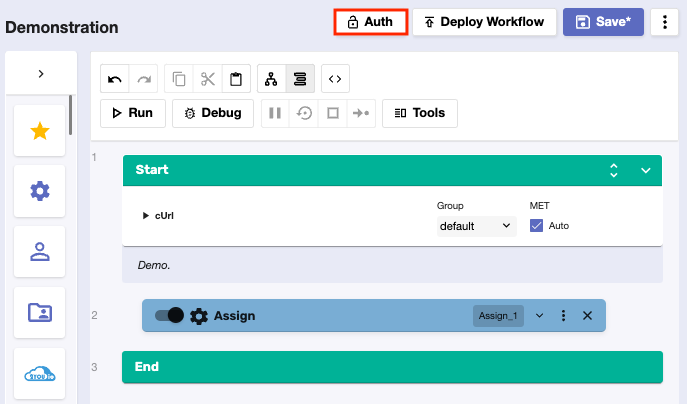
In the flat layout, all action blocks have line numbers, and each number represents the order of a block. “Start” comes first and “End” comes last.

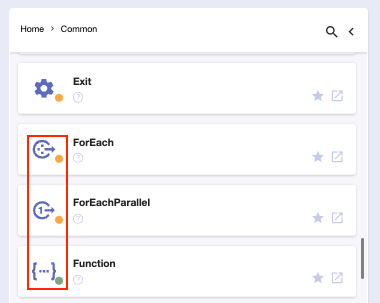
Most integrations and blocks are visualized by different icons and colors depending on what they do.
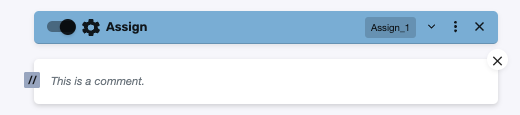
Custom comments can be added to blocks or at any point of the workflow. Place the mouse below a block and click the + button.
From the pop-up menu, select Add Comment and write your comment.

Click once outside the field to save the comment. It can be dragged, moved, relocated, edited, and removed just like a typical block.
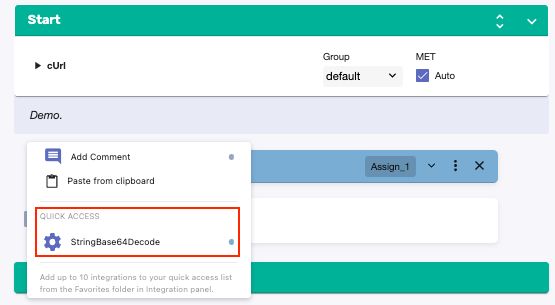
The same dropdown allows you to instantly add quick-access blocks from your Favorites folder.
You can see the name of the output variable(s) of some blocks at the bottom-left corner.

Authentications
You can quickly add authentication services for your workflow directly from the Editor.
To start, click the Auth button.
A separate window will open for adding a new authentication or choosing an existing one:
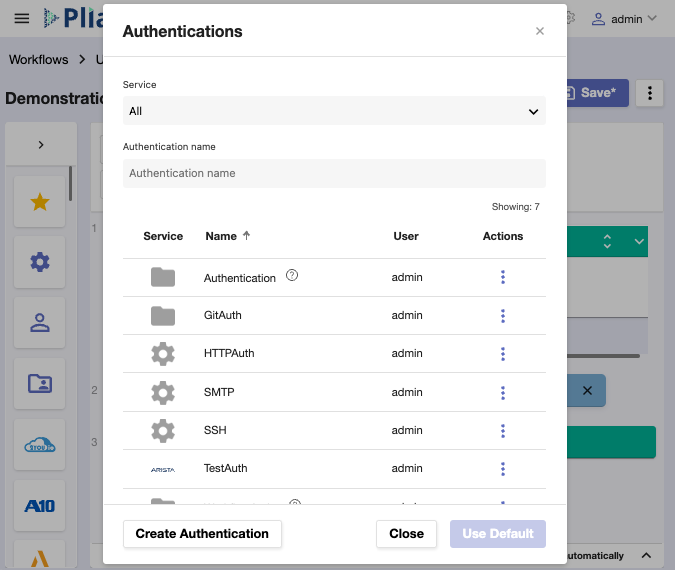
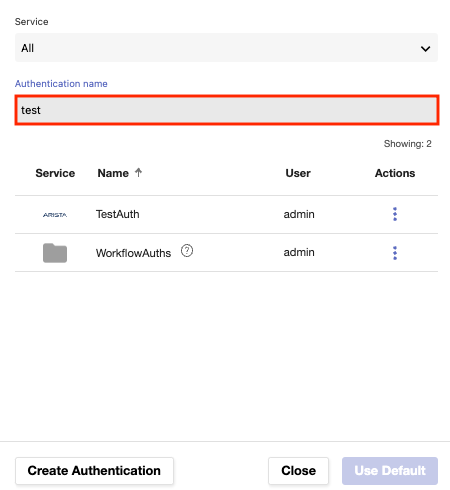
You can find an authentication service by typing its name in the search bar, or within the list below.
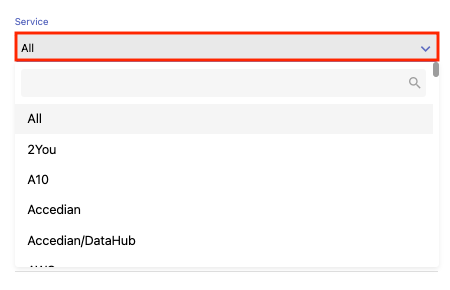
Results can also be filtered according to the specific authentication provider you select from the Service bar.
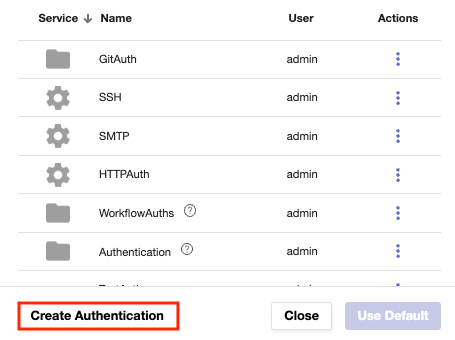
Existing authentications can be sorted by their service provider, name, or user who created them, and edited or deleted through the three-dot button.
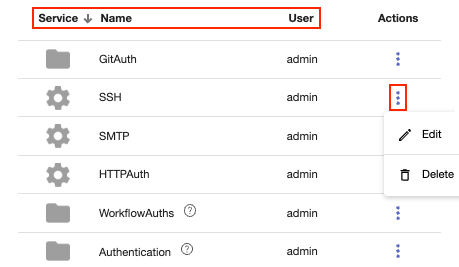
To see an authentication description, hover the mouse over the question-mark icon.

To create a new authentication directly from here, click the Create Authentication button.
In a separate section, you’ll have to fill in the following:

Name - the name of the authentication.
Description - an optional description for the authentication.
Service - the service or integration on which the authentication will be based.
Depending on the service, you’ll need to fill out some credentials, each of which can be made overridable for later changes.
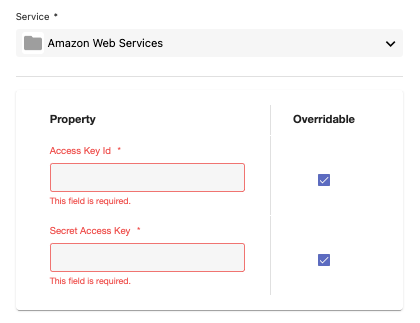
When you’re done, click Save.
Then, to apply the new authentication service for the workflow, select it from the list and click Use Default.

Later on, block fields that work with authentication services will be able to reveal all of your authentications for you to choose from.
Alternatively, you can create a new one directly from there instead.

It’s also possible to authenticate a variable on the level of the Start block.
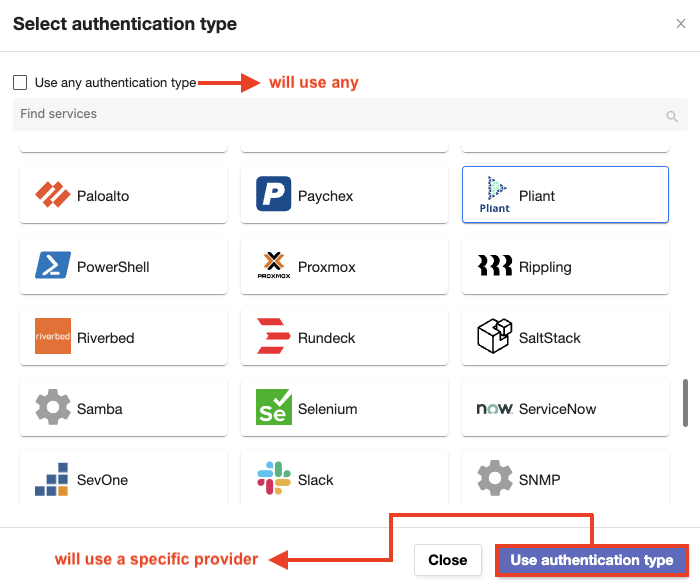
You need to select Authentication as the type first.

This will open a separate window where you can select a specific authentication type or opt for the “any” option.
As a result, references of the authenticated variable in other blocks will apply to its service provider accordingly.
Saving a Workflow
To save your workflow, click the Save button.
This preserves your progress up until this point and allows you to return to the workflow later.
Running a workflow
Workflows take different times to execute depending on their complexity.
There’s a standard limit of 3600 seconds, or 1 hour, after which a workflow will still be able to finish running but without any authentication services within its blocks.
To execute your workflow, click the Run button. The workflow will be auto-saved.
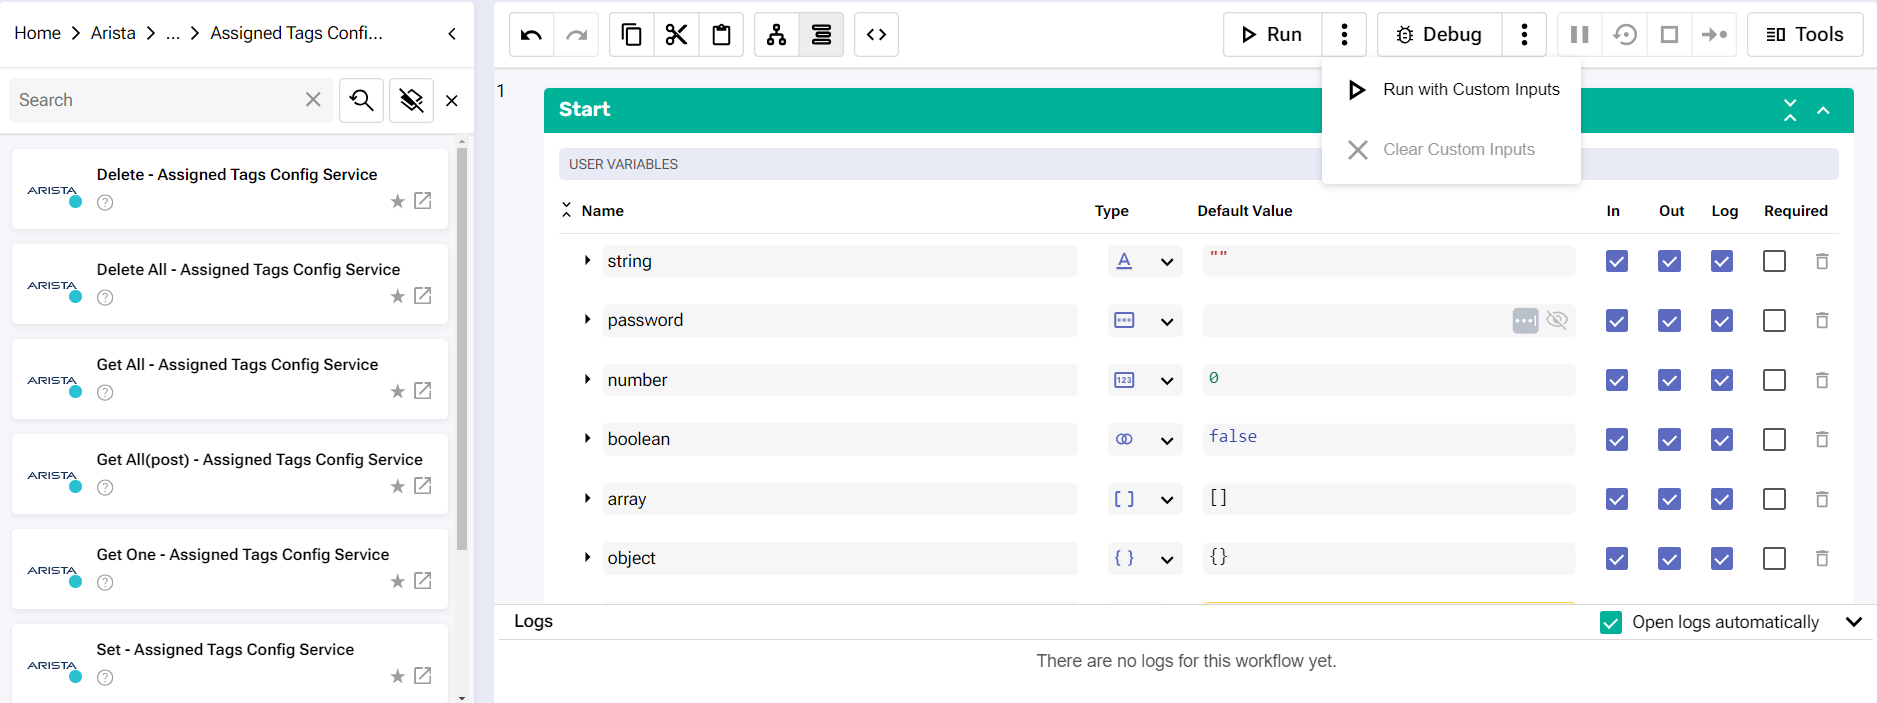
By clicking on the three dots menu you can expand the alternative run workflow options – to Run with Custom Inputs, or Clear Custom Inputs that have already been entered. Clicking on the Run with Custom Inputs will open the Run Workflow screen.
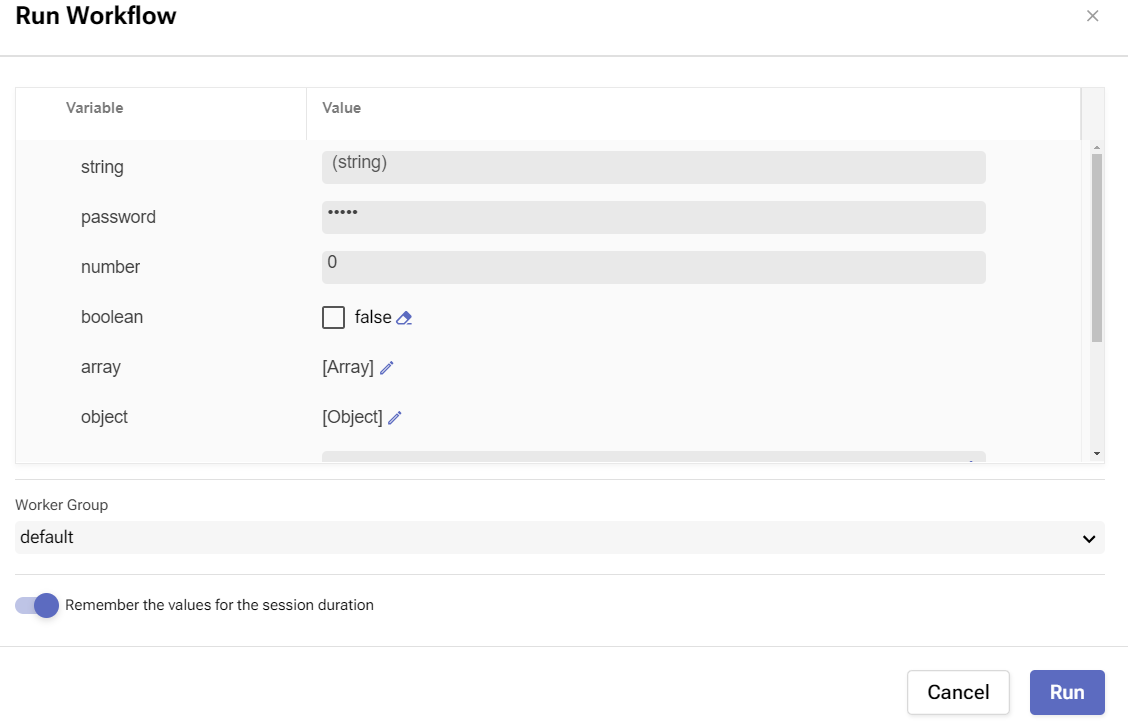
In the Run Workflow screen, you can visualize all Input variables in the workflow blocks. By editing these parameters you can create a custom execution run. You may optionally toggle on/off the Remember the values for the session duration option to save the input variables during the session runtime. Click on Cancel to exit from the screen, or Run to start the workflow execution.
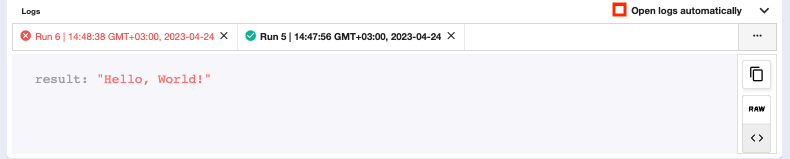
You’ll notice the Logs section automatically expanding at the bottom of the screen. This is where logs for the workflow are generated.
If everything’s alright, you’ll get a “success” message and the log will be in green.

If there's a problem, you’ll get an “error” message, and the log will be in red, meaning that the workflow has failed to execute.

You can preview or close successful and failed executions by navigating through the tabs or clicking the three-dot button.

Log execution data is copied using the folder button.
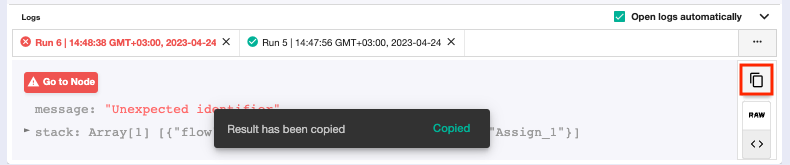
The Raw and Formatted versions of the logs can also be made available using the buttons.

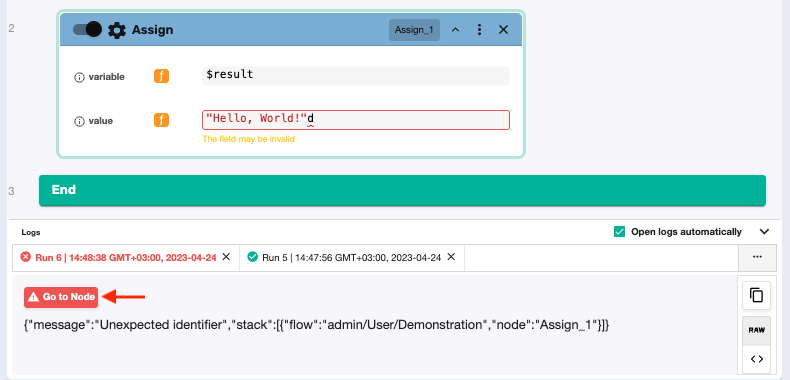
The Go to Node button takes you to the block in which an error was made.
To disable the automatic opening of logs, tick off the Open logs automatically check box.
Every execution is reflected in the Dashboard and Logs in real-time.
Deploying a Workflow
To take your executions' security into your own hands, you can take advantage of the deployment capabilities of the Editor. Unlike regular workflows, deployed workflows are considered active and harder to access by regular users, unless such setting is explicitly enabled.
Deployment relies on API Gateway technology, which is centered around APIs, stages, and endpoints.
For more information, please check out Deploy a workflow using API Gateway.
To initiate the process from within the Editor, save your progress and click the Deploy Workflow button.
You’ll be taken to a separate Deploy Workflow page. Here, you’ll need to link the flow to an API, stage, and endpoint.
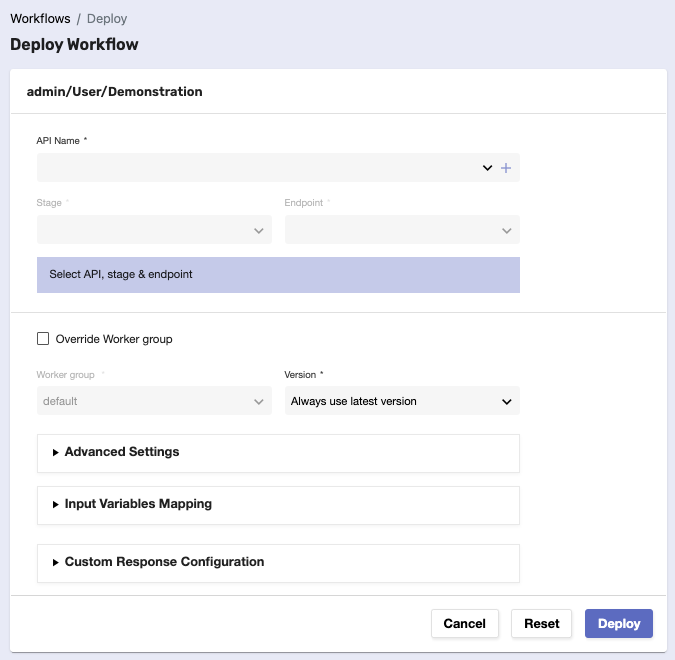
When done, click Deploy. You’ll be taken back to the Editor where a “success” message should appear.
Deployed workflows have a green status in the Active column on the Workflows tab.
Tools (Object Editor and Debugger)
There are two integrated workflow management tools available at your disposal. Their capabilities make them inseparable components of both the flow and sequence Editor.
You can find them within a side menu which is triggered by the Tools button. When clicked, the button expands this menu with one tab for the Object Editor and another for the Debugger.
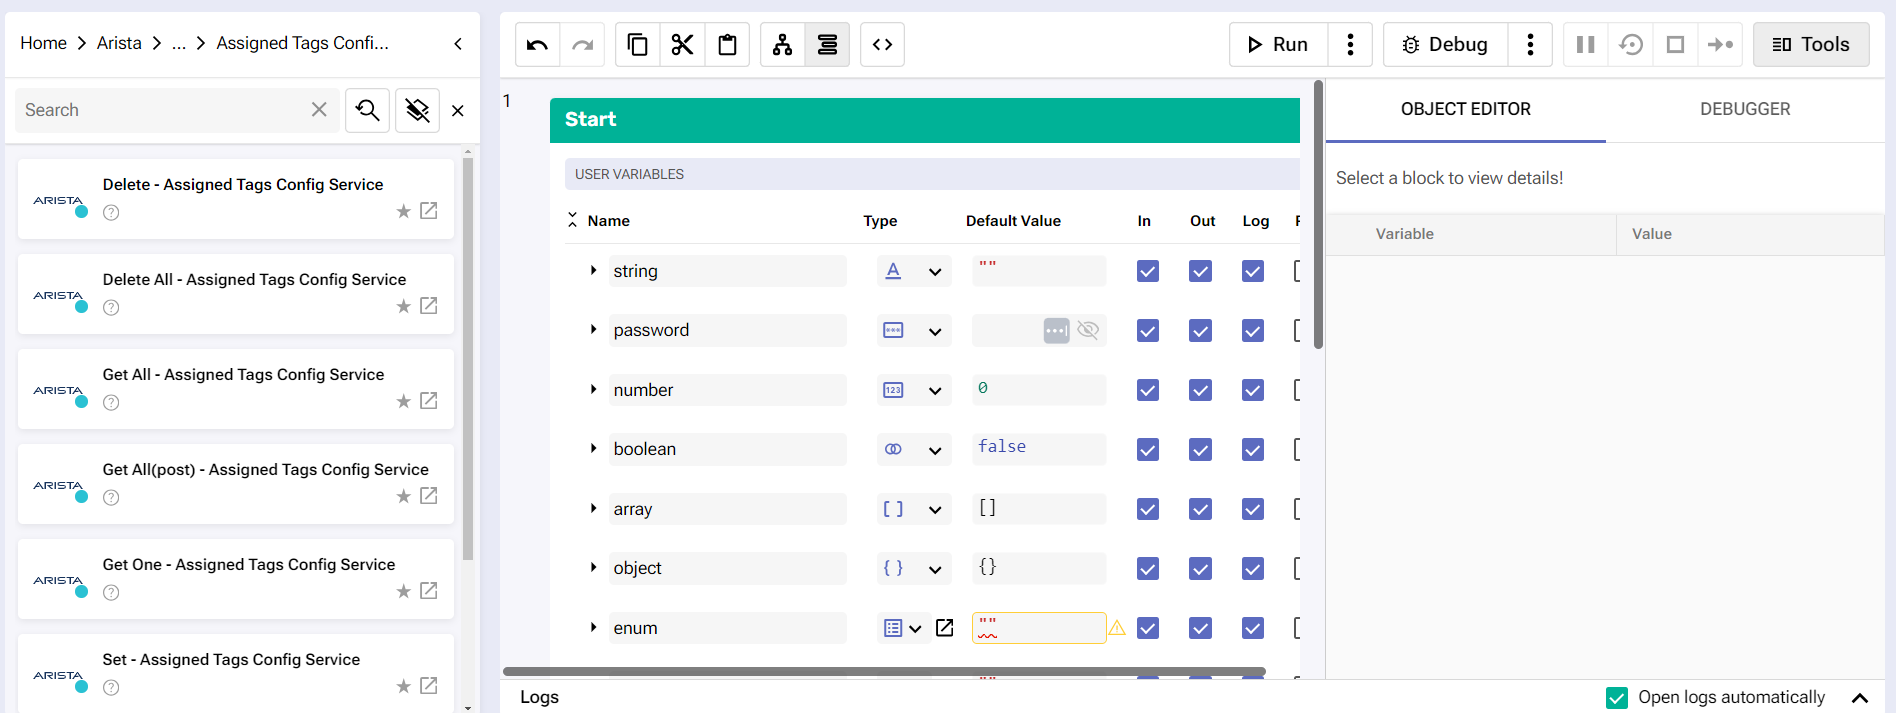
Object Editor
To have more flexibility when building workflows, you can take advantage of the Object Editor.
This is a compact and more programming-oriented version of the flow, where you can manipulate all of your blocks' variables using the JSON editor.
Debugger
If you need to perform a check and/or edit a workflow as it is executing, you can debug it.
This feature proves extremely beneficial for identifying errors and offering quick solutions, all the while preserving your progress.
How to debug
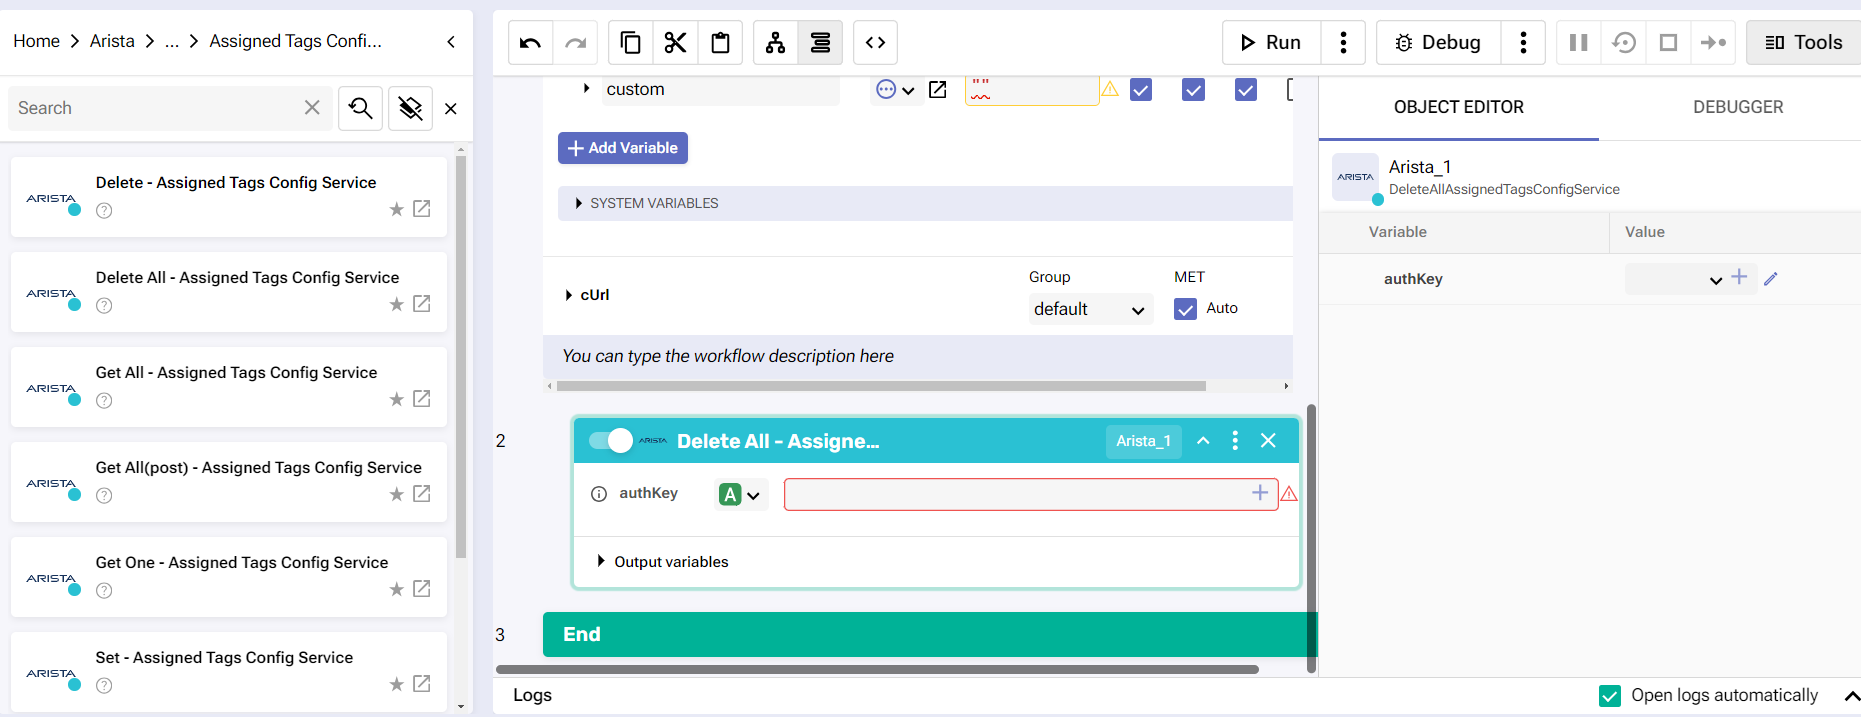
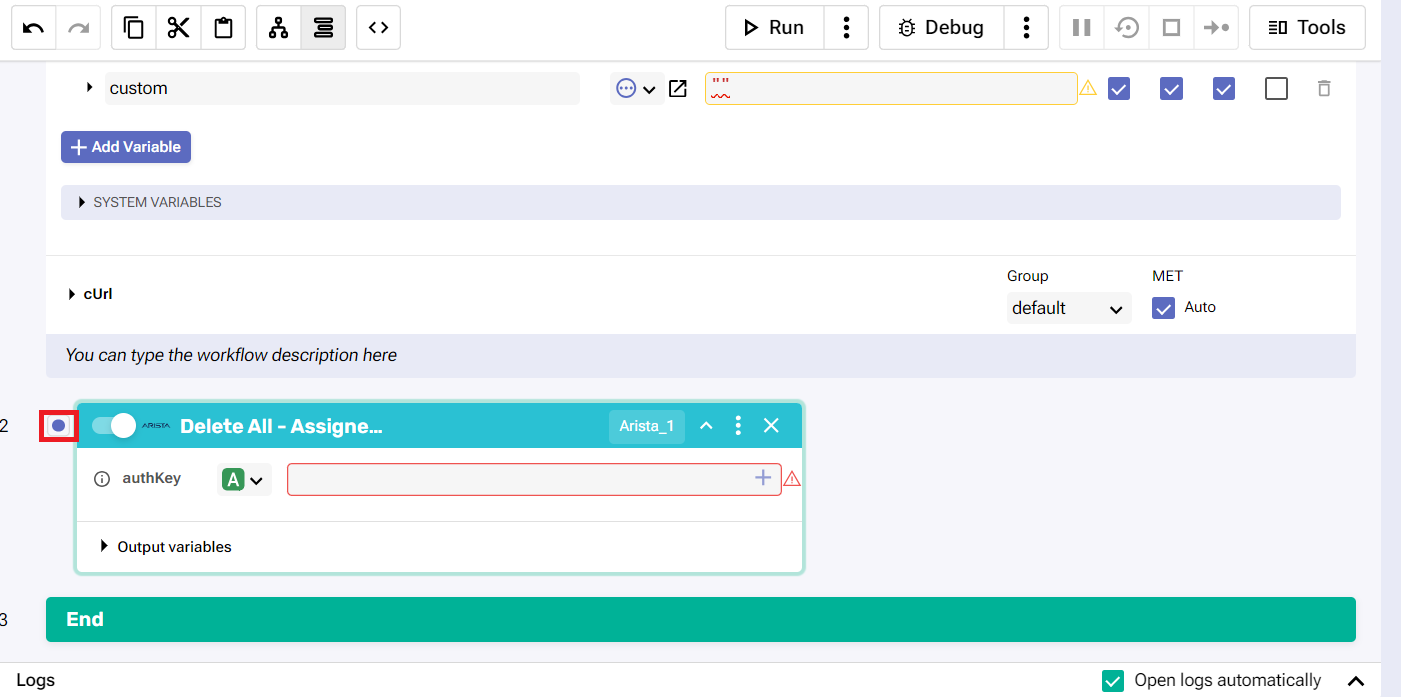
On the left of each block, there’s a square with a blue circle that turns red when clicked.
Make sure to push it for the block(s) (breakpoint) you want the execution to stop at.
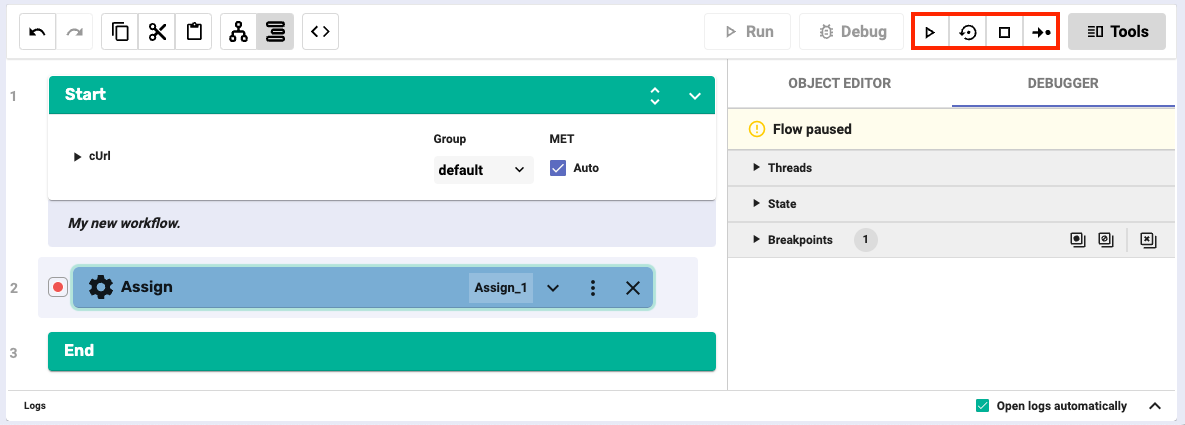
Then, click the Debug button.
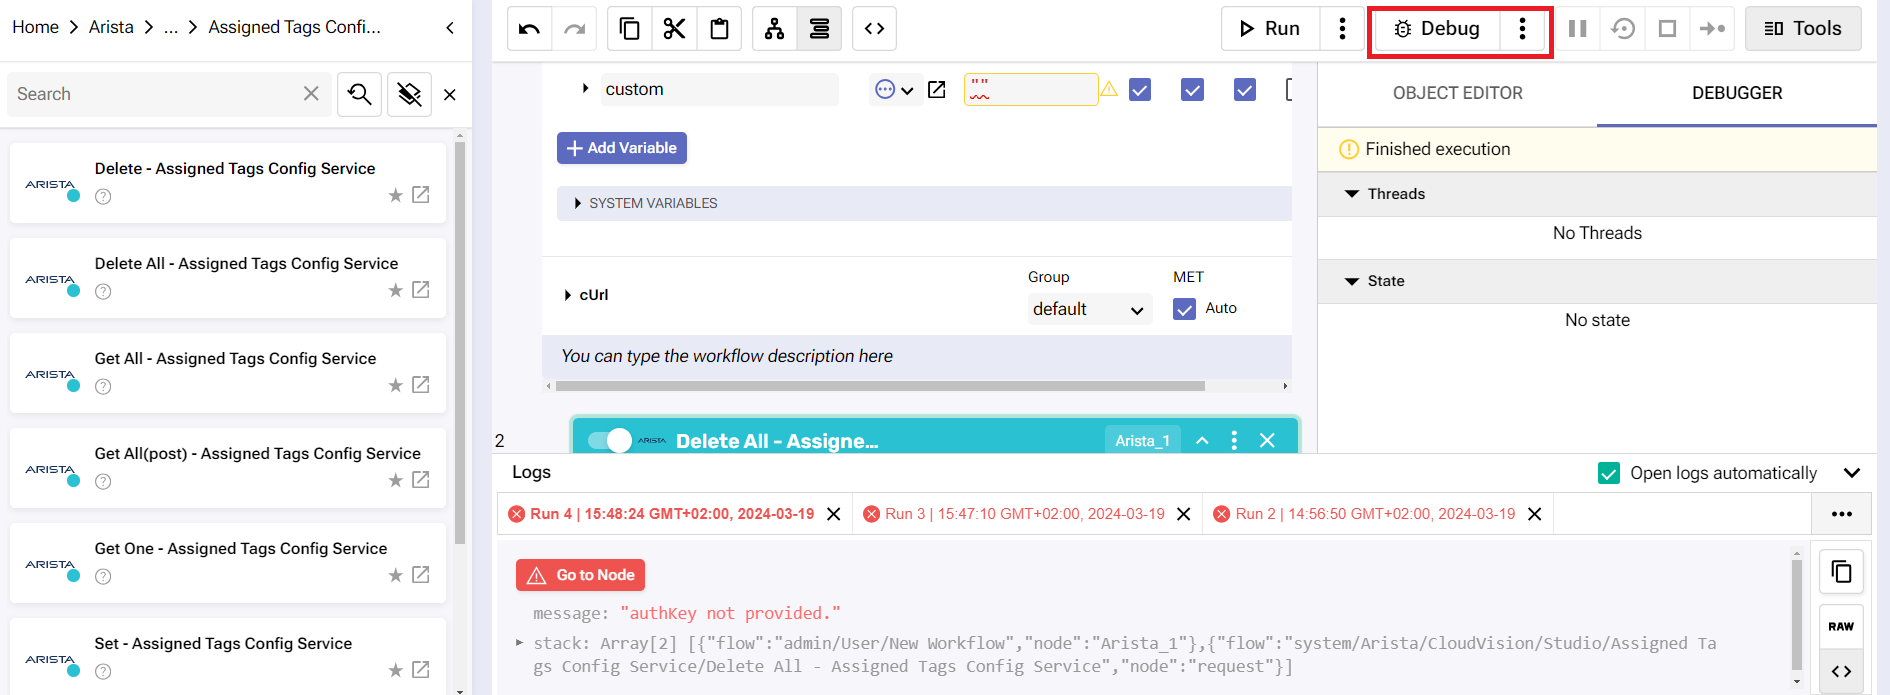
A normal execution will begin but it will be paused so that you can see the threads, state, and breakpoints of the workflow.
Changes can be made to the variables and values if necessary, just like in the Object Editor.
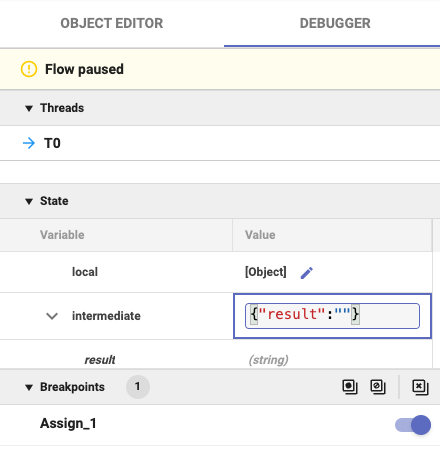
You can also manage your breakpoints in bulk (enable, disable, or clear) with the help of three buttons:
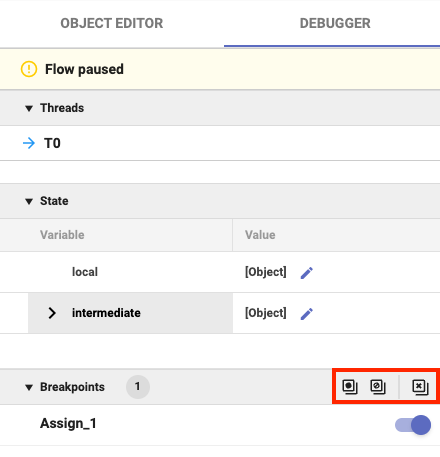
Enable all - turns on all breakpoints.
Disable all - turns off all breakpoints.
Clear all - delete all breakpoints for the current workflow.
To “unpause” the workflow, you can perform one of four debugger commands: Resume (F9), Start Over (Shift+F10), Stop (F10), and Step (F8).