Split
Overview
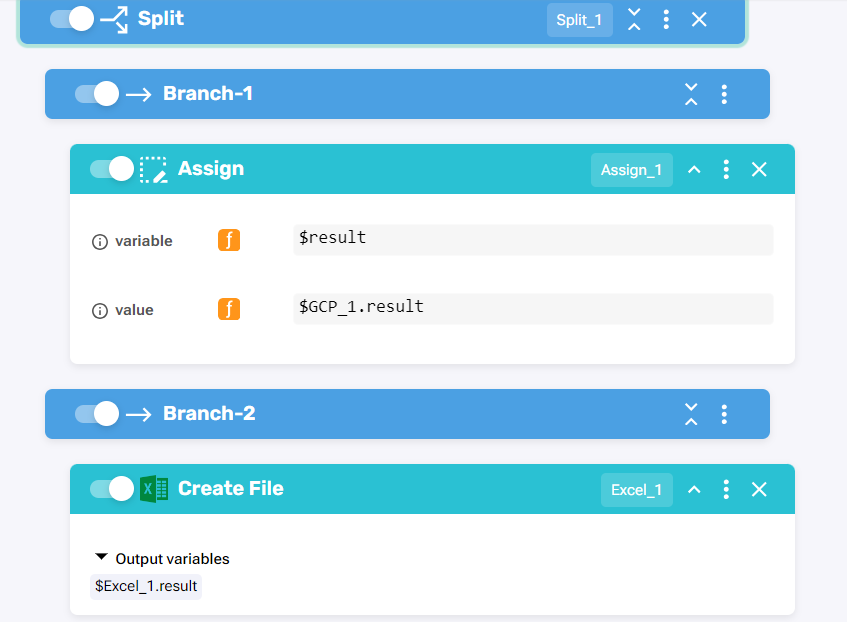
With the Split block, you can orchestrate blocks into branches for parallel execution. You can split the flow into as many branches as needed.
Procedure
Access the Split block from the Common folder in the workflow editor and drop it to the desired location.
This will automatically create two branches of the workflow at the Split location. You can then place any desired block in either place. If more than three branches are created per Split section, you can delete one of them.

You can optionally create additional branches by clicking on the Branch button when in the Flow layout, or the Add Branch button in the Flat layout.
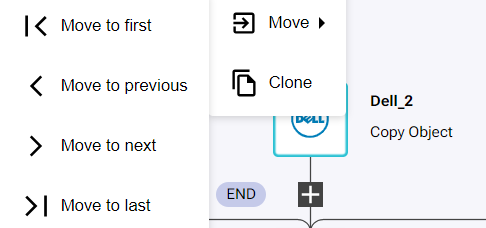
Branches can be reordered by accessing the Actions menu and selecting Move, the available options are to Move to first, Move to previous, Move to next, Move to last.
Behavior
Once you have created a Split block in the workflow editor, the next block will begin executing only when all prior split branches have run. In complex structures, this can result in blocks that are in a "waiting" state, dependent on the execution of Split branches placed before them in the orchestrated layout.