Create a Job
Overview
When you create a job, workflows will be executed automatically.
Here, you can schedule when certain flows will be run on the system, and on which worker groups. This can be done at any interval and at any time.
To avoid issues with time zones and daylight-saving times, jobs are scheduled in UTC.
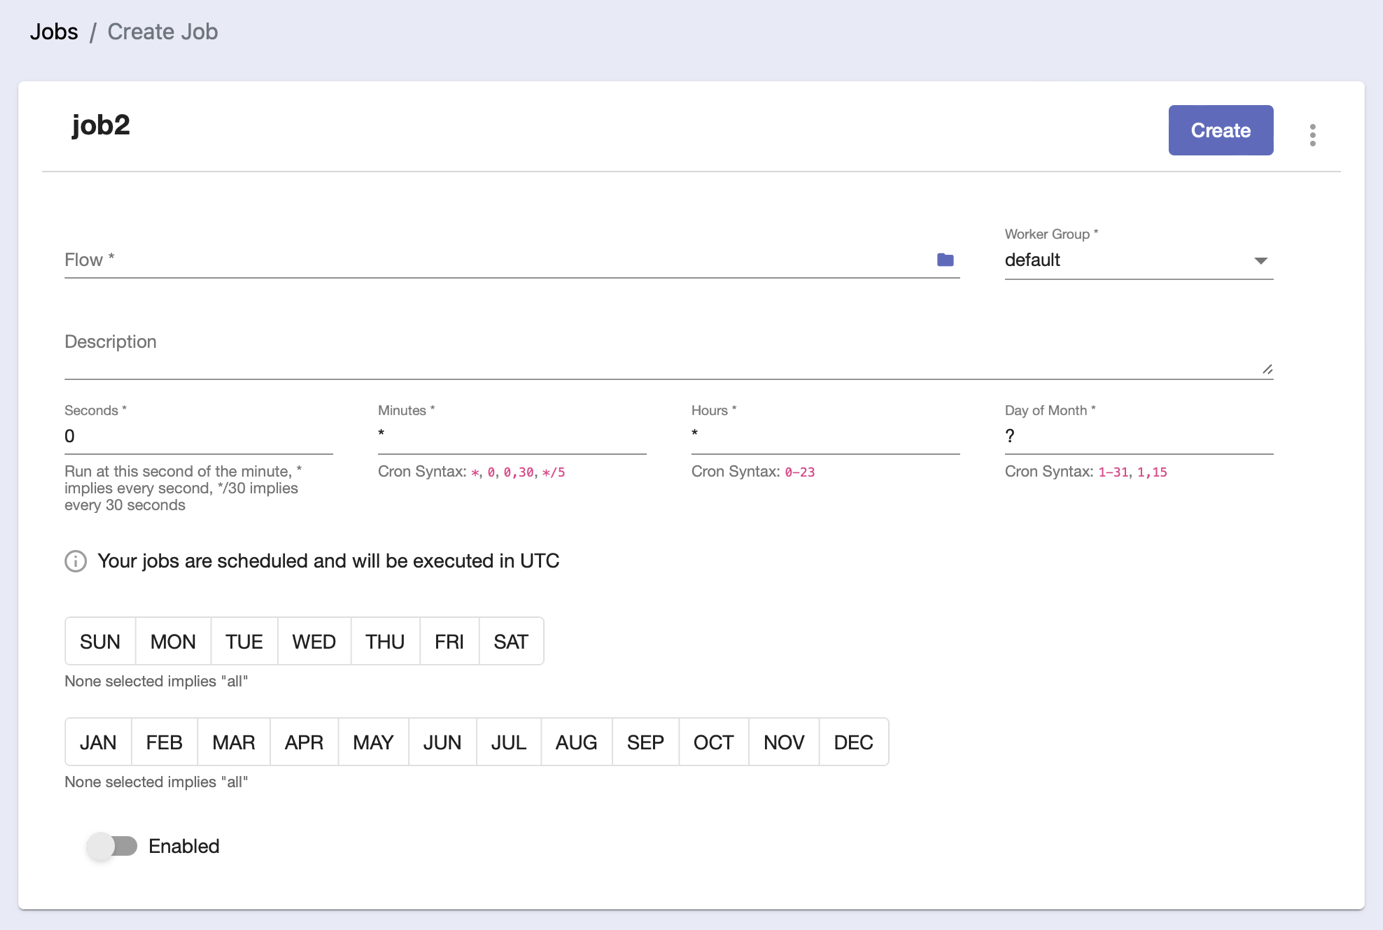
Job Editor
Before you begin
From the Jobs tab, click on an existing job row or create a new job with the + Create button.
Make sure you have permission to schedule a workflow.
Scheduling a job
Scheduling can be done using cron syntax which makes use of the following special characters:
Character | Meaning |
|---|---|
* | any value |
, | value list separator |
- | range of values |
/ | step values |
There are four fields that can be used for scheduling a job: seconds, minutes, hours, and day of the month.
Each field enables you to customize the way in which you schedule jobs:
Parameter | Accepted Values | Usage | Example | Explanation of Example |
|---|---|---|---|---|
Seconds | 0-59 | This is used to specify the second(s) in the timeframe during which you want to run a particular job. |  This will run the job every 30 seconds. | For this condition to be met, '*/30' is placed in the Seconds field, '*' in the Minutes field, '*' in the Hours field, and '*' in the Day of Month field. |
Minutes | 0-59 | This is used to specify the minute(s) in the timeframe during which you want to run a particular job. | 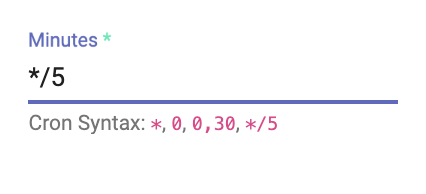 This will run the job every 5 minutes. | For this condition to be met, ‘0' is placed in the Seconds field, '*/5’ in the Minutes field, '*' in the Hours field and '*' in the Day of Month field. |
Hours | 0-23 | This is used to specify the hour(s) in the timeframe during which you want to run a particular job. | 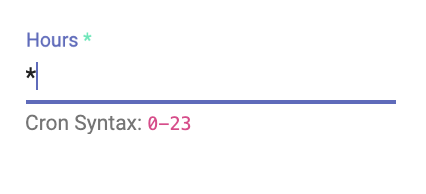 This will run the job every hour. | For this condition to be met, '0' is placed in the Seconds field, '0' in the Minutes field, '*' in the Hours field and '*' in the Day of Month field. |
Day of Month | 0-31 | This is used to specify the day(s) of the month in the timeframe on which you want to run a particular job. | 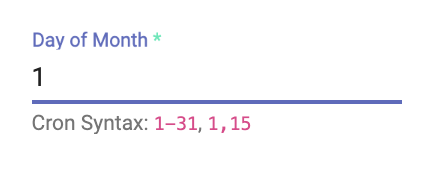 This will run the job every 1st of the month. | For this condition to be met, '0' is placed in the Seconds, Minutes, and Hours fields, and '1' in the Day of Month field. |
Under the fields, you can see a selector for days of the week and months of the year.
These are additional rules you can set regarding when the job will run. If you leave them blank, the scheduler will take this as every day and every month, respectively.
Keep in mind that all jobs are scheduled in UTC time by default.
Procedure
Once you’ve opened the Job Editor, you can rename the job with the help of the three-dot button next to Create.

2. Select the flow associated with this job (the one you want to schedule) from the list of workflows. The list is opened once you click the blue folder icon.
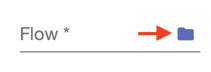
Flows are selected from a separate window.

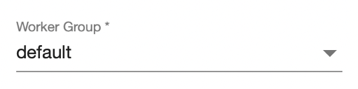
3. Select a worker group that will perform the automated operations.
4. Optionally give the job a description.

5. Fill in the fields for Seconds, Minutes, Hours, and Day of Month for when the workflow should run (as demonstrated above).

6. Activate the job by toggling the Enabled slider.

7. Click the Create button at the top-right corner of the screen.

The job will be saved and you will be returned to the list of jobs.