Overview
The Dashboard Overview is where you’re taken right after you log into the platform.
Before you begin
To access the Overview from somewhere else, click Dashboard and then Overview.
A quicker way is through the logo at the upper-left corner.
Features
The Dashboard Overview offers you the ability to perform several actions on the spot.
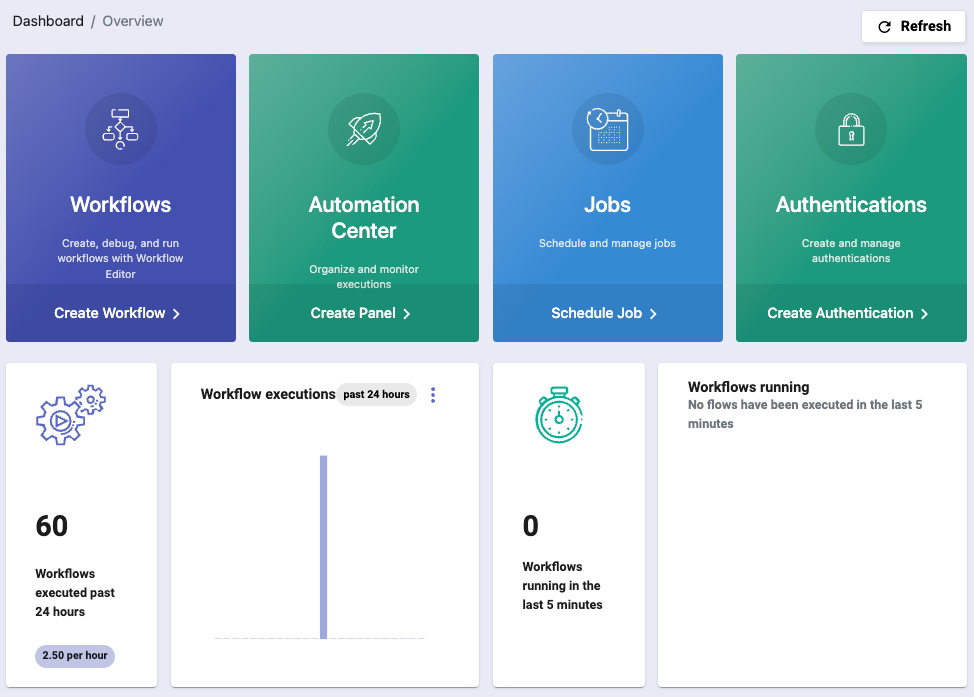
1. Access the Workflows page and build a workflow from scratch using the Workflow Editor.
Click anywhere on the Workflows square to go to the main page.
Click the Create Workflow button to add and build a new flow inside the Editor.
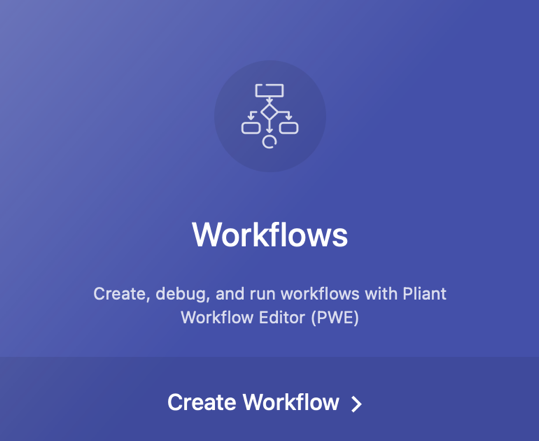
2. Access the Automation Center to make your workflow execution easier and more organized than ever.
Click anywhere on the Automation Center square to go to the main page.
Click the Create Panel button to start building a panel.
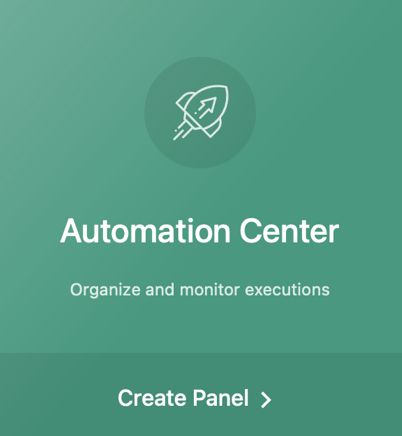
3. Access the Jobs page and schedule jobs.
Click anywhere on the Jobs square to go to the main page.
Click the Schedule Job button to create and schedule a new job.
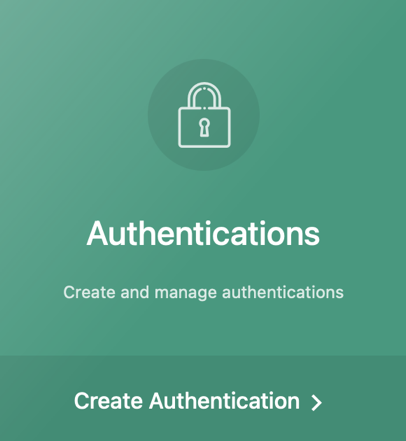
4. Access the Authentications page and create authentications.
Click anywhere on the Authentications square to go to the main page.
Click the Create Authentication button to add a new authentication.
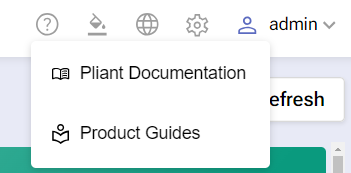
By clicking on the question mark icon, you can access the platform Documentation portal via the button or access the Product Features Guides tool. They are an easy way to get started by introducing the most important platform features. They are shown the first time when a new user logs into the platform or when they haven’t seen them yet.
The Dashboard Overview also provides you with a real-time view of the following:
How many flows have been executed in the last 24 hours, including per hour and on specific hours of the day.

How many flows have been running in the last 5 minutes and how many have been executed.

You can export the charts in different file formats by clicking the three-dot button.

The provided information is automatically updated every 10 seconds, but you can always use the Refresh button for manual update.

Navigation
You can proceed to interact with the platform by visiting:
ROI - where you can generate detailed reports about your workflows.
Workflows - where you can build, edit, import, export, deploy and execute workflows.
Authentications - where you can create and configure authentications.
APIs - where you can create and manage your APIs, as well as access the Workflow Deployments module.
Logs - where you can review past executed workflows.
Jobs - where you can create programs for scheduled workflow execution.
Automation Center - where you can publish and monitor your workflow executions through panels and tiles.
Global Settings - containing links to:
o System Configuration - which allows you to change the platform’s color theme and configure different authentication-related settings.
o Users Management - where you can manage users who may log into their Pliant instance.
o Roles Management - where you define permissions that can be assigned to users.
o Integrations - where you upload or delete integrations in or out of the system.
o Worker Groups - which deals with worker group creation and management.
o About Pliant - which provides the versions of the different components, licensing information, and the ability to update the platform's license.