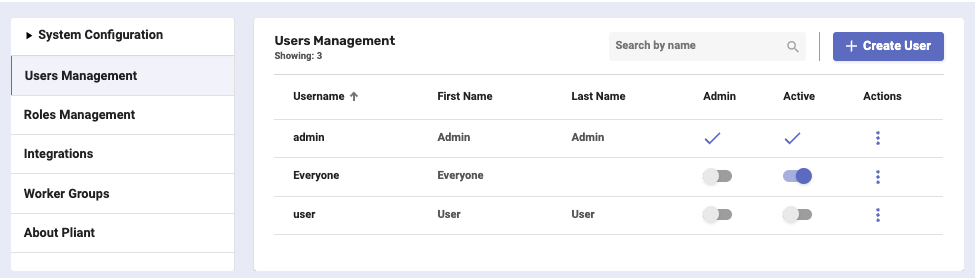
Users Management
Overview
On this page, you can manage user profiles. It’s how you add new users to the system and edit their data when necessary.
Before you begin
From your Platform instance, click Global Settings and select Users Management.
Make sure you have permission to add and make changes to users on the platform.
Features
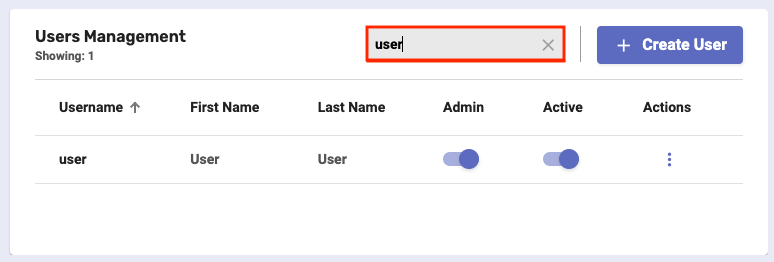
Locate a user or multiple users with the help of the Search bar.
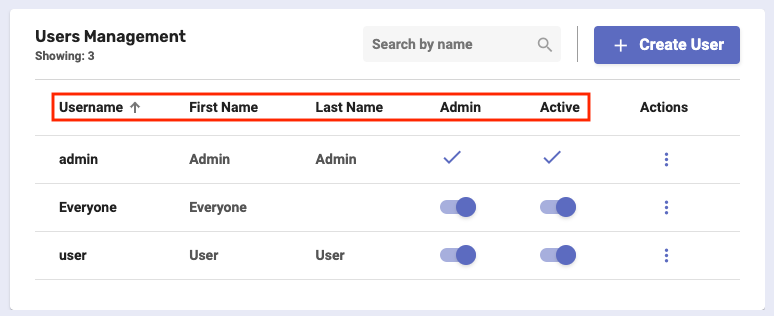
Sort users by their username, first name, last name, whether they are admin, and whether they are active on the system. Click a column title to apply the sorting.
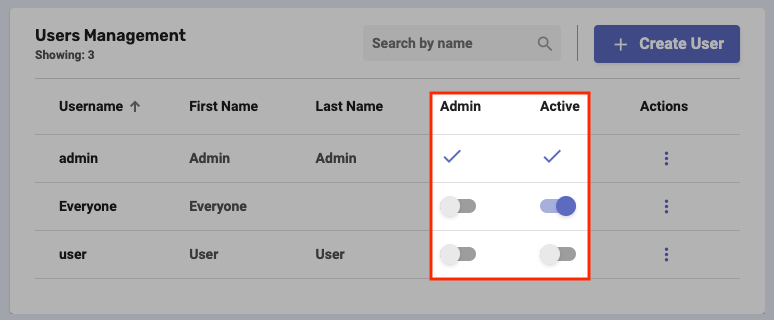
Grant users administrator rights by enabling the Admin slider or make them active/inactive on the platform with the Active slider.
The main admin user has these settings turned on by default.
User Creation
You can add new users on the platform in just a few steps.
Click Create User at the upper-right corner of the page.

You need to fill in the mandatory fields on the Create User screen.
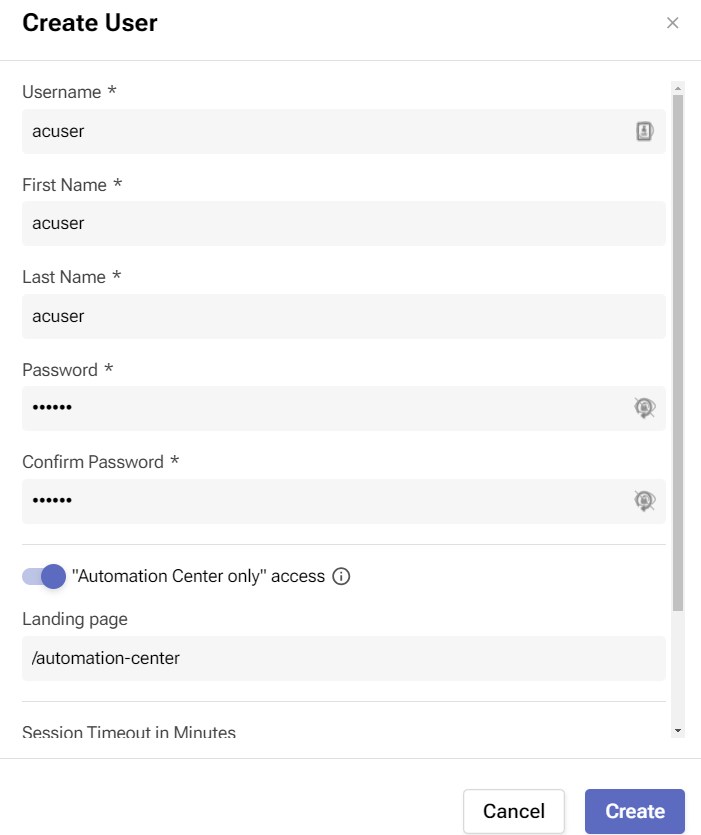
Username - the unique username of the user used for logging into the platform; once defined, it cannot be changed.
First Name - The first (formal) name of the user
Last Name - The last (formal) name of the user
Landing page - default page the user will be taken to after logging in; set by its relative URL path in respect to the Platform installation.
Optional field. If left blank, the new user will see the Dashboard by default.Password - the unique password of the user used for logging into the platform
Confirm Password - a confirmation of the password
“Automation Center only” access – This toggle creates Automation Center access-only user accounts. When enabled, this will set this condition upon the user and the platform. Automation Center-only users can execute workflows and view results and logs but have no other access to the platform.
Landing Page – This field allows you to designate a custom landing page that is shown when the Automation Center only user logs in.
Session Timeout - determines how many minutes the user can stay logged in without doing anything before being automatically logged out
Active - a slider that makes the user active or inactive on the platform; this is not possible for admin users, which are active by default.
2. Click Create to finish creating the user.
User actions
There are three actions you can perform on any user. Click the three-dot button in the Actions column.

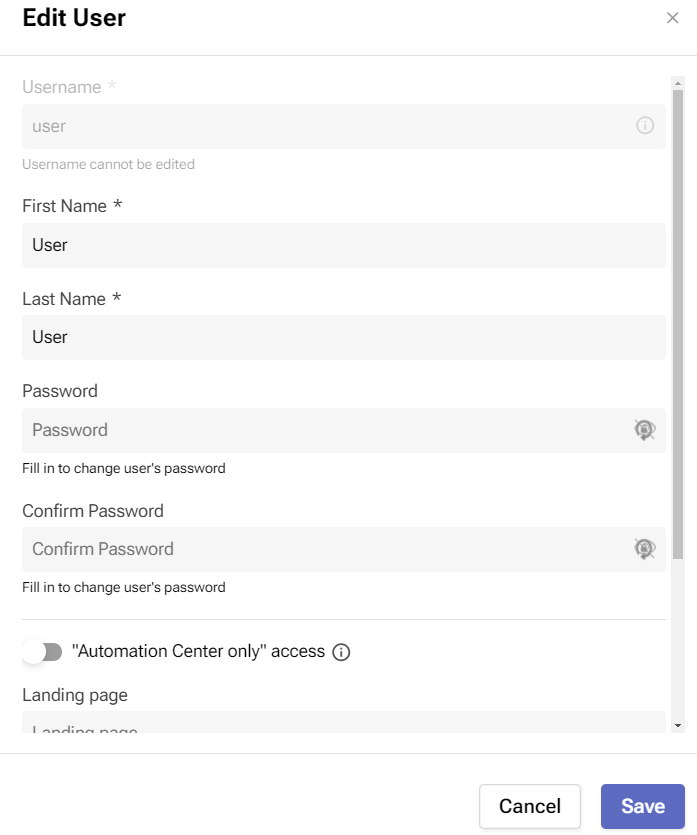
Edit User - This allows you to change the user’s details (except the username) through the Edit window.
Another way to open it is by clicking on the user’s row. Once you’re done, hit Save.
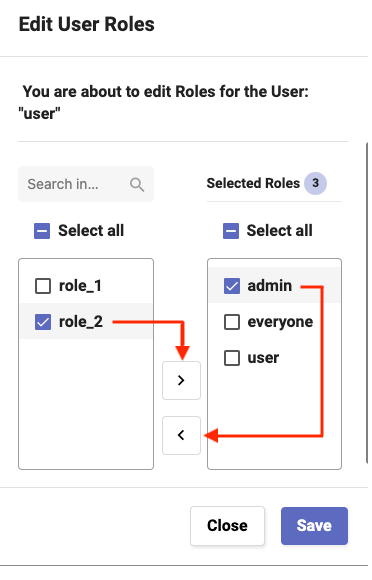
Edit User Roles - This launches a window where you can define which roles (permissions) the user will be granted.
For example, assigning the “admin” role to a user essentially allows him to have full uninterrupted access to the platform.
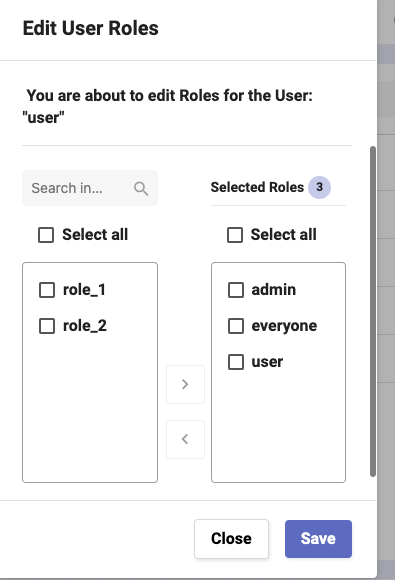
To link a role to the user, select its check box on the left and click the right arrow.
Inversely, to remove a role, select its check box on the right and click the left arrow.
Don’t forget to hit Save to apply your changes.
Delete - This removes the user from the system and will ask for confirmation first.
