Authentication Fast Login
Overview
Standard authentication procedures don’t begin their work until users have manually added a service on the platform. This includes selecting it from a list, providing its credentials and successfully confirming it. Although different sensitive data may be required for each integration, the same steps apply to every authentication’s creation.
To speed up the process of accessing and using workflows, the Open Authorization (OAuth) standard presents a convenient authorization alternative. It’s widely used as a delegated framework for REST/APIs, enabling apps to obtain limited access to a user's data without giving away that user's password.
By configuring it on Pliant, you essentially allow an external provider such as Google, Citrix or Hubspot to take care of how your users interact with their workflows.
All you need to do is a one-time setup per supported provider.
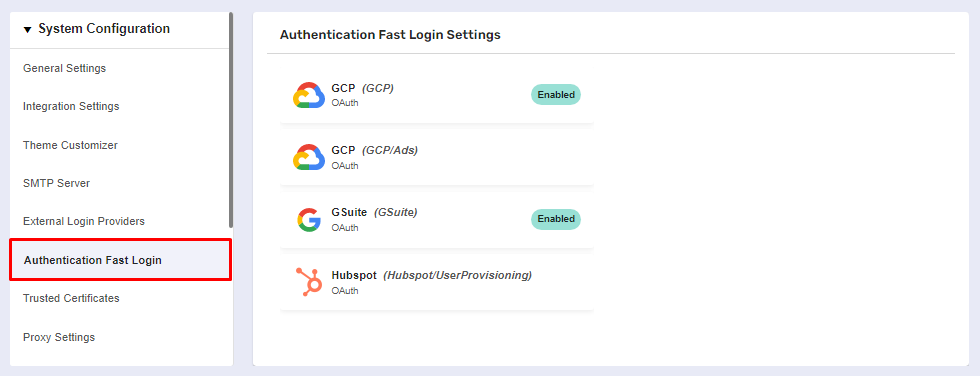
The Authentication Fast Login page
Before you begin
Navigate to Global Settings >> System Configuration >> Authentication Fast Login.
You must have admin permissions and authentication services that support fast login authentication.
Hostname Setup
You need to set the hostname for the Pliant installation as a Kubernetes environment variable in the pliant-api deployment. All Pliant-based URLs used for SAML authentication are generated from the HOST_URL variable. If you are using a Pliant hosted instance, please contact Pliant Support (support@pliant.io) to perform this step. Otherwise, you will need to have access to a console that can run kubectl commands for your Pliant instance (Example process shown in BASH shell on Linux).
Replace “
instance.domain.io” in line 1 with the actual fully qualified domain name or IP address
host_fqdn=instance.domain.com
2. and run the following command from a Pliant host node:
entity_id=${host_fqdn}-spa
kubectl set env deployment/pliant-api -e HOST_URL=https://${host_fqdn} -e SECURITY_SAML_SP_ENTITYID=${entity_id}
Procedure
You need to choose an authentication provider from the list of supported integrations to configure its settings for work with OAuth.
Upon clicking, a separate panel will automatically expand to the right of the provider.
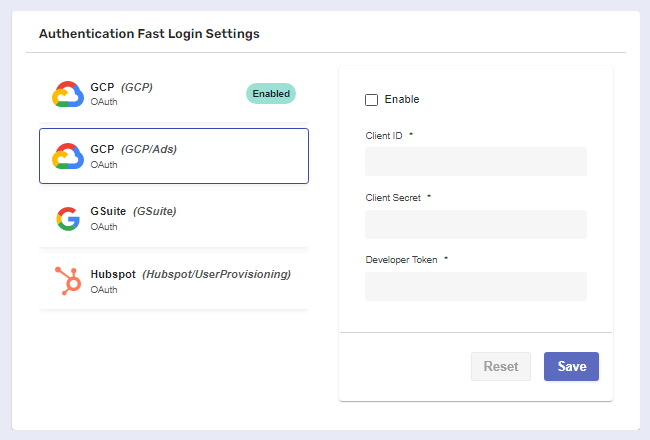
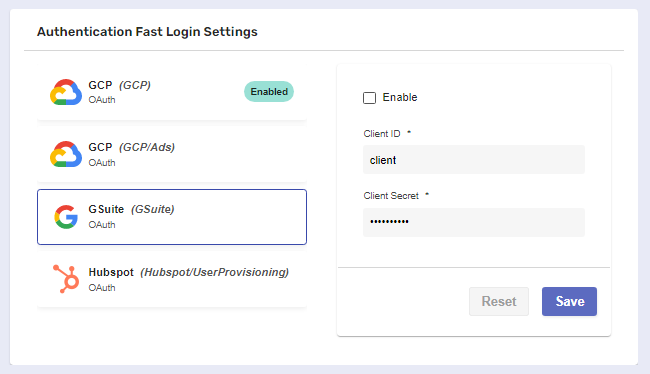
Inside the panel, you’ll need to fill in the required information. Depending on the auth provider, appropriate credentials must be obtained in advance.
In this case, we’ve generated our Client ID and Client Secret with the help of the Google Developers Console.
The provider setup page will require a redirect URL. This URL will always be:
https://{your.instance.fqdn}/api/v1/fast-login/authorization-code
For external guidance on how to obtain credentials for supported providers, check out:
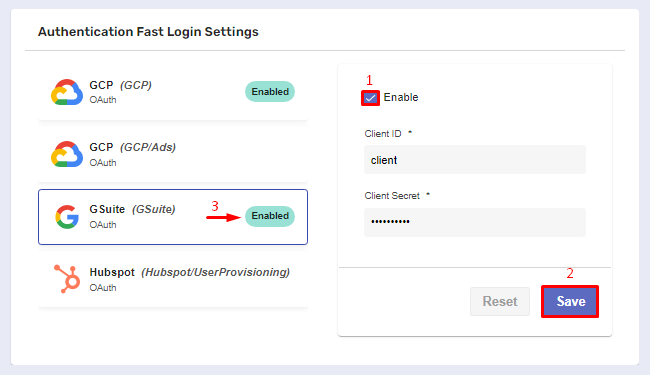
When you’re done, Enable and Save the configuration.
If successful, the authentication provider will acquire Enabled status, allowing your users to implement OAuth into it on-demand.
Implementing OAuth Login into authentications
Both administrators and users with basic permissions can create authentications with fast login.
To begin, navigate to the Authentications page and create a new service.
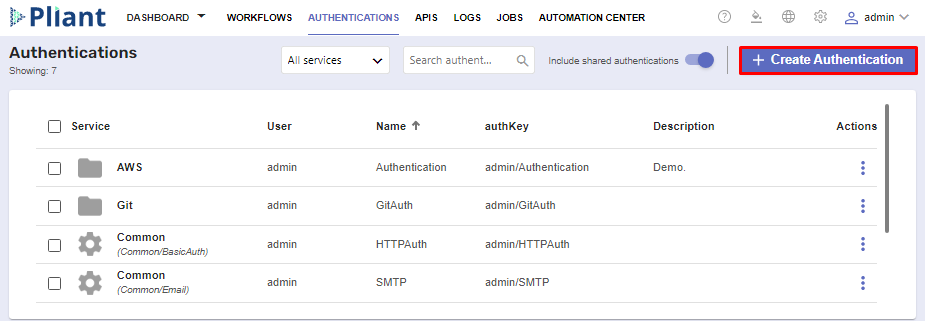
Proceed to fill out the basic Name and Description fields. From the Service dropdown, select the auth provider which is set-up to work with OAuth.
In our case, we’ll need GCP.

Down below, instead of the usual settings required for the creation of an auth provider, you’ll need to select one of two methods:
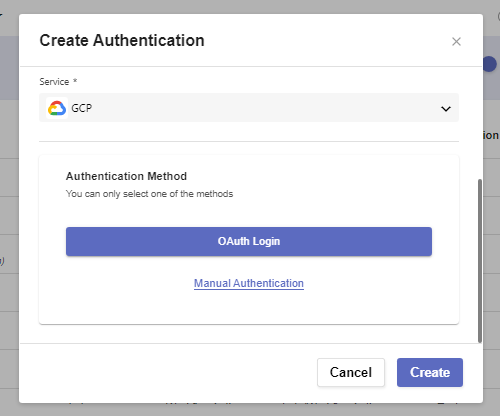
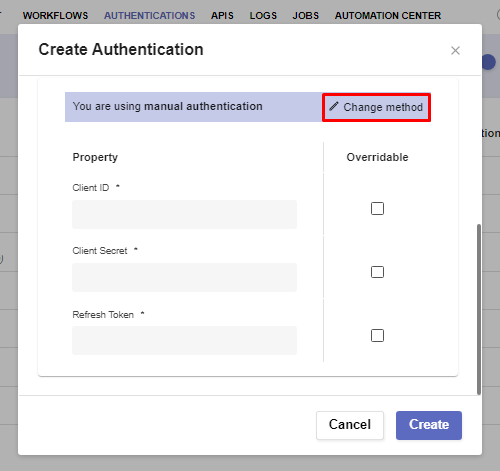
Manual Authentication expands the window with the standard required credentials.
You can go back by clicking the Change Method button.
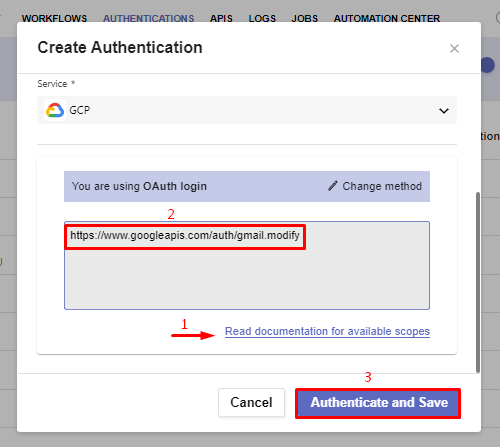
OAuth Login leads you to the final field needed for a successful setup of fast-login Authentication.
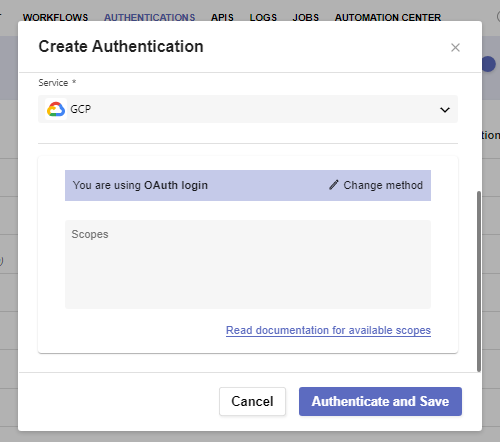
In order to implement OAuth, you must provide at least one scope for your external provider, which is based on and associated with its credentials (e.g. the Client ID and the Client Secret). Scopes come with a pre-defined set of permissions and allow the platform to create and solidify its connection with the authentication service. When providing multiple scopes, they must be in a space delimited list with no newline characters.
In the GCP scenario, various links are available on Google’s developers website. You can access it via the Read documentation for available scopes button.
When done, click Authenticate and Save.
This opens a separate window for choosing which external provider account you’d like to use for fast-login authentication across your workflows from now on.