Integrations
Overview
On this page, you can import integrations into the UI and keep them up-to-date.
These are all the blocks the Workflow Editor works with - essential elements in its normal functioning as a whole.
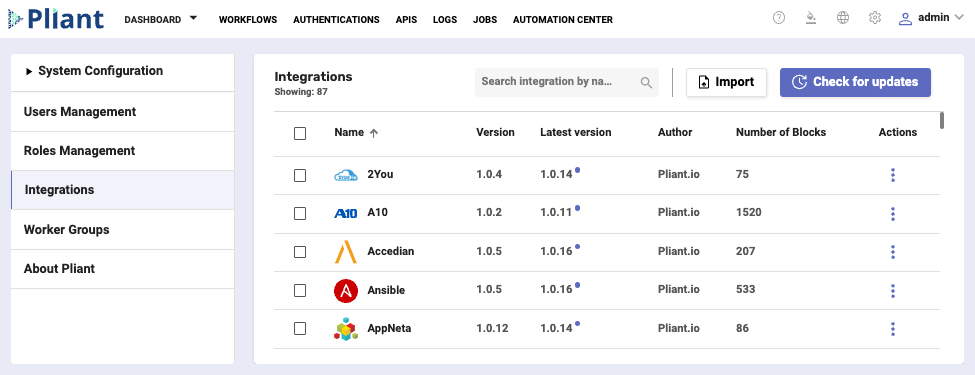
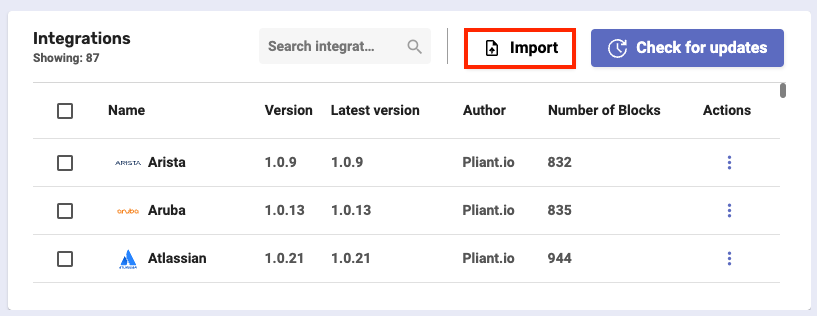
The Integrations page
Before you begin
From your Pliant instance, click Global Settings and select Integrations.
Make sure you have permission to add and manage integrations on the platform.
Features
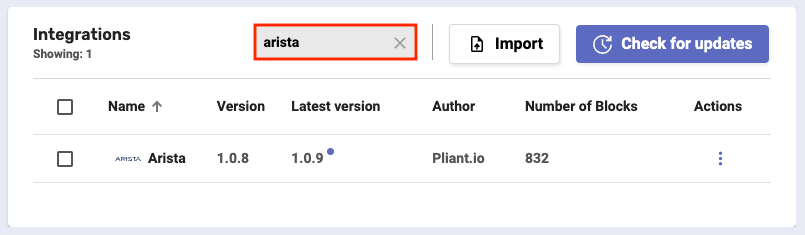
Search for an integration by typing its name in the Search bar.
Sort integrations based on their name, version when uploaded, latest version, author, and the number of blocks they contain.
Click the title of a column to apply the sorting.
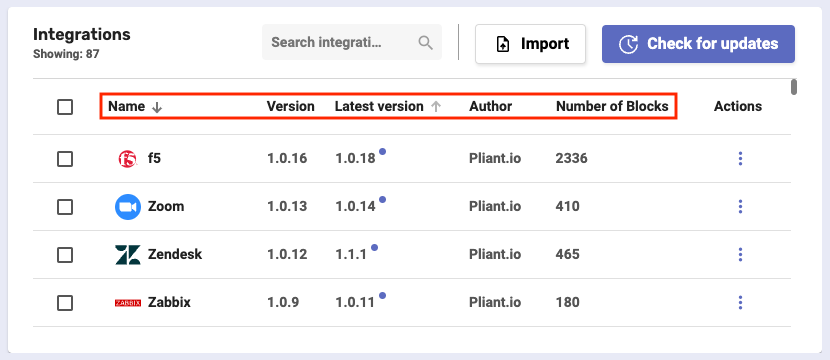
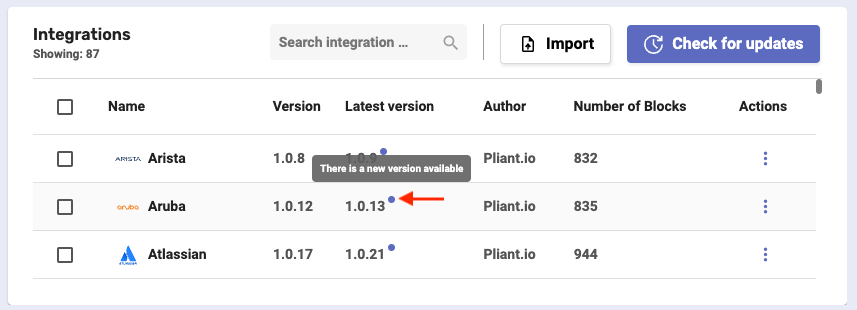
The blue dots next to the version number in the Latest version column indicate that an integration needs to be updated.
Procedure to update
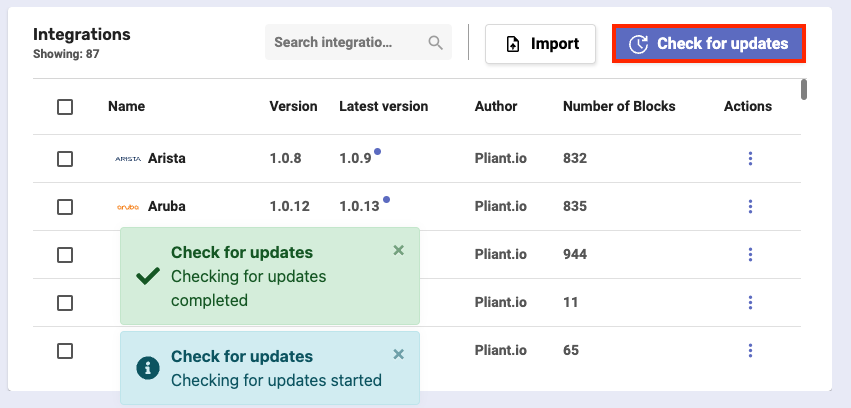
Integrations need to be refreshed once in a while. To keep everything up-to-date, the page has an auto-check as well as manual update capabilities.
At any time, you can see whether there are any new versions of integrations by clicking the Check for updates button.
It refreshes the screen and displays blue dots for integrations that need to be updated.
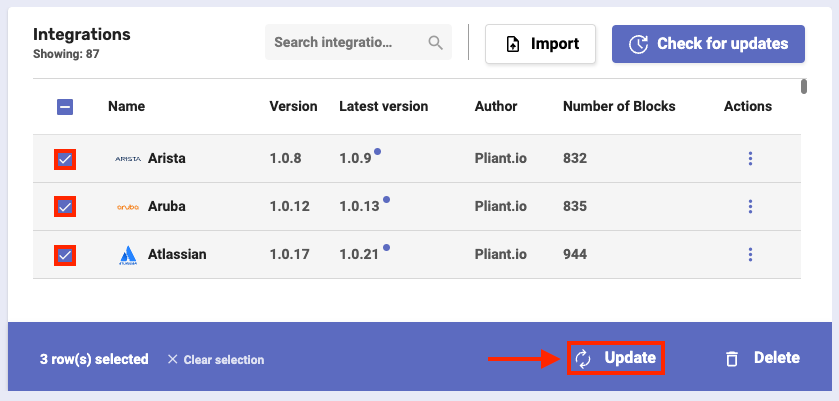
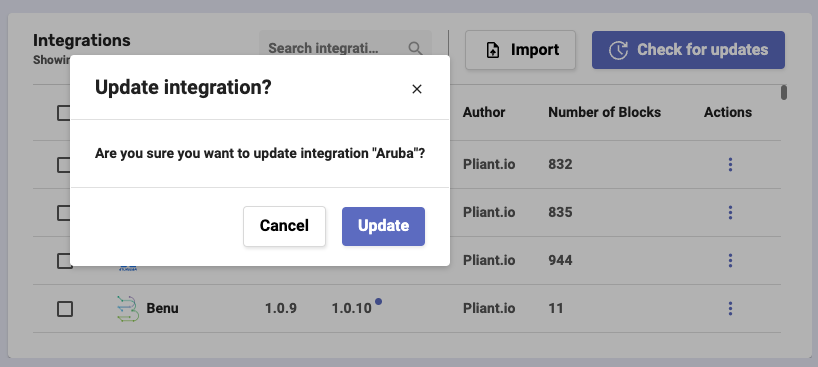
2. To manually update one or more outdated integrations, simply select them using the square boxes and click the Update button at the bottom.
A pop-up will appear asking you to confirm the action.
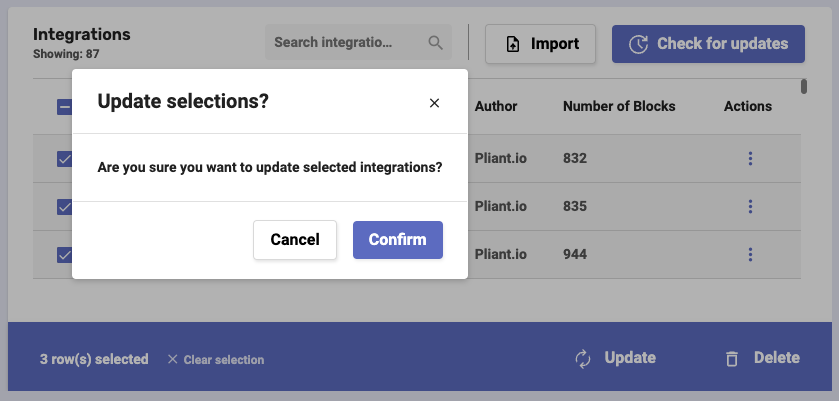
The system will update the integrations in a couple of seconds to a few minutes' time depending on the request demand.
Integration actions
There are two actions you can perform on individual integrations. Click the three-dot button in the Actions column.
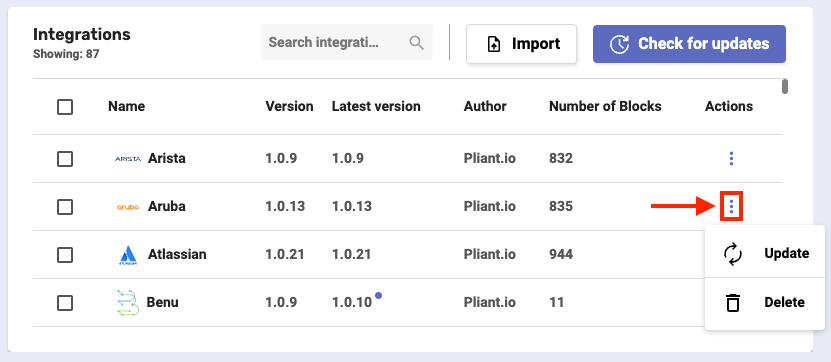
Update - this will update the integration to its latest version, following the standard procedure.
Delete - this will completely remove the integration from the system, asking you for confirmation first.
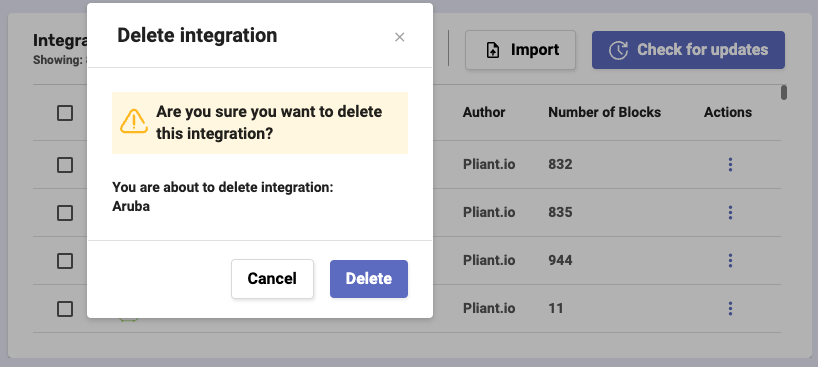
If you want to uninstall several integrations at once, select them and click the Delete button at the bottom.
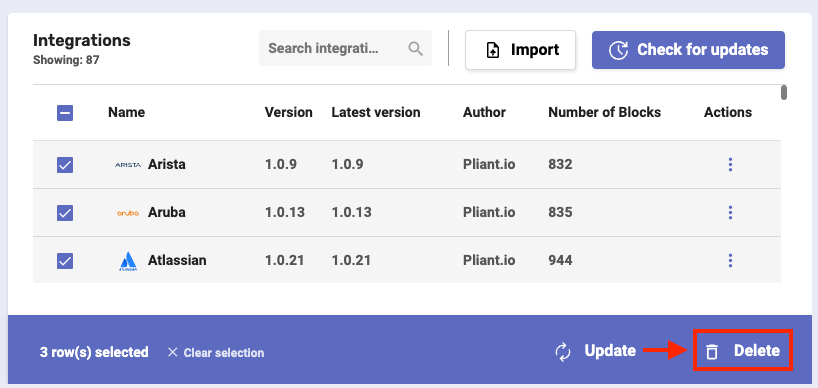
As with individual integrations, you’ll be asked to confirm the operation.
Procedure to import
To begin uploading new integrations into the platform, click the Import button.
You’ll be taken to a separate page that offers two ways of importing:
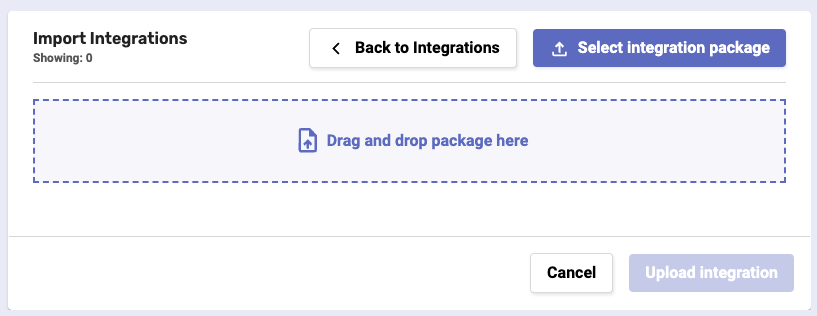
Drag and drop a package of integrations into a specified area.
Click on a button, choose the packages from your computer and upload them.
2. Choose one of the two methods and proceed to import. You can add as many packages as needed.

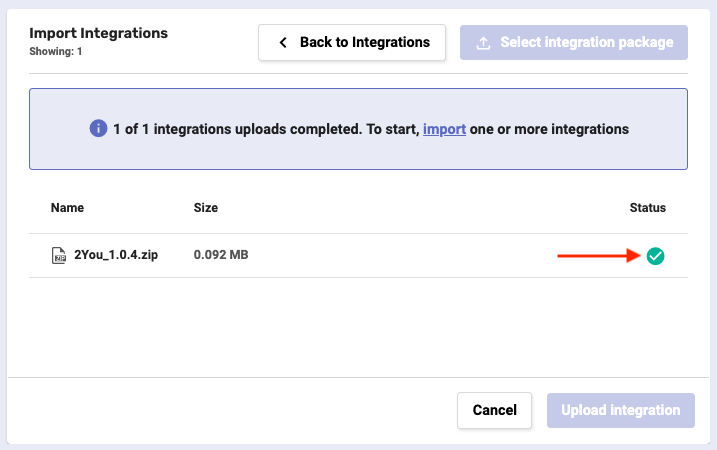
3. The integration(s) will appear on the page ready to be uploaded. Click the Upload Integration button.
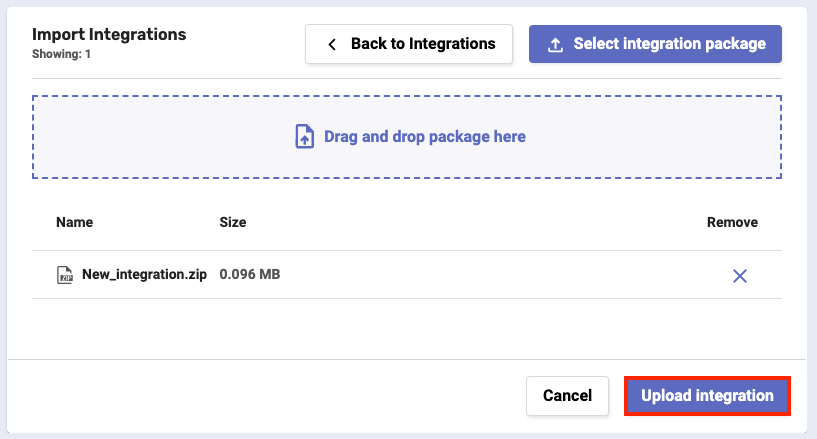
A package is successfully uploaded once its status bar becomes a green check mark.

If the imported integration already exists on the platform or generates problems, the upload will fail and an appropriate error message will appear.
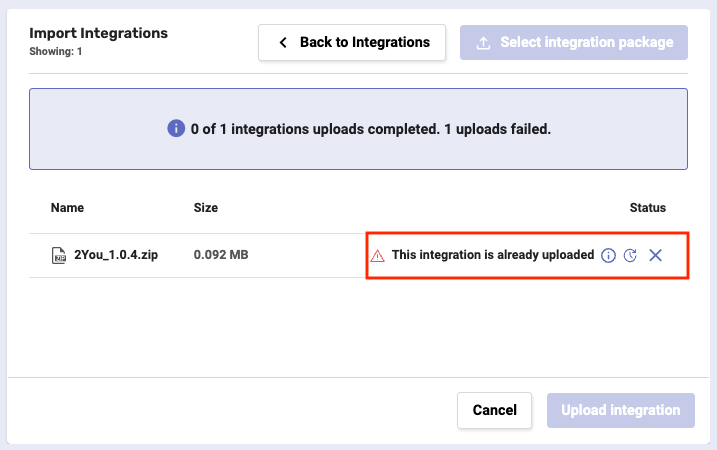
When the issue is duplicate files, you have three options:
If you click the first icon from left to right, it’ll give you details about the error.
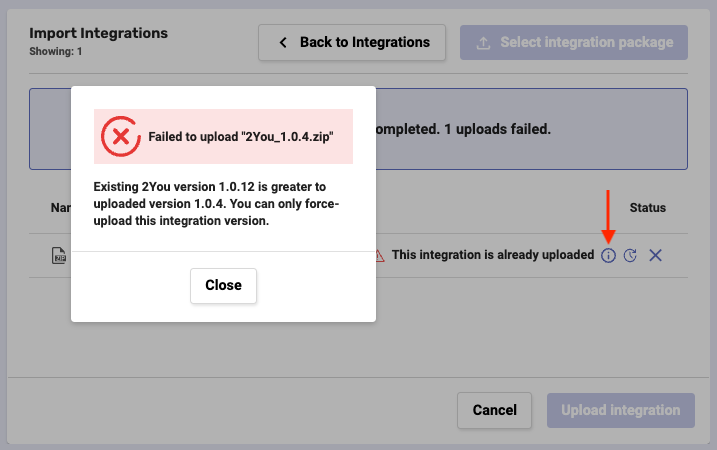
The second icon allows you to force-update the existing integration.
The third icon removes the duplicate and takes no further action.
You can find your imported entries in the Workflow Editor in the form of blocks that can be used to build workflows.