Authentication for Azure
In this document, we will create an authKey that will allow Pliant to perform system management tasks such as VM deployment in Azure.
The authKey created here functions as a "service account" for Pliant in Azure AD to provide access to an Azure AD subscription.
1. Sign in to: https://aad.portal.azure.com/#blade/Microsoft_AAD_IAM/ActiveDirectoryMenuBlade/Overview
2. Click on the "App registrations" under the Manage list
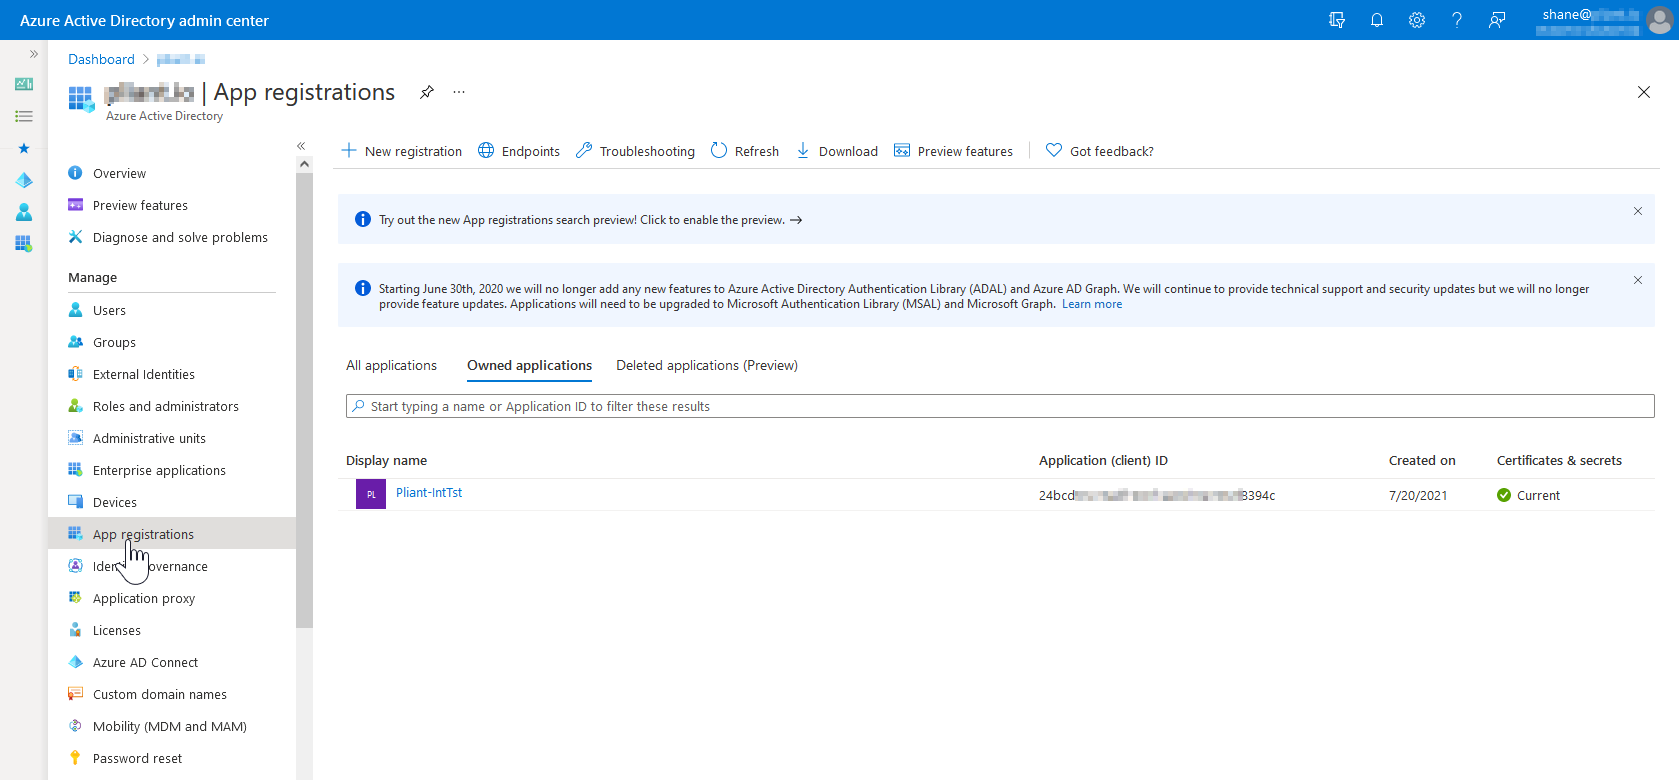
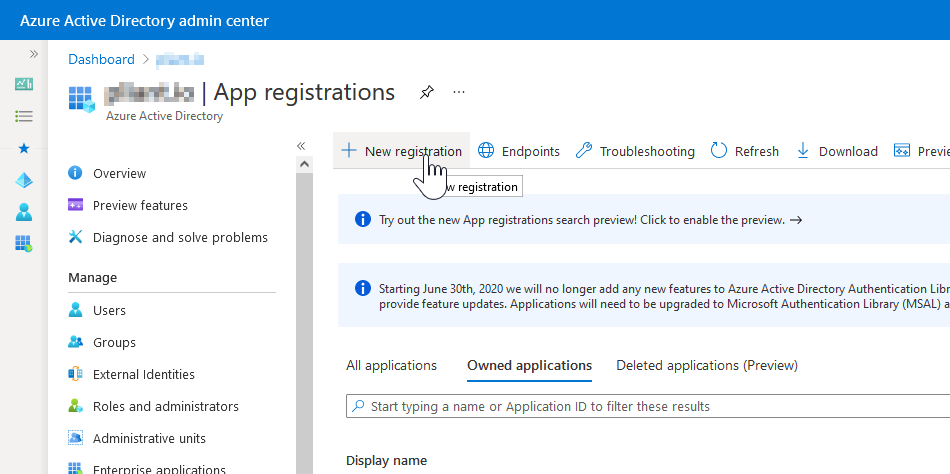
3. Click on "New Registration"
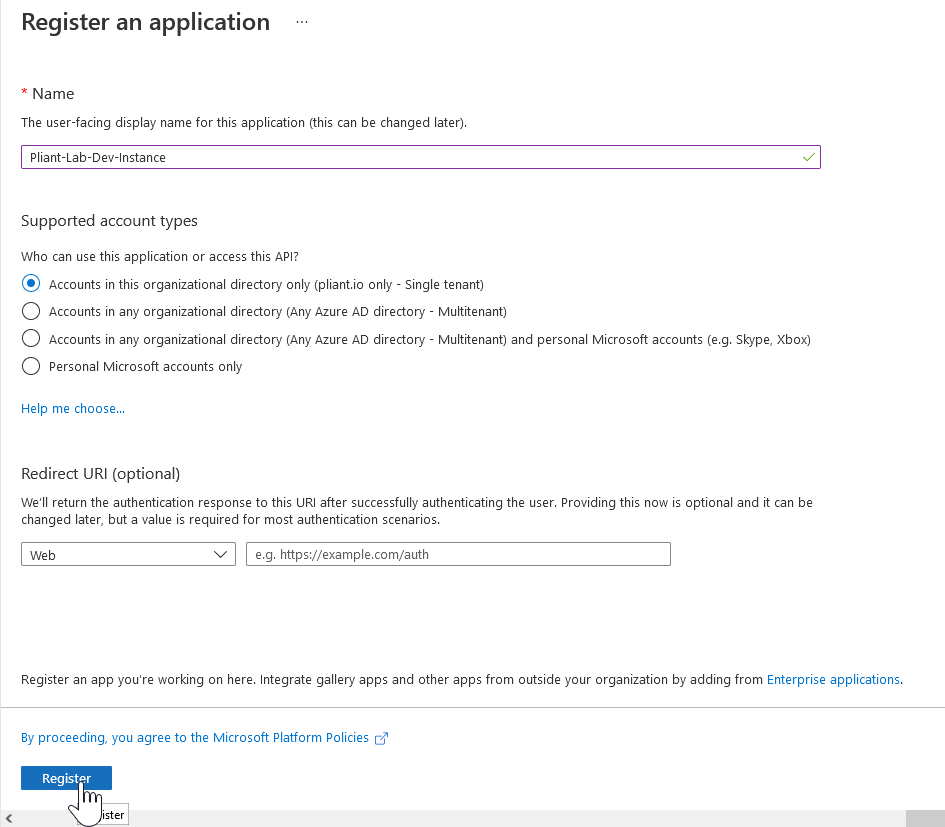
4. Give your application a name, leave other settings at defaults. Click "Register" when you're done.
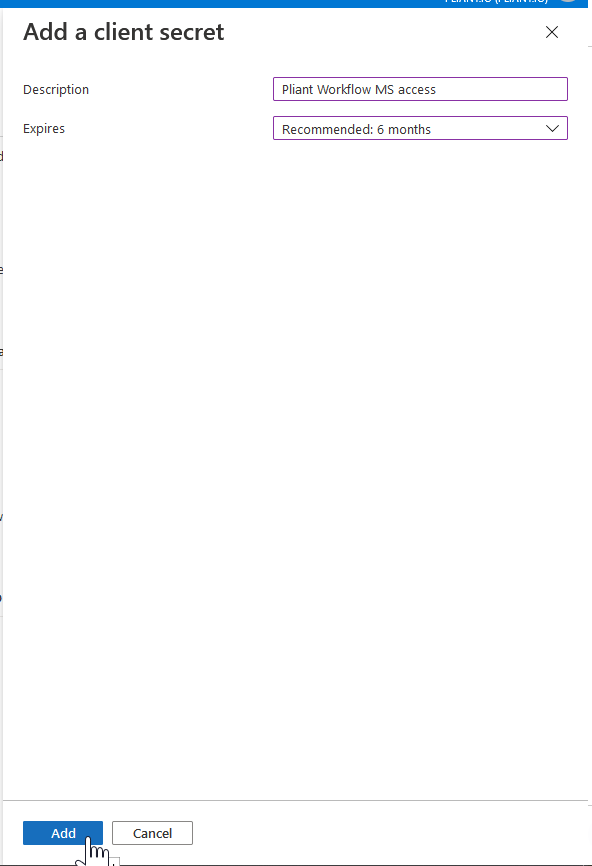
5. Click the "Certificates & secrets" option in the menu on the left

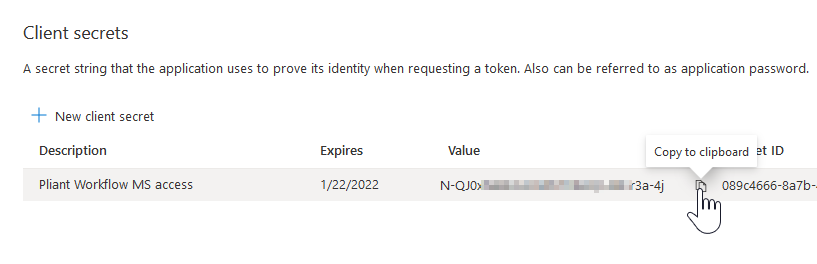
6. Click the "New client secret" link

7. Give your secret a description and choose an expiration, then click the Add button.
Note: You will need to remember to generate a new secret on this page and update your Pliant authKey when or before this secret expires or your workflows will not be able to authenticate.
8. Open Pliant in a new tab or window and create a new Azure authKey. You may want to mention the name of your Azure AD App in your description for reference at a later date.
Note: Instructions for creating authKeys can be found in the Training section of Pliant linked Here.

9. Return to Azure and copy the value of the Client secret you just created. Return to Pliant tab and paste it into the Pliant authKey in the Client Secret field.
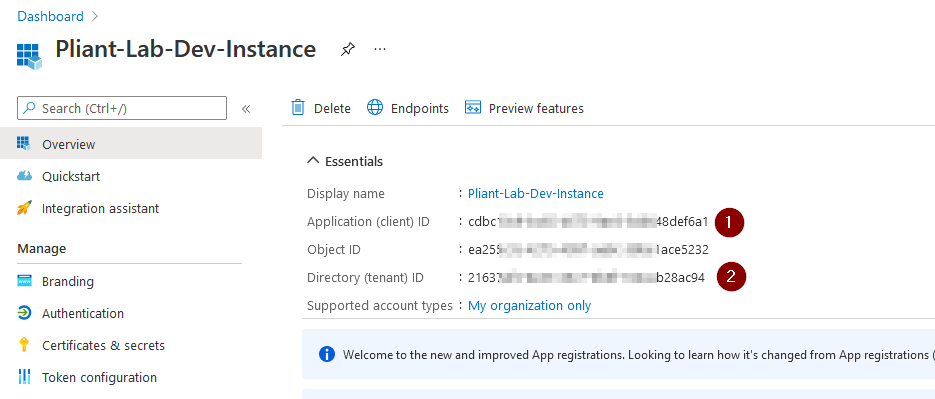
10. Click the "Overview" link in the left hand navigation of Azure.

11. From the dashboard page:
(1) Copy the "Application (client) ID" from Azure and paste into the "Application Id" field of the Pliant authKey.
(2) Copy the "Directory (tenant) ID" from Azure and paste into the "Tenant" field of the Pliant authKey
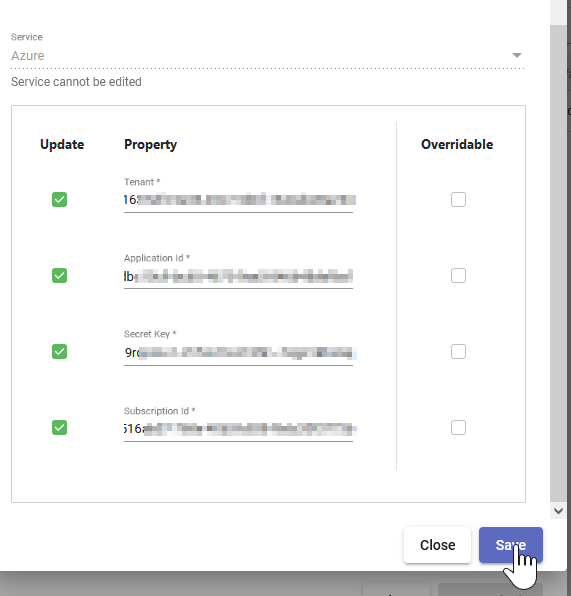
12. Go to https://portal.azure.com/#blade/Microsoft_Azure_Billing/SubscriptionsBlade
Select and copy the Subscription ID of the subscription you would like to manage via Pliant and paste this into the "Subscription Id" field of the authKey.

13. Click Save on the authKey
14. Back in the AzureAD Subscriptions window, click on the name of your subscription to view its details:

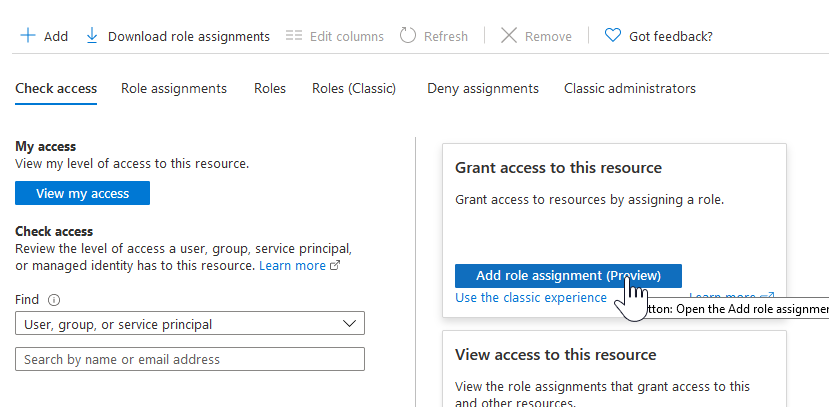
15. Choose the "Access Control (IAM) option from the left side navigation

16. Click the "Add role assignment" button
17. Choose the role you would like to use with Pliant, then click Next
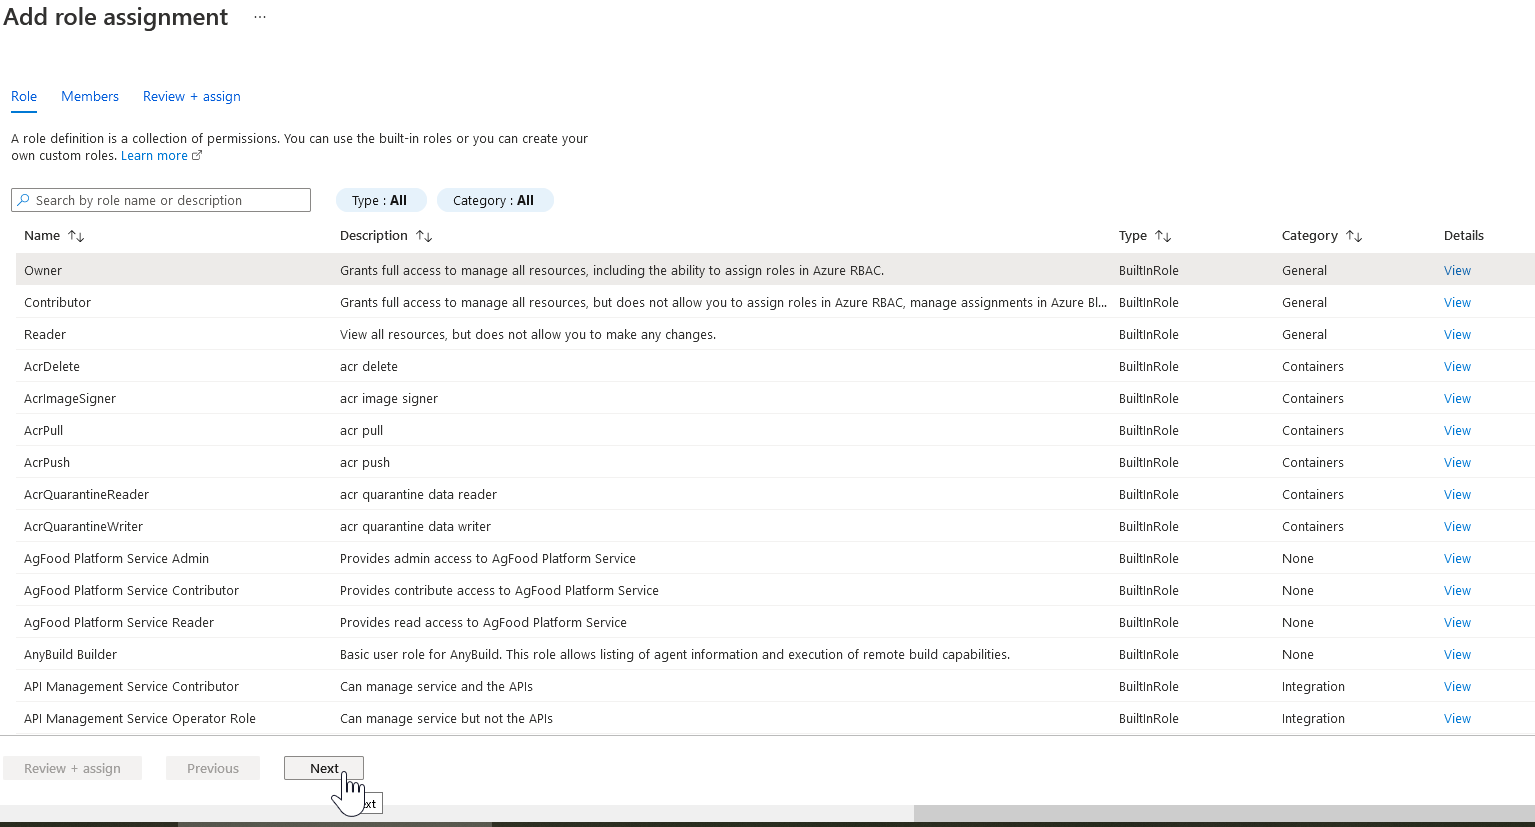
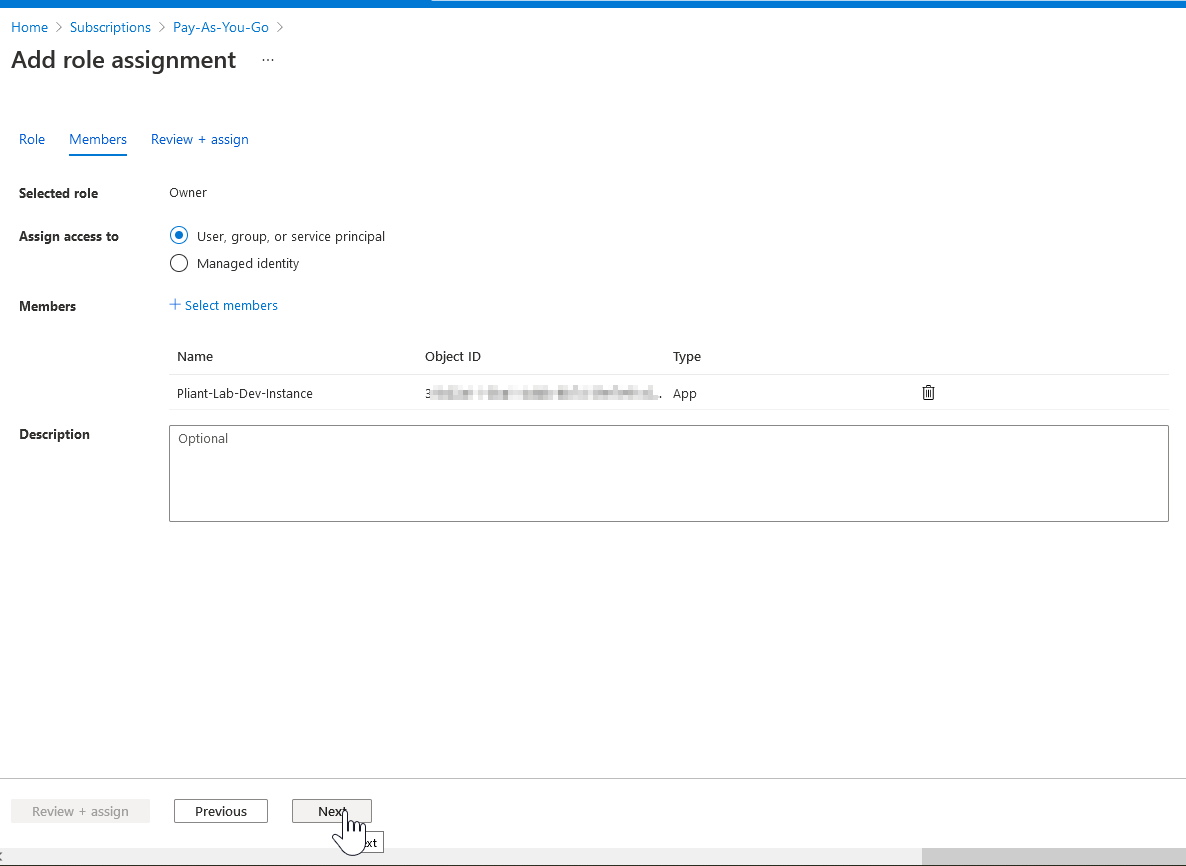
18. Add the app you created in Step 4 to the selected role
Choose "Assign Access to" = "User, group, or service principal"
Click the "+ Select Members" link
In the right hand pane that displayed, enter the name of the previously created app
Select the app
Click the "Select" button in the bottom right

19. Click the Next button
20. Click the "Review + assign" button
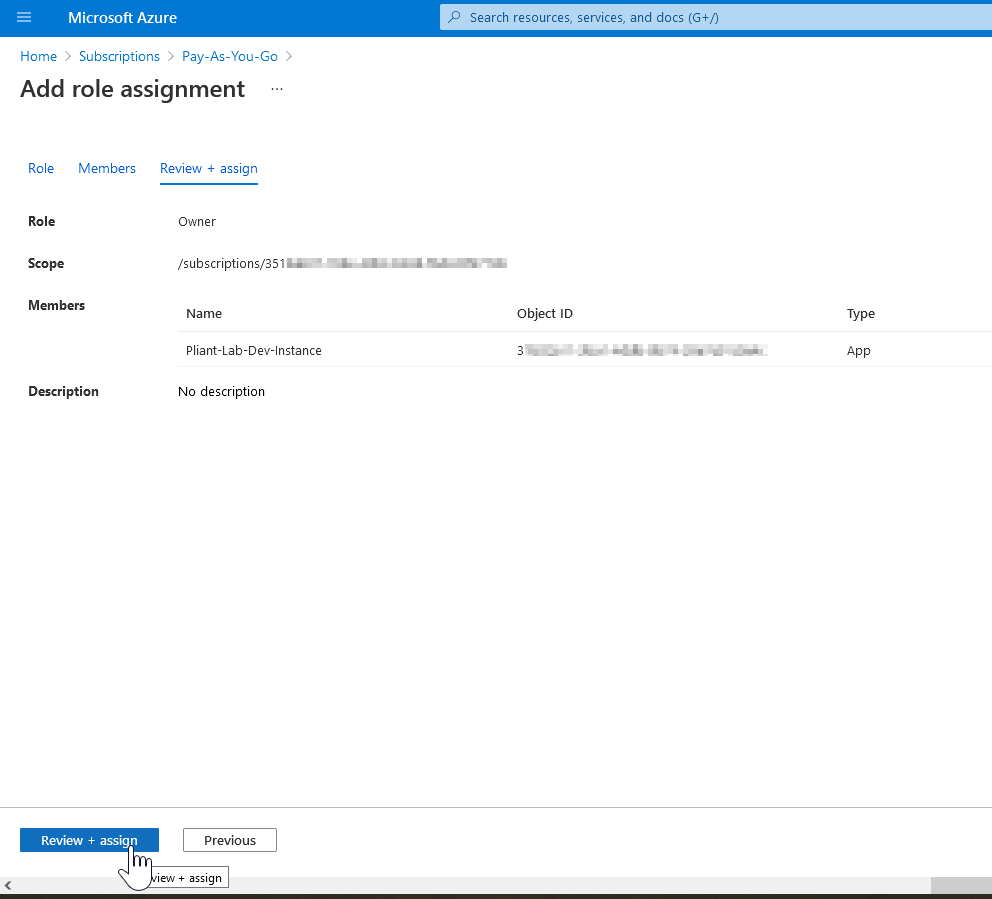
21. Your Pliant authKey now has access to operate the given Azure subscription.