How-To: Create a “Hello, World!” Workflow
This Workflows page allows users to create and/or edit existing workflows. Using the Workflow Editor, users are able to drag and drop blocks from the list of integrations on the right.
Before You Begin
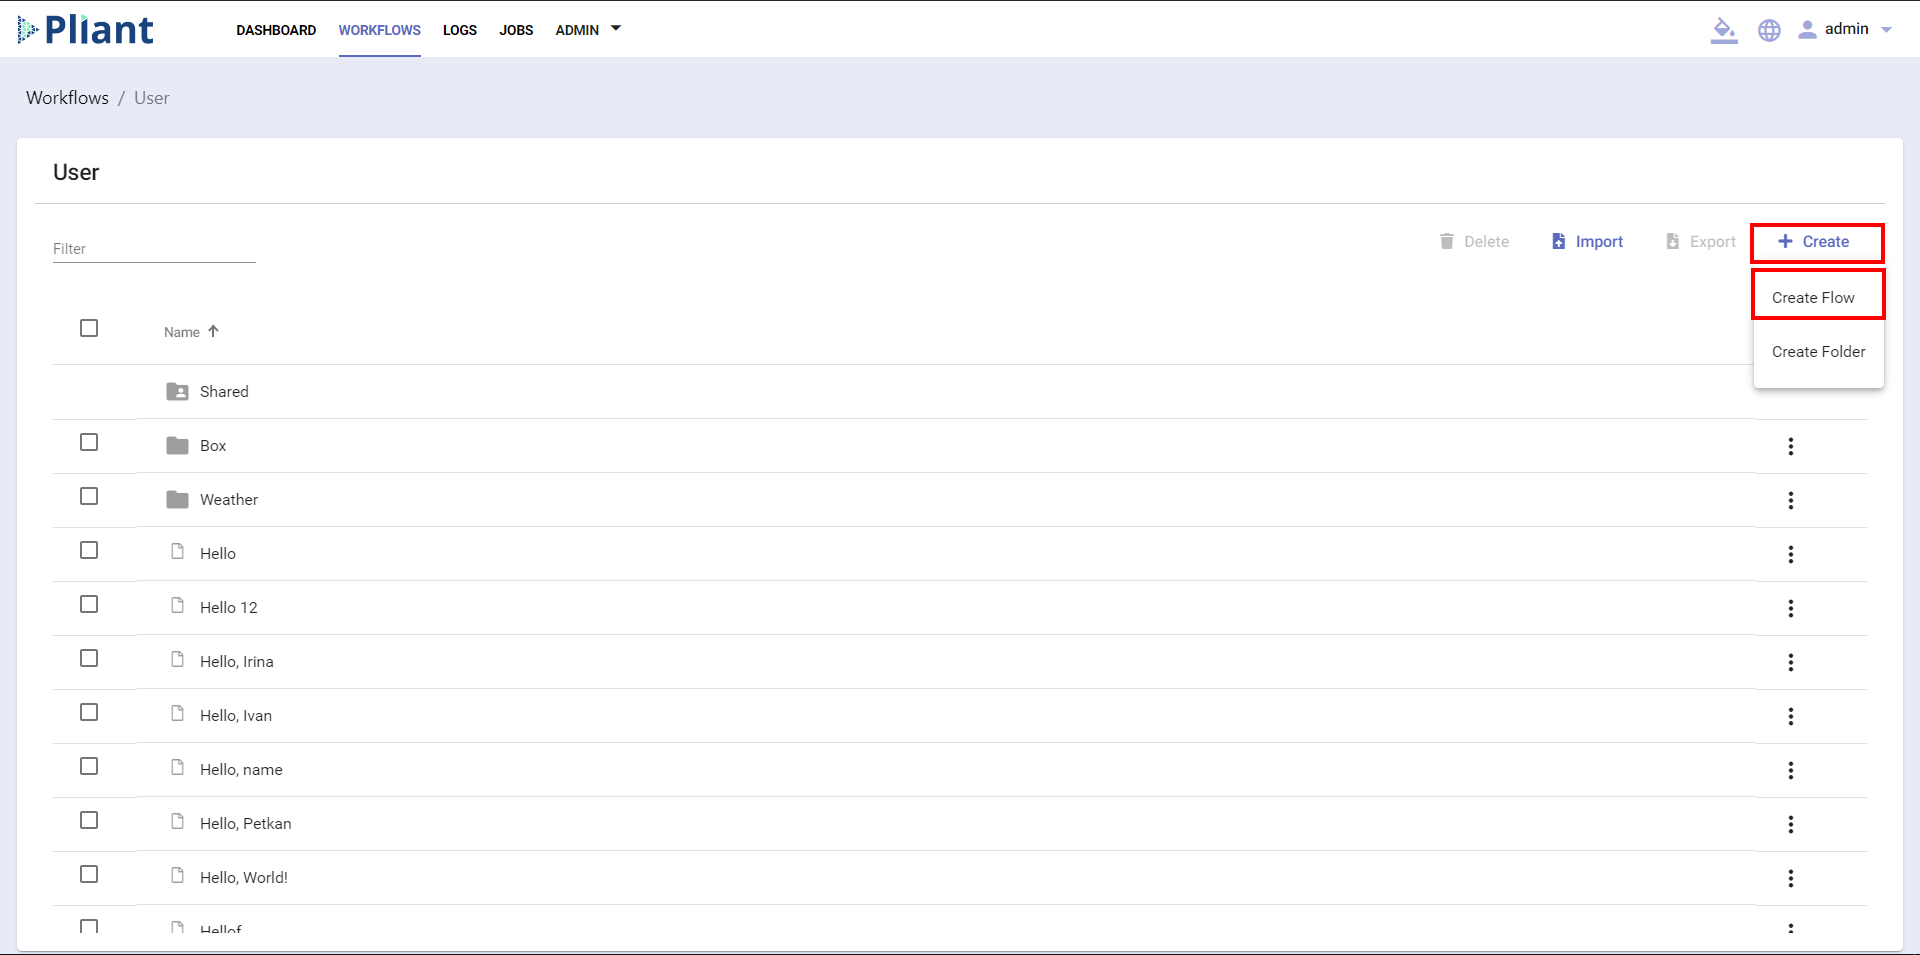
Make sure that you are on the "Workflow Editor" page and that you have the appropriate permissions to interact with the required integrations. This page is accessible by clicking the "+ Create" button to name and create a new workflow, or by clicking on an existing workflow from the list.
- Enter a name for the workflow, for example “Hello, World!”
You will be automatically redirected to the Workflow Editor page, from where you create and run your workflows:
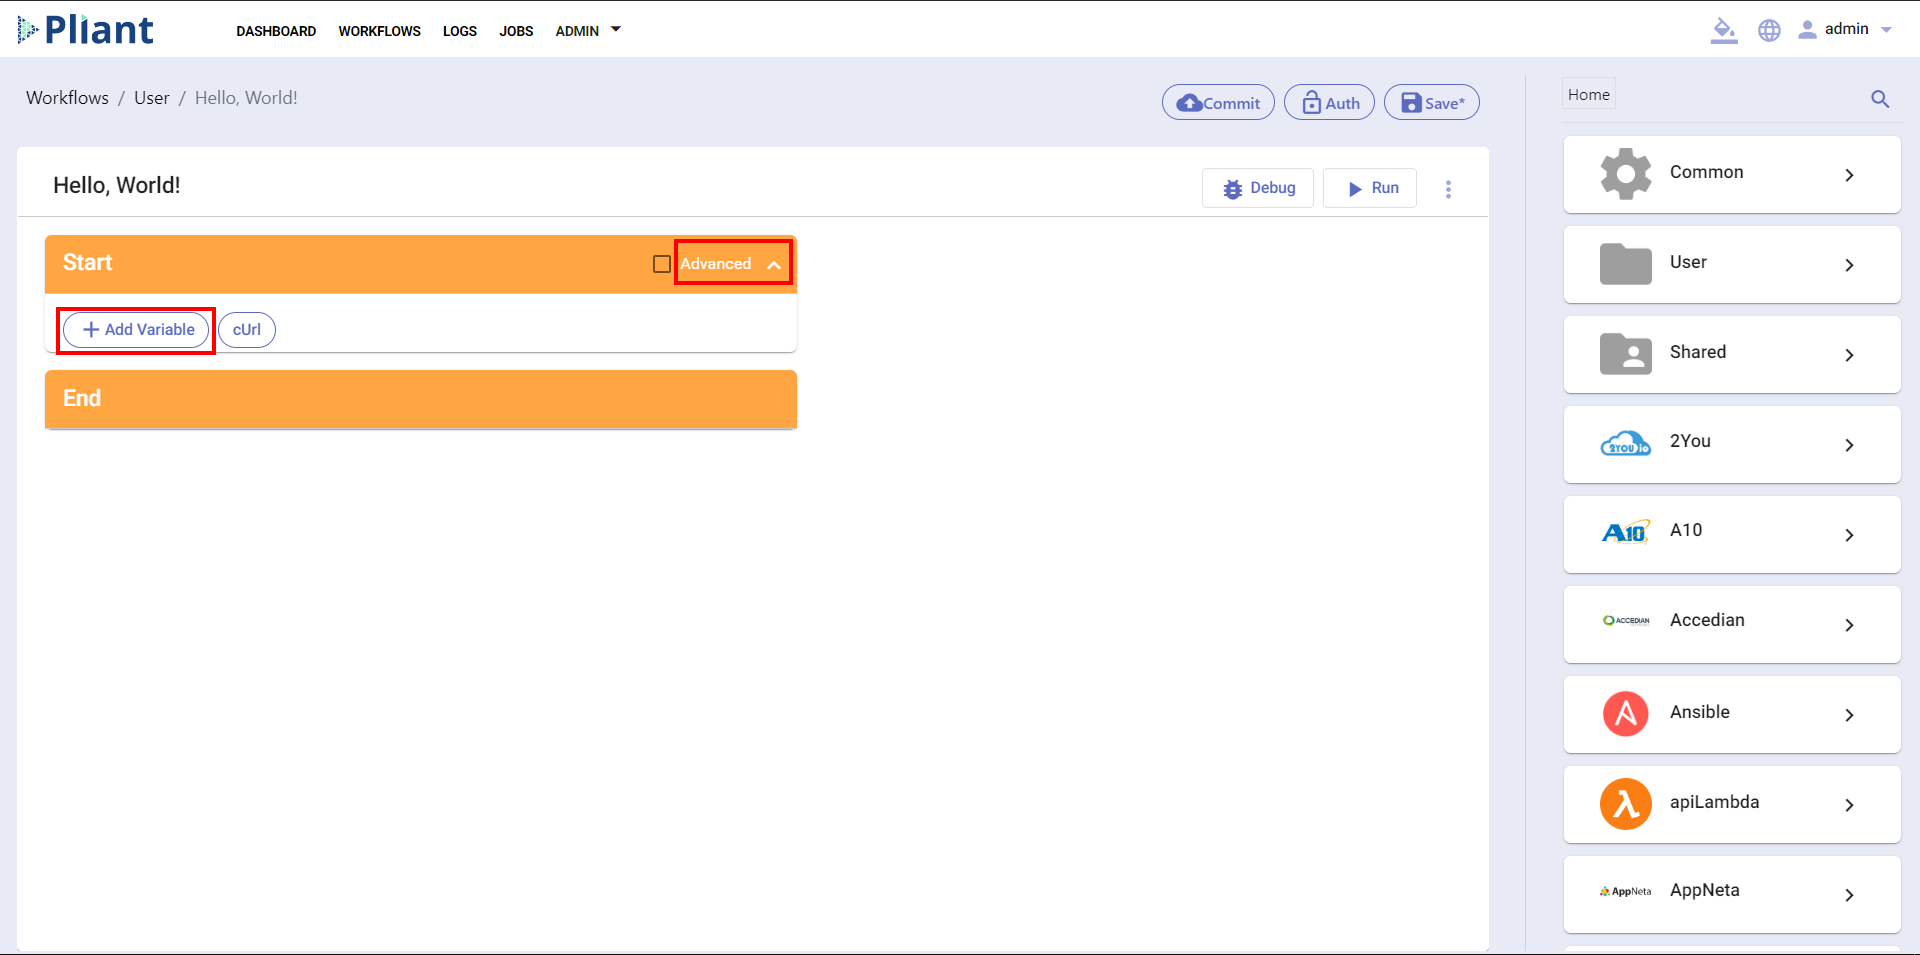
- Click on the Advanced button to expand the Start block of the workflow.
- Click on (+) Add Variable, you will see two fields, where you can enter a Name and Default, tick the Output checkbox if you want to create a variable that will be returned to you from the system when you Run the workflow, or choose Input if you want the variable to insert data into the system:

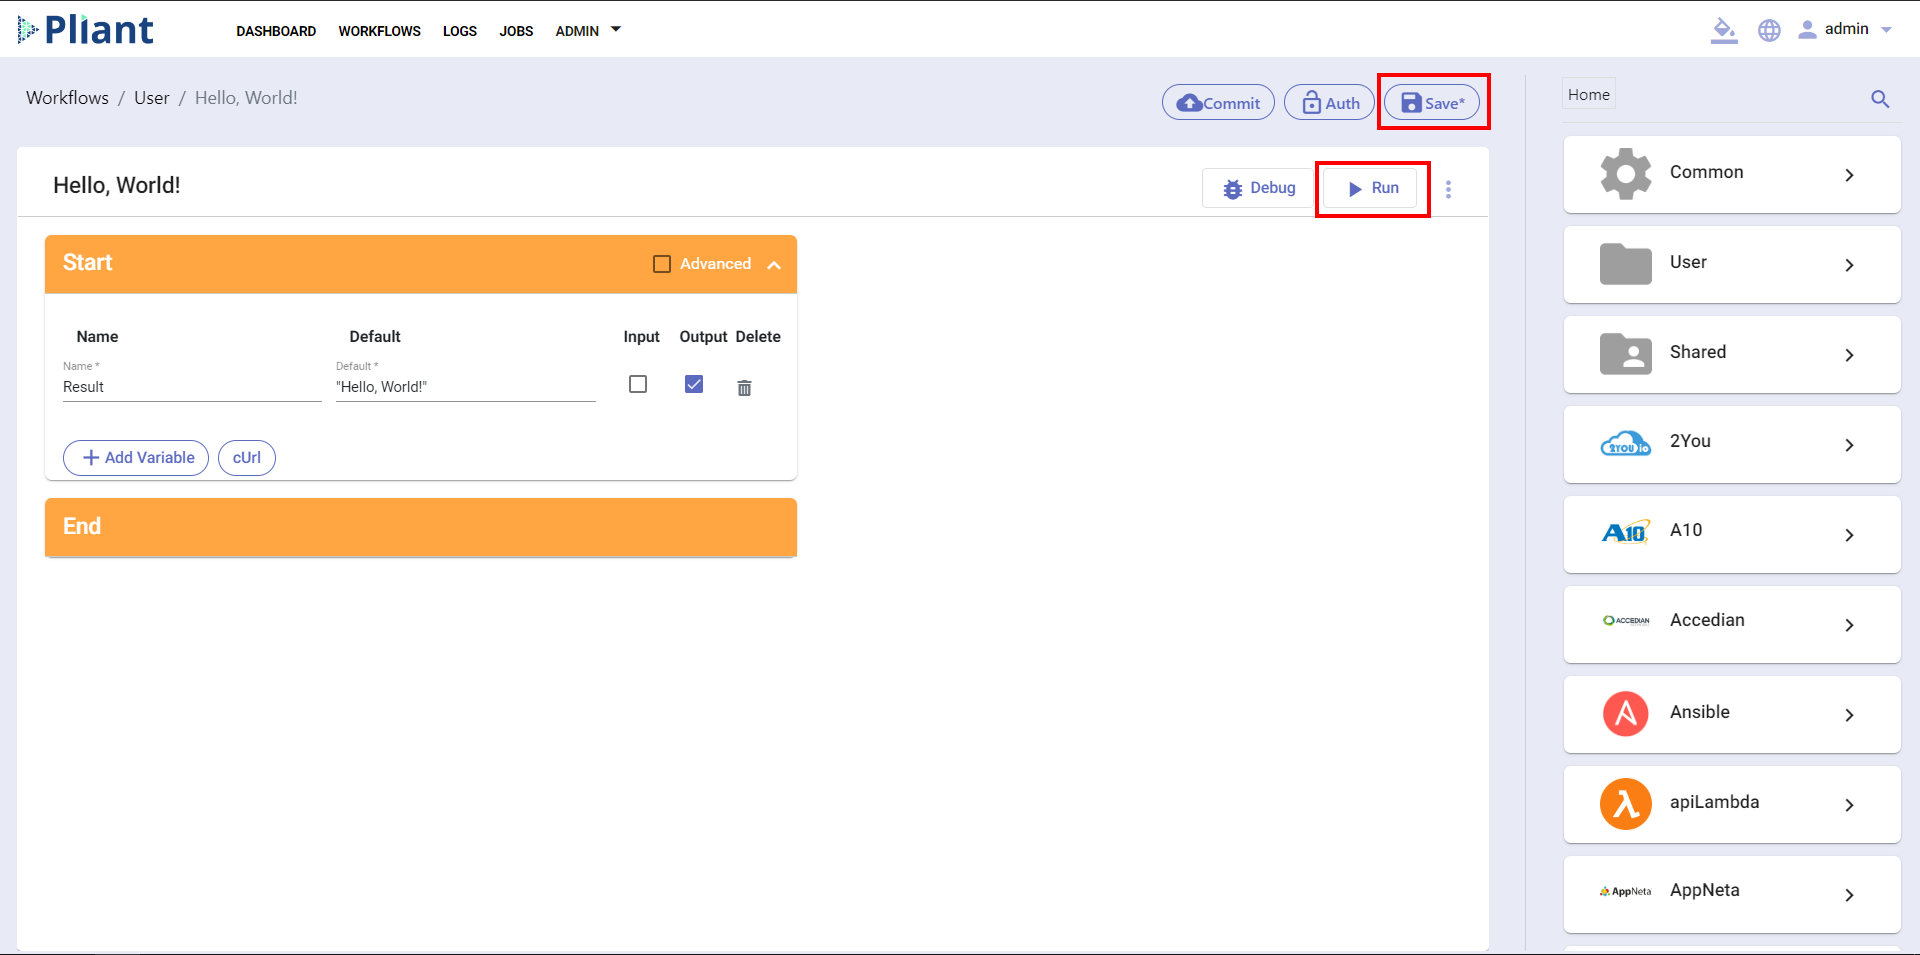
- Click on the
 icon if you want to Delete the variable.
 - Click on the Save button, which is located at the top right of the workflow working field.
- Click on the Run button, which is located under the Save button, to run and test your workflow.
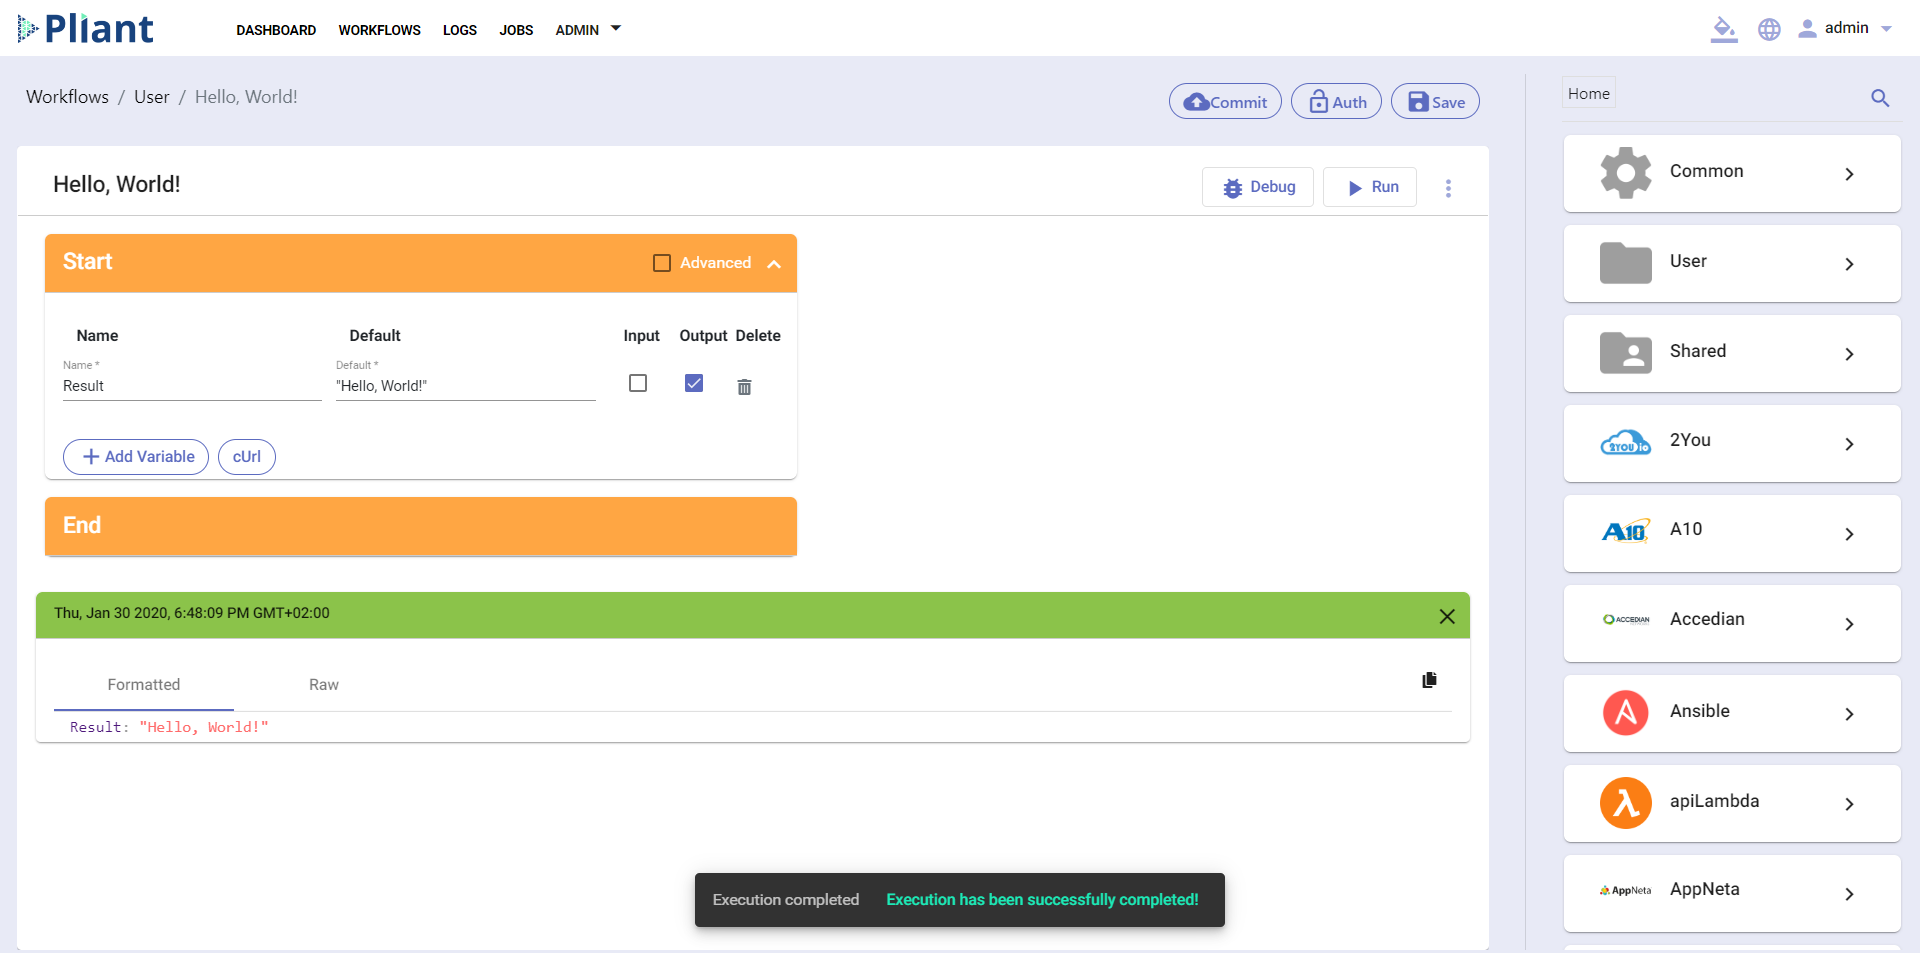
The system will then execute the workflow and you will receive a pop-up message telling you if the execution of the workflow was successful and a green block showing you the result of the workflow:
Watch the video of this in real-time!!